MAC Address write Guide
MAC Address write overview
The MAC address is stored in different memory address from the firmware area of the W55RP20-S2E.
Therefore, reflashing the W55RP20-S2E firmware will not erase the MAC address input if only the firmware area is overwritten.
WIZnet’s MAC address OUI is 00:08:DC:XX:XX:XX.
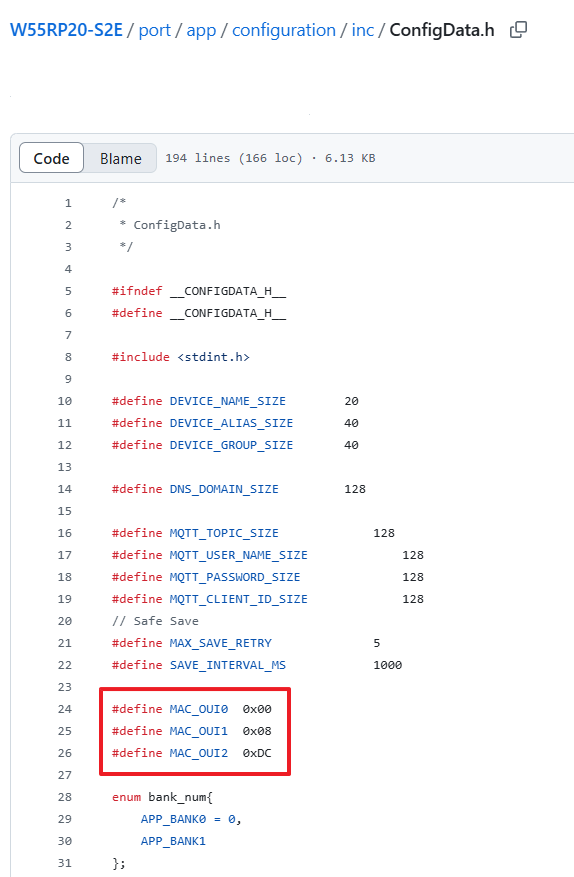
If you need to use a different OUI, please use W55RP20-S2E FW version 1.1.2 or later,
modify the MAC_OUI0, MAC_OUI1, and MAC_OUI2 defines in port/app/configuration/inc/ConfigData.h with your desired OUI,
then build and download the new firmware before proceeding with the setup guide.
Required Hardware and Software
Hardware
- Devices with W55RP20-S2E firmware downloaded
- Cables (Ethernet / Serial)
Software
How to write MAC Address
There are two ways to write MAC Address
Using WIZMacTool
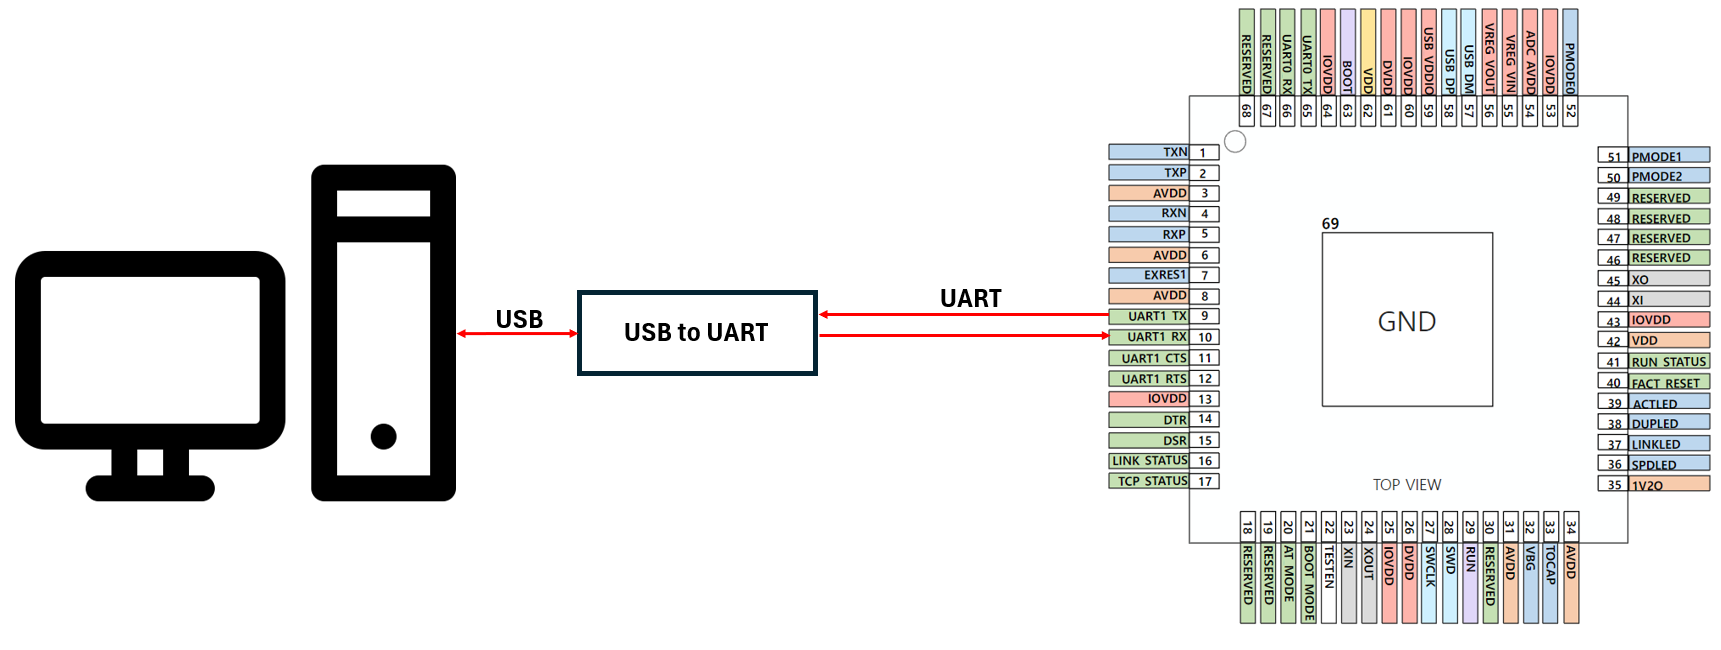
Step 1: Connect UART1 of W55RP20-S2E to PC
At this step, you will need a separate UART to USB module.
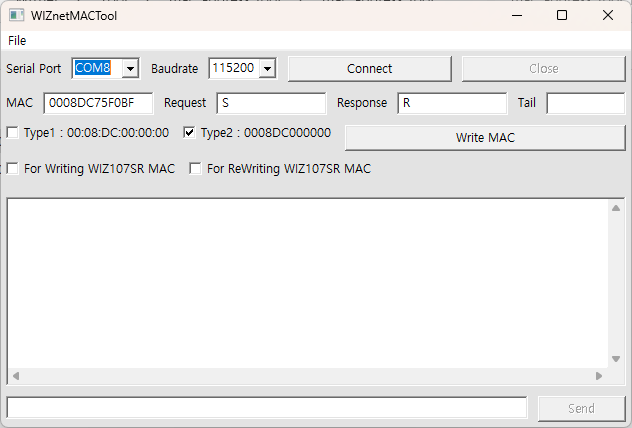
Step 2: Run WIZMacTool
Run WIZMacTool and connect the COM port to which the W55RP20-S2E is connected.
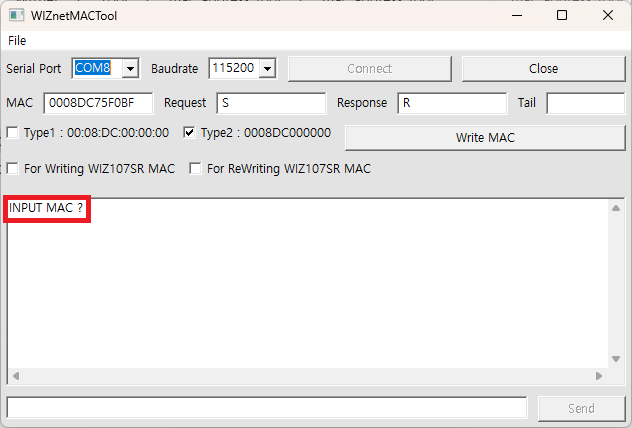
Step 3: Check INPUT MAC
After connecting the COM port of the W55RP20-S2E to WIZMacTool, reset the W55RP20-S2E and verify that "INPUT MAC" is displayed in WIZMacTool.
Step 4: Write MAC Address
Set up WIZMacTool as shown in the picture, enter the MAC address you wish to input, and click Write.
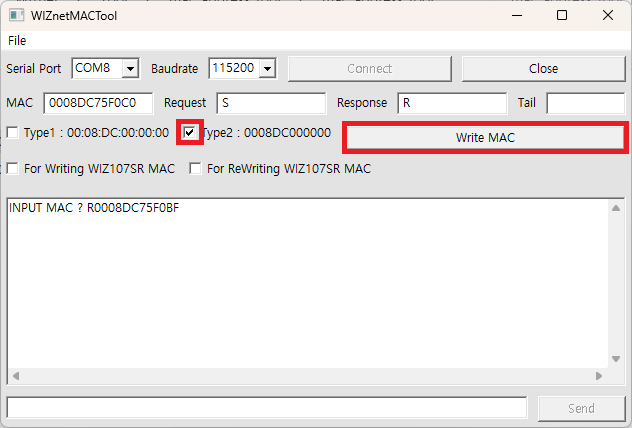
If the MAC address is successfully written, the W55RP20-S2E will respond with the letter R and the MAC address you entered.

For convenience when entering consecutive MAC addresses, WIZMacTool increments the MAC address by 1 after clicking Write MAC.
Step 5: Done
You can verify the changed MAC address by searching with the config-tool
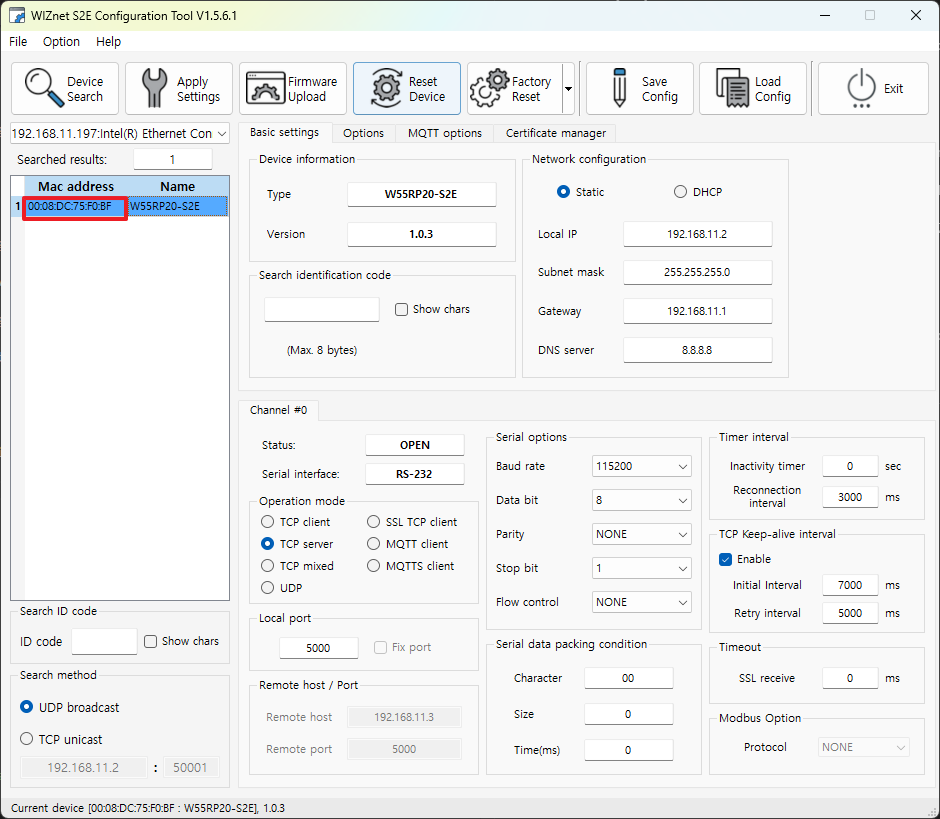
or checking it via AT commands.
Using Serial Command
Step 1: Connect UART1 of W55RP20-S2E to PC
At this step, you will need a separate UART to USB module.
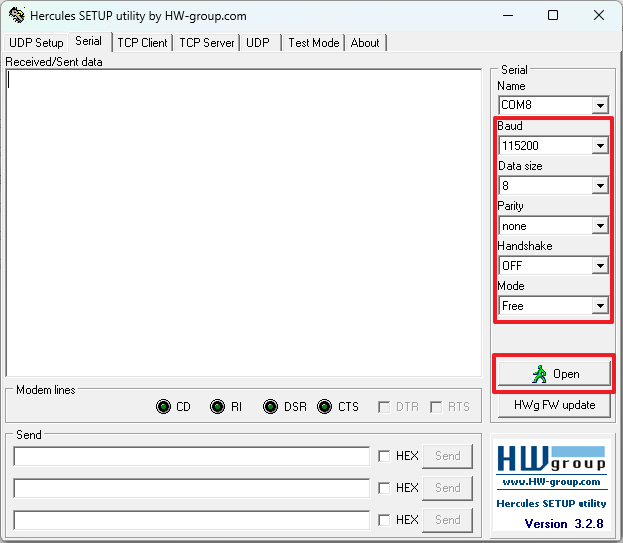
Step 2: Run serial program
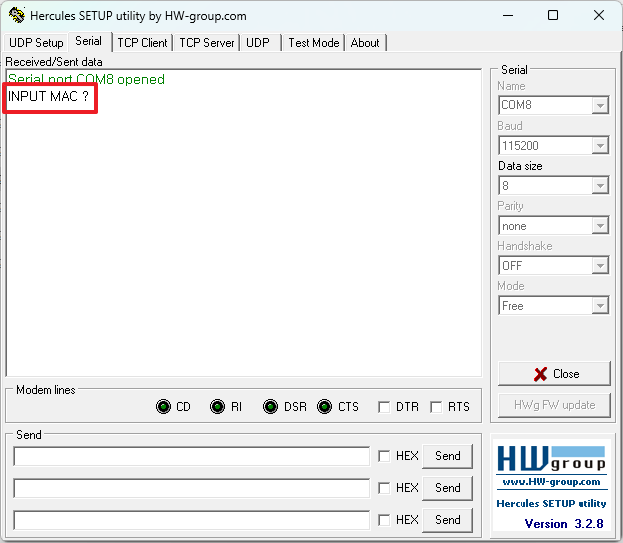
Open the COM port connected to the W55RP20-S2E using a serial monitor program. In this manual, we used an open-source tool named Hercules.
Step 3: Check INPUT MAC
After the COM port of the W55RP20-S2E is opened in the serial program, reset the W55RP20-S2E and verify that "INPUT MAC" is displayed.
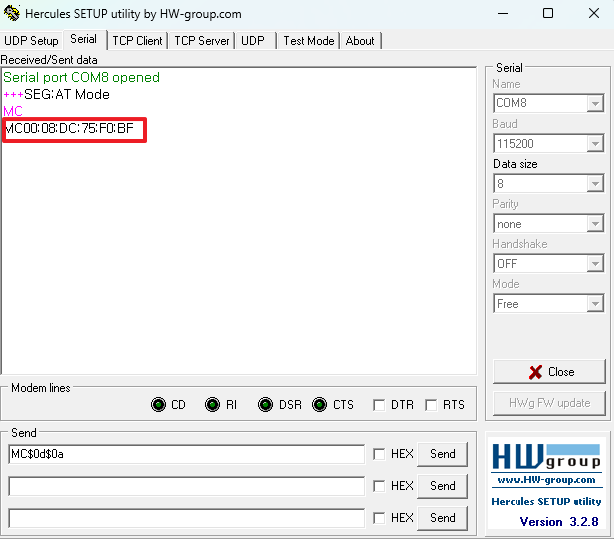
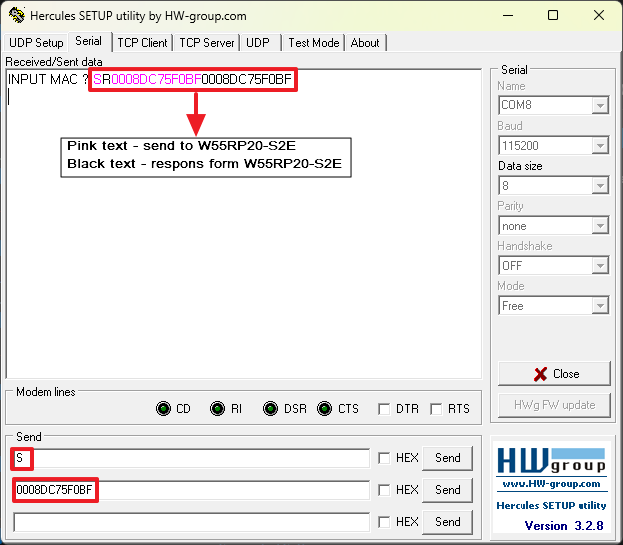
Step 4: Write MAC Address
Send the character 'S' followed by the MAC address you wish to input. The W55RP20-S2E will respond with the character 'R' and the MAC address you sent, indicating that the MAC address has been successfully written.
Step 5: Done
You can verify the changed MAC address by searching with the config-tool
or checking it via AT commands.