Getting Started with W55RP20-EVB-PICO
Overview
This manual is a guide for downloading the W55RP20-S2E firmware to the W55RP20-EVB-PICO hardware and using it as a serial to ethernet.
Required Hardware and Software
Hardware
- W55RP20-EVB-PICO
- Cables (Ethernet / USB-C)
Software
Use W55RP20-EVB-PICO as a serial to ethernet device
Step 1: Flash W55RP20-S2E Firmware onto W55RP20-EVB-PICO
Download the last verson of W55RP20-S2E Bin_Files_VXXX.zip
W55RP20-S2E
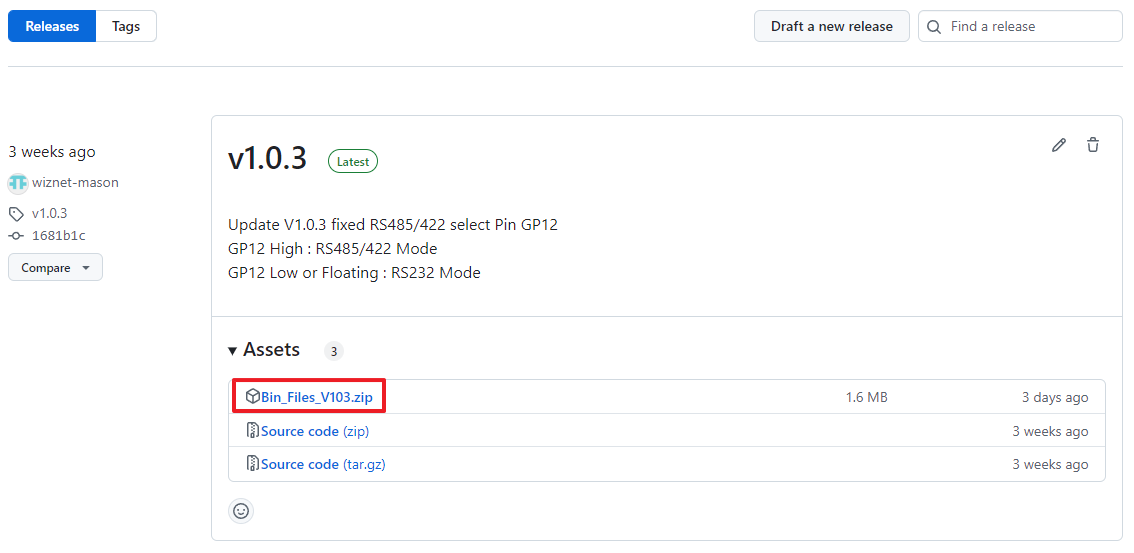
Unzip the Bin_Files_VXXX.zip
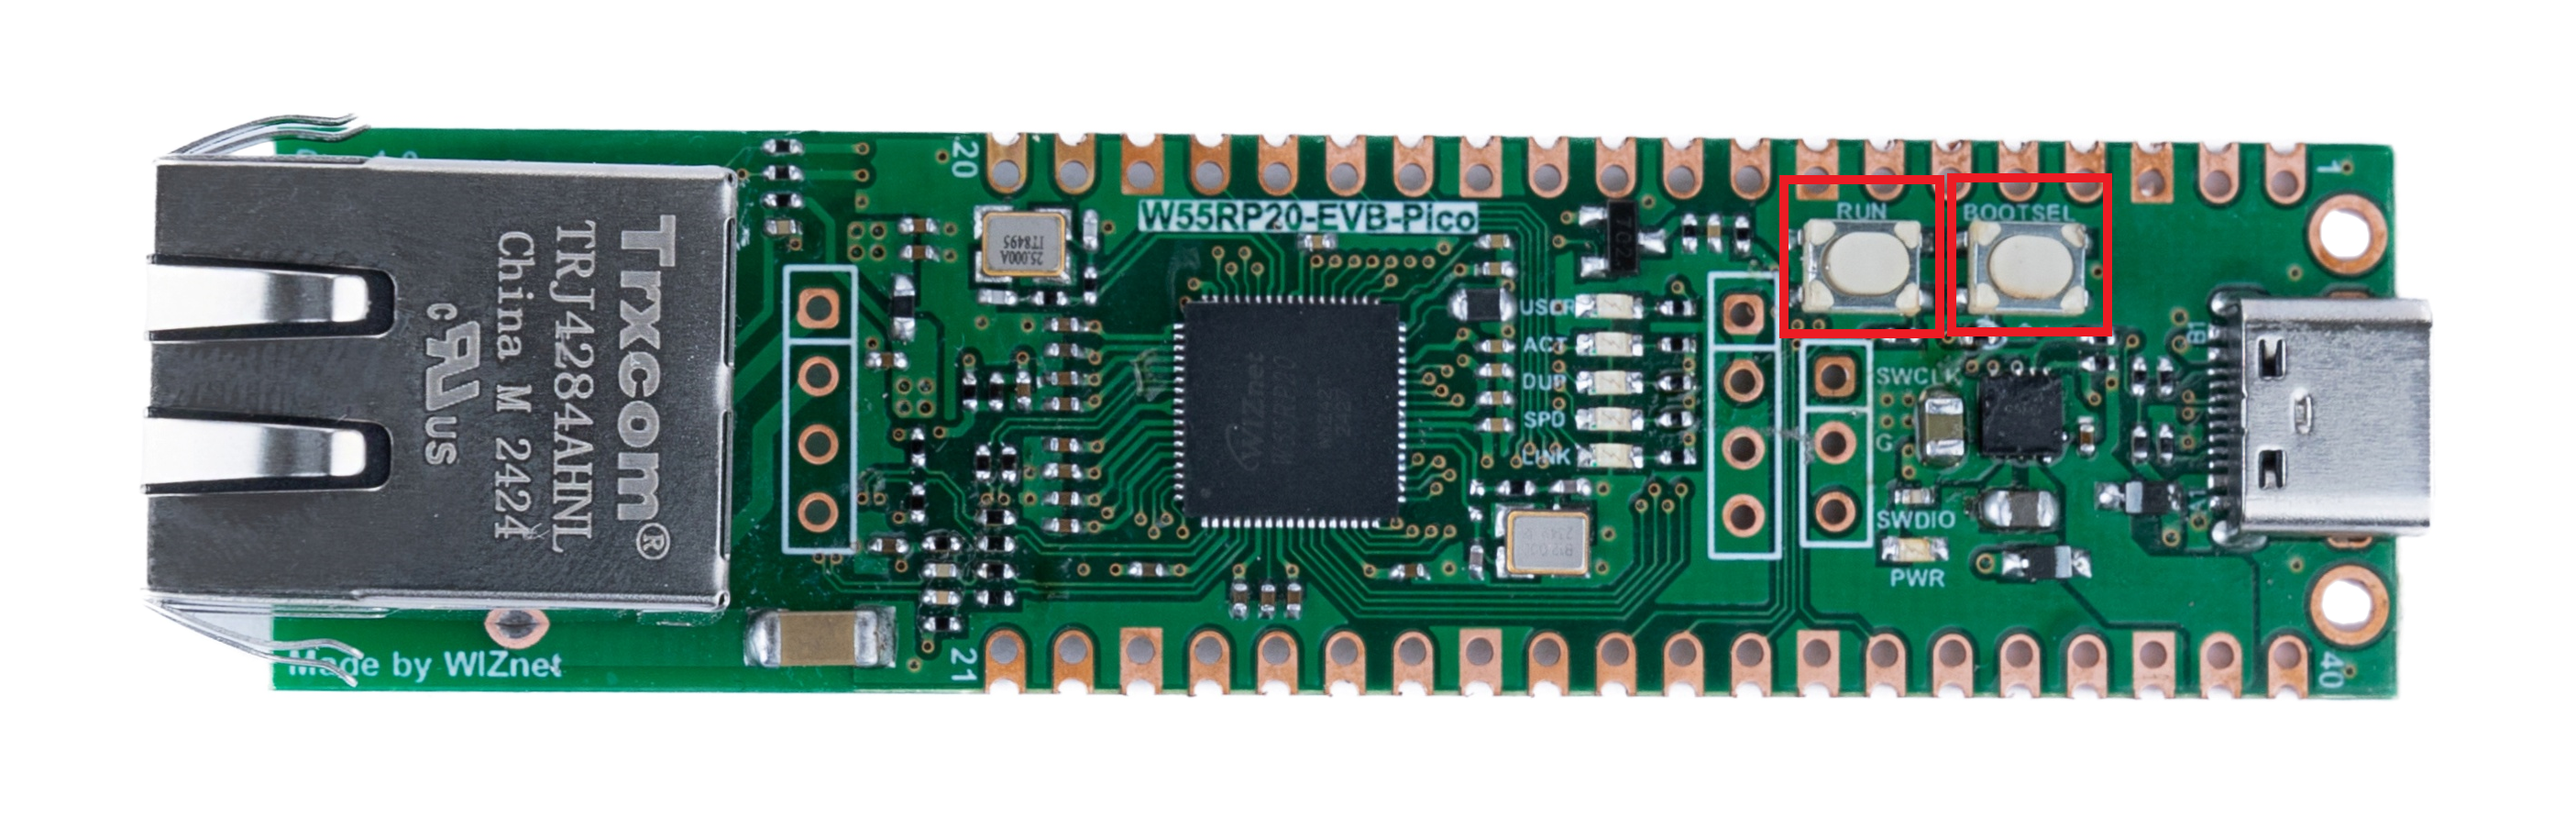
Connect the w55rp20-evb-pico via USB. While holding down the BOOTSEL button, press the Reset button briefly once.
You can see RPI-RP2 removable disk will appear.
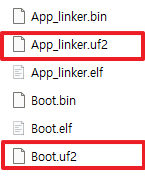
Drag and drop App_linker.uf2 and Boot.uf2, one by one, from the Bin_Files_VXXX folder.
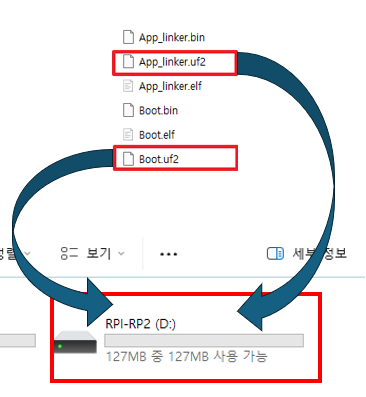
After dropping the first file onto the drive, the drive will disappear. To proceed, you need to put the board into BOOTSEL mode again and then drop the second file onto the drive.
Step 2: Write MAC address
To write MAC address refer this link
Step 3: Done
Once the MAC address input is completed, the user LED on the W55RP20-EVB-PICO will change to the Running LED.
This toggles every second while the S2E application is running.
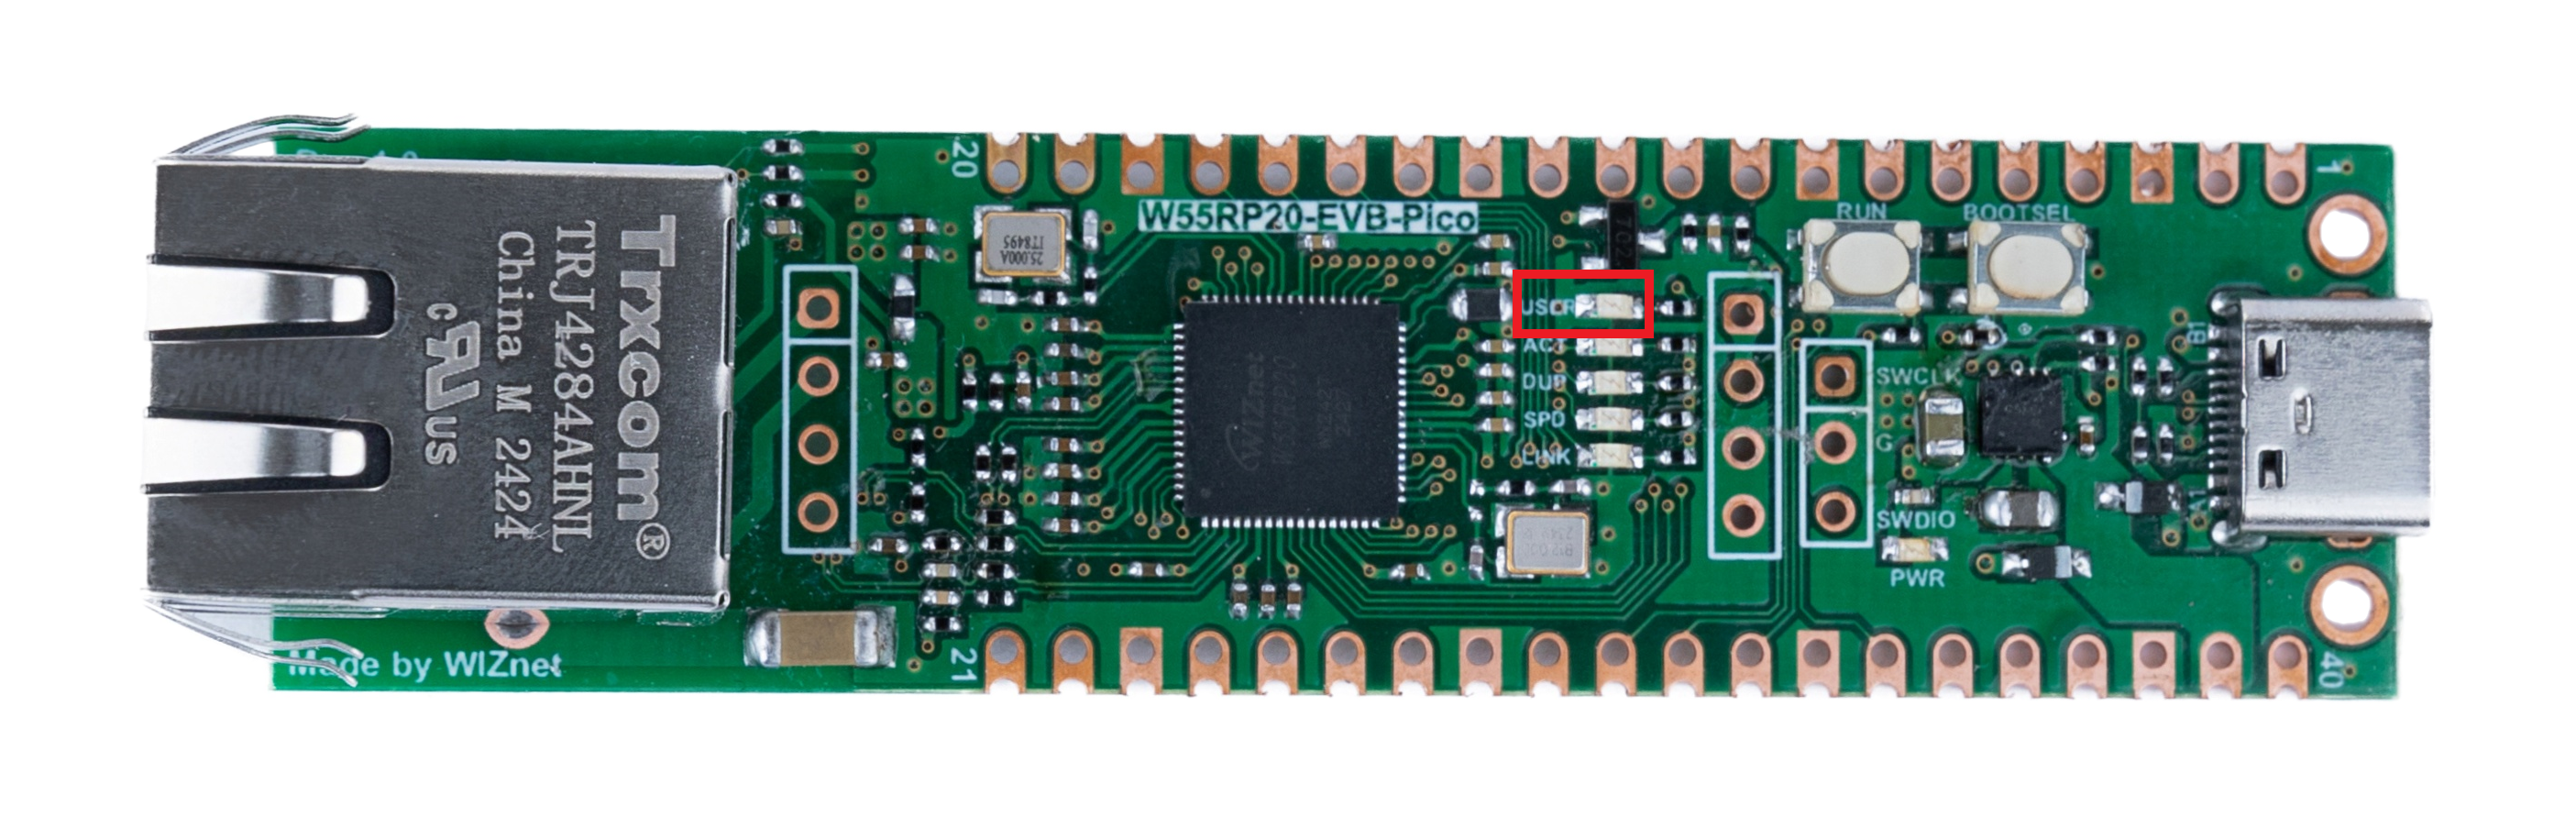
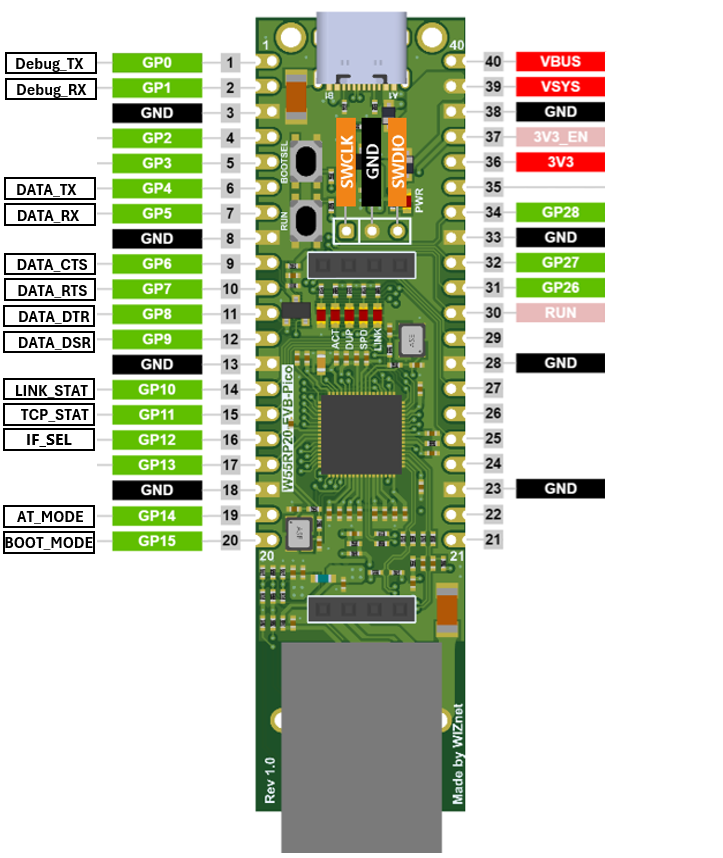
After uploading the W55RP20-S2E firmware to the W55RP20-EVB-PICO, the pin map is as follows: