Make New W5500 EVB Projects
This page introduce that how to make project for W5500 EVB with different IDEs like NXP LPCXpresso.
Make a new W5500 EVB project with LPCXpresso IDE
0. download and install Dev. enviroment & compiler
NXP provide a free (also commercial version available) Dev. Enviroment incl. IDE and C compiler. The free version compiler is limited to 8k code but can be extended to 256k of code by a free registration.
Download the IDE + compiler here:
🌎 http://www.lpcware.com/lpcxpresso/download
Parallel to the download & install you register here:
🌎 http://www.lpcware.com/user/register
In the LPCXresso IDE you can go to:
'Help' -> 'Create serial number and register (Free Edition)...'
here, copy that serial number.
Then, logged in at 🌎 http://www.lpcware.com , you can create the
activation code using that 'serial number':
🌎 http://www.lpcware.com/lpcxpresso/activate
copy the activation code here, and go to:
'Help' -> 'Activate (Free Edition)...'
enter (paste) the activation code and now you can create projects of
256k size.
Now, after a restart, your LPCXress IDE is running and you can create new and your own projects for the NXP MCUs.
1. Select 'New project' and project type
QuickStart panel (Located in the lower left in LPCXpresso IDE as default) -> Select 'New project'
- MCU category and Project type selection -> Select 'LPC11Exx' and 'LPCOpen - C Project'
- Target MCU selection -> Select 'LPC11E36/501'
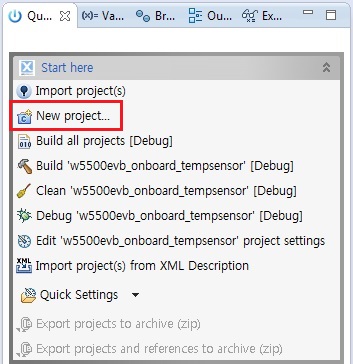
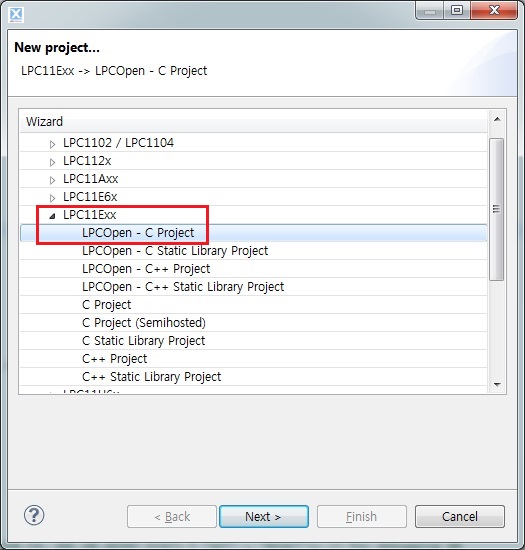
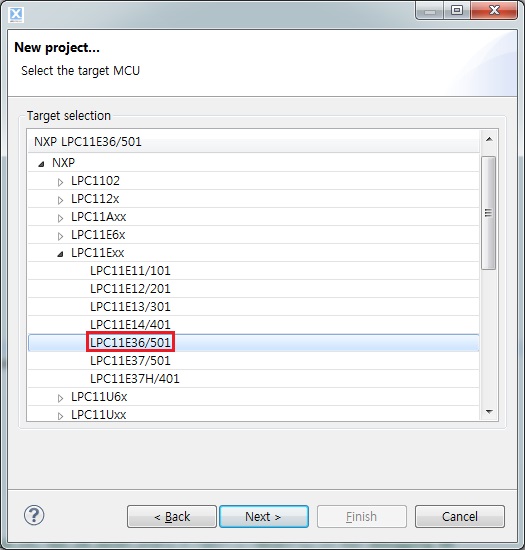
2. Import libraries to LPCXpresso IDE workspace
You should import provided library projects to your new project for easy to configure and utilize MCU APIs. This is the required library components for new projects as follows.
- LPCOpen Chip Library - lpc_chip_11exx
- LPCOpen Board Library (W5500 EVB Board Library) - wiznet_evb_w5500evb_board
- WIZnet ioLibrary - ioLibrary
Download the libraries and projects for W5500 EVB from
WIZnet GitHub
repository. After downloading,
import the required project libraries to your workspace.
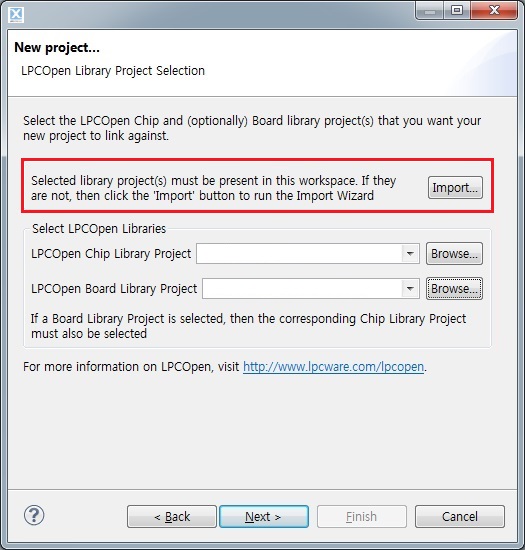
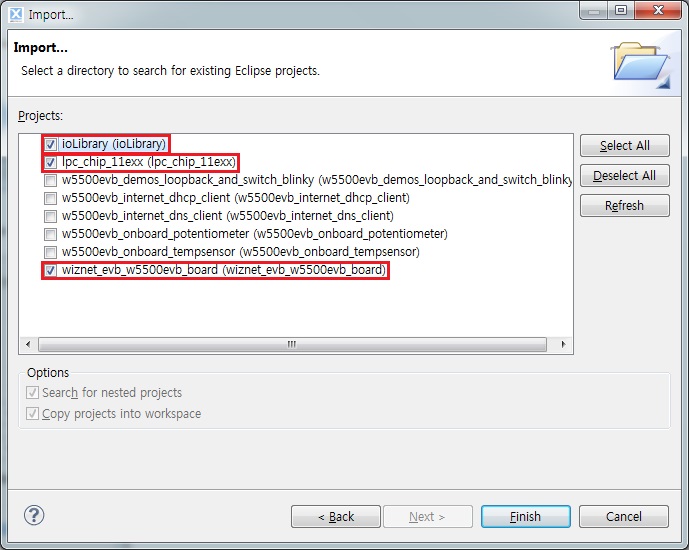
3. Select Chip and Board libraries
W5500 EVB projects based on libraries as below. Select the LPCOpen Chip and Board Library and add on your project.
- LPCOpen Chip Library - lpc_chip_11exx
- LPCOpen Board Library - wiznet_evb_w5500evb_board
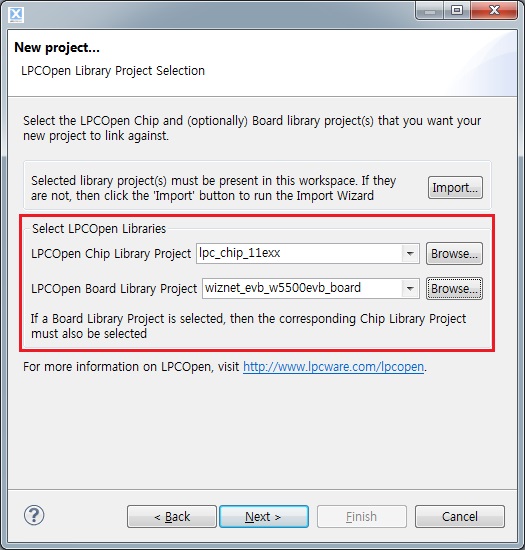
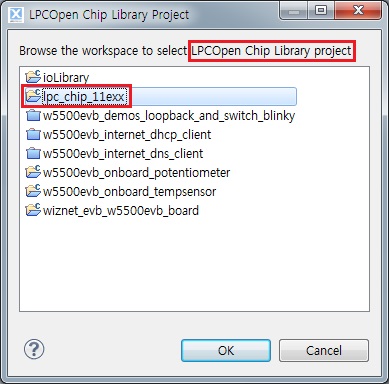
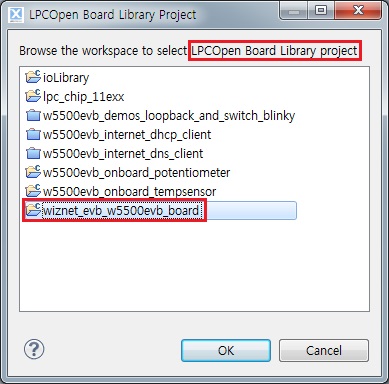
4. Create a 'new project'
Set the remaining options for your environment and press the finish
button, the 'new project' is created.
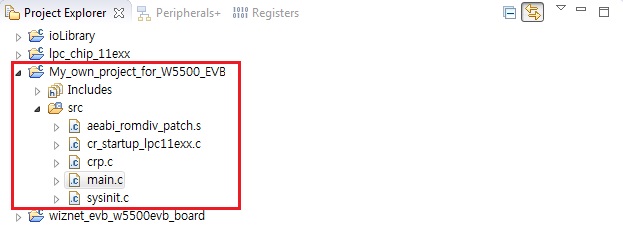
5. Link the ioLibrary to your project
The LPCXpresso IDE provides 'Smart Update' function. it also provides a
simple mechanism for creating the links to a static library project from
an application project. For more details, please refer to
NXP FAQ page for 'Linking to library projects'
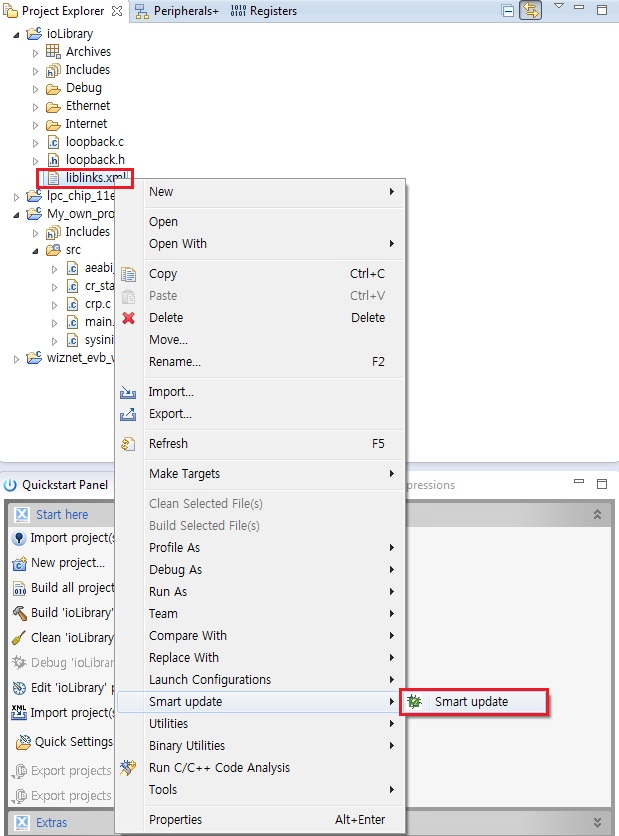
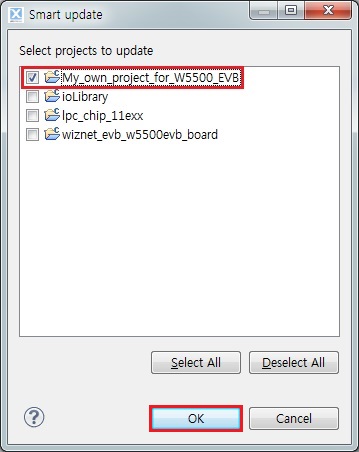
6. Set the library type for serial debugging
If the 'printf(/)' / 'scanf(/)' functions to use a UART, user can
retargeting to Redlib's printf(/) as follows. For more details, please
refer to NXP FAQ page for
'Using printf(/)'
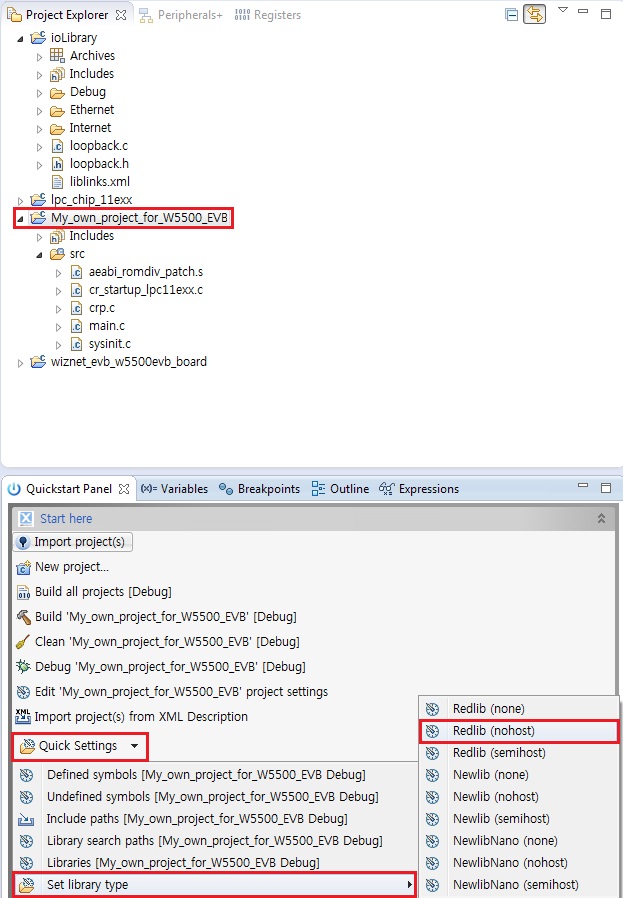
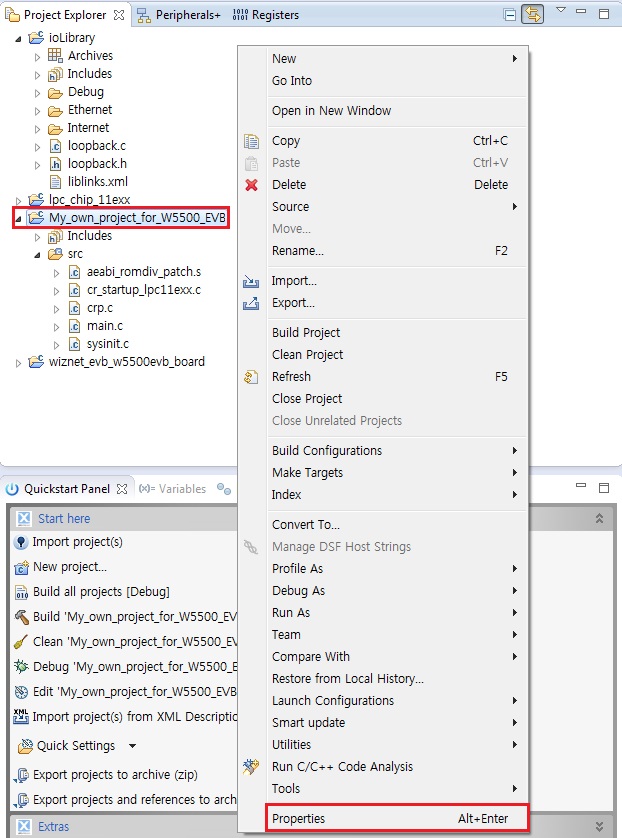
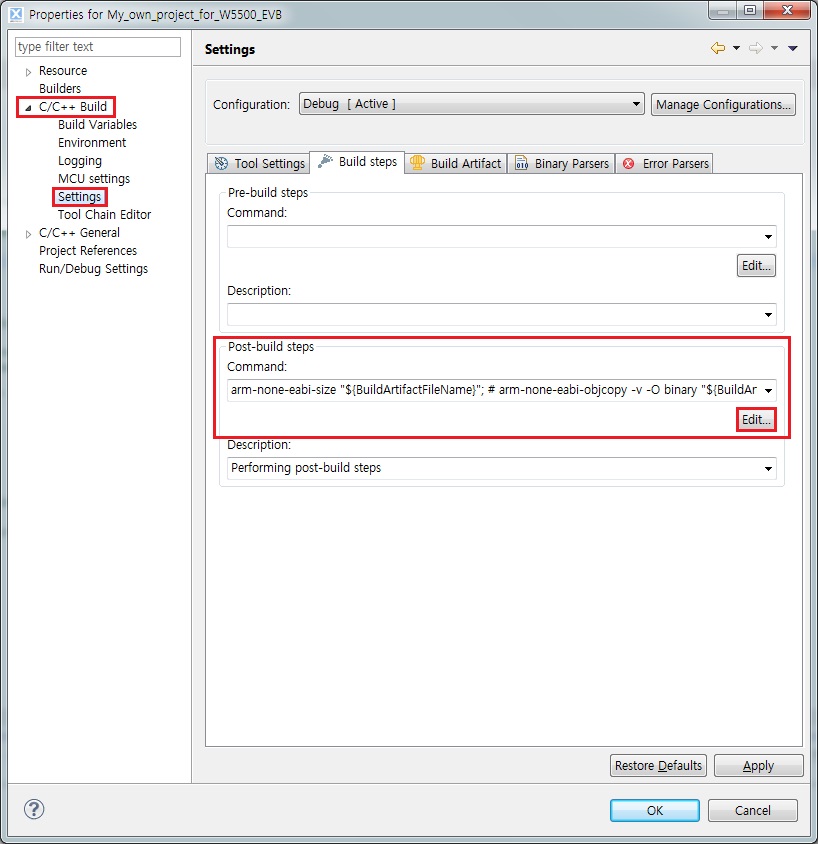
7. Change the C/C++ build commands for generate firmware image
Build command changes in project properties for generate 'BIN' and 'HEX'
files.
The following changes to the 'build commands'.
arm-none-eabi-size "${BuildArtifactFileName}"
arm-none-eabi-objcopy -O ihex "${BuildArtifactFileName}" "${BuildArtifactFileBaseName}.hex"
arm-none-eabi-objcopy -O binary "${BuildArtifactFileName}" "${BuildArtifactFileBaseName}.bin"
checksum -p ${TargetChip} -d "${BuildArtifactFileBaseName}.bin"
8. Complete settings
From now on, you can make your own application project based on newly
created project for W5500 EVB!
Please refer to NXP LPCXpresso Getting started user guide
for more details.