WizArduino MEGA WIFI (ENG)
Overview
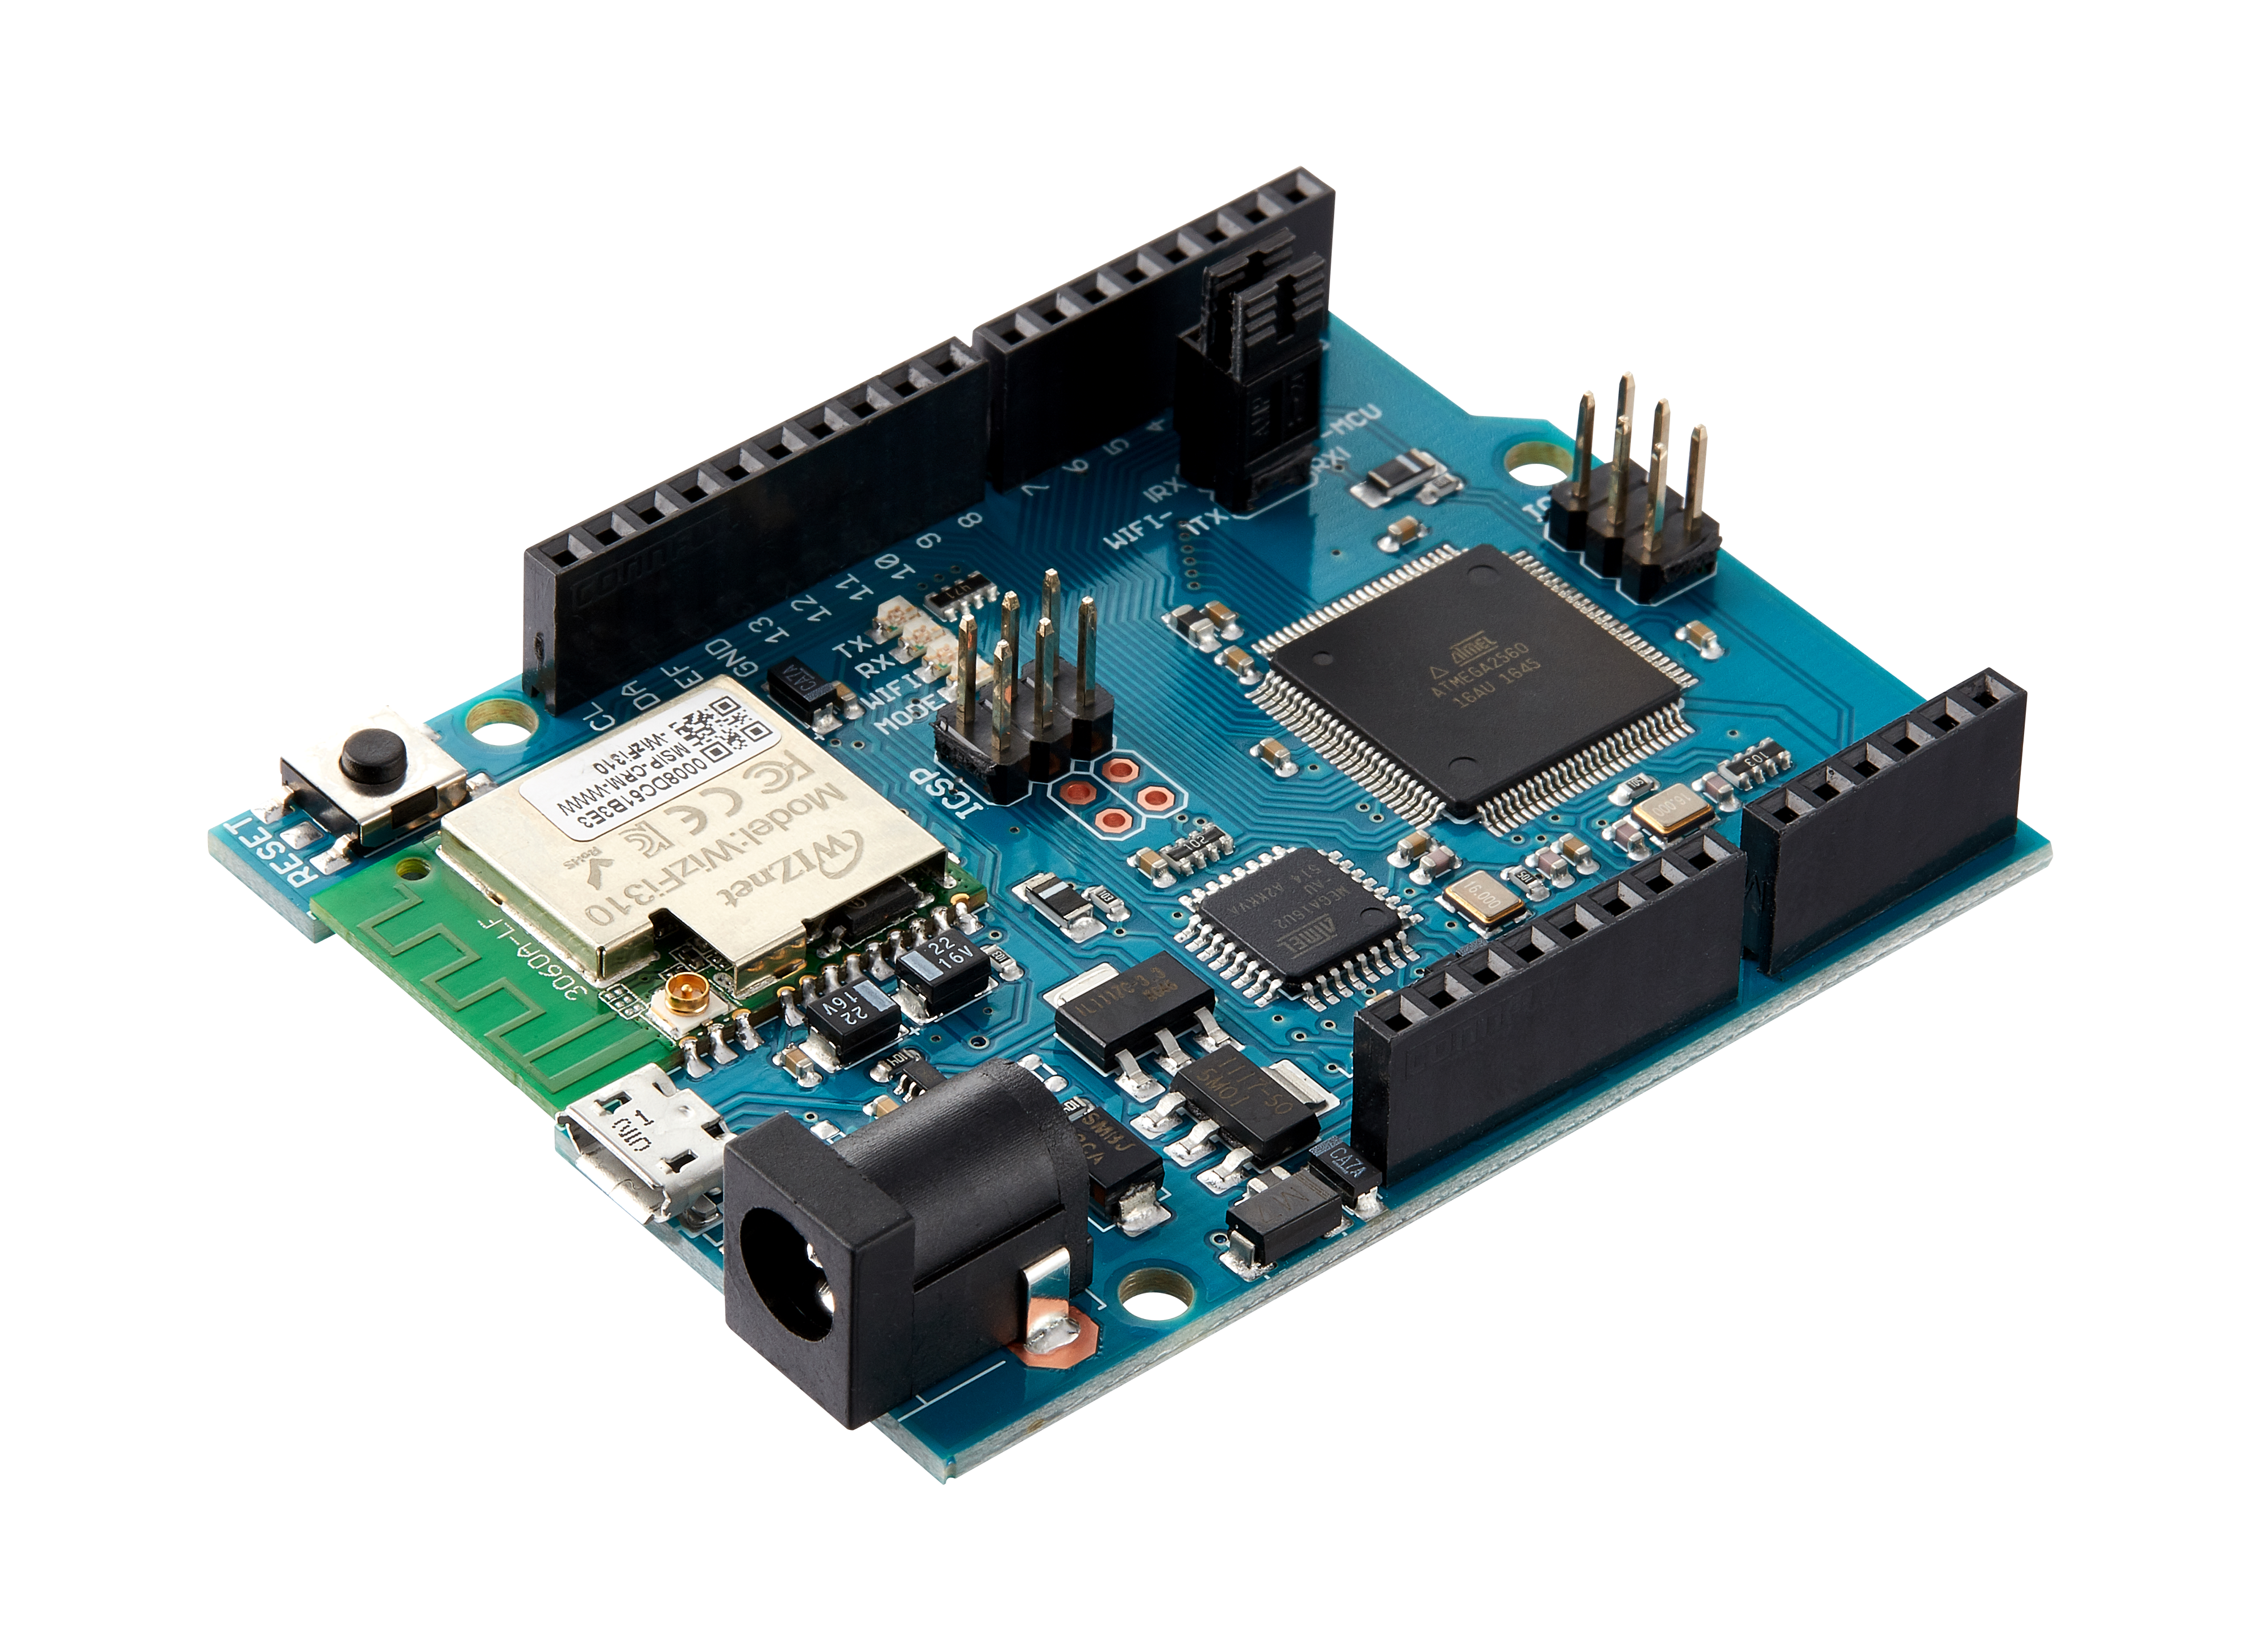
WizArduino MEGA WIFI is composed of 🌎MEGA 2560 board and WizFi310, which makes it as simple as the Arduino UNO platform and applicable for IoT development.

WizArduino Mega WIFI is an ideal board to start any IoT, Home Automation, Robot, drone, and DIY project
Features
Hardware Features
- Microcontroller : ATmega2560
- Operating Voltage : 5V
- Digital I/O Pins : 20 (of which 12 provide PWM output)
- Analog Input Pins : 6
- DC Current per I/O Pin : 20 mA
- DC Current for 3.3V Pin : 50 mA
- Flash Memory : 256 KB of which 8 KB used by bootloader
- SRAM : 8 KB
- EEPROM : 4 KB
- Clock Speed : 16 MHz
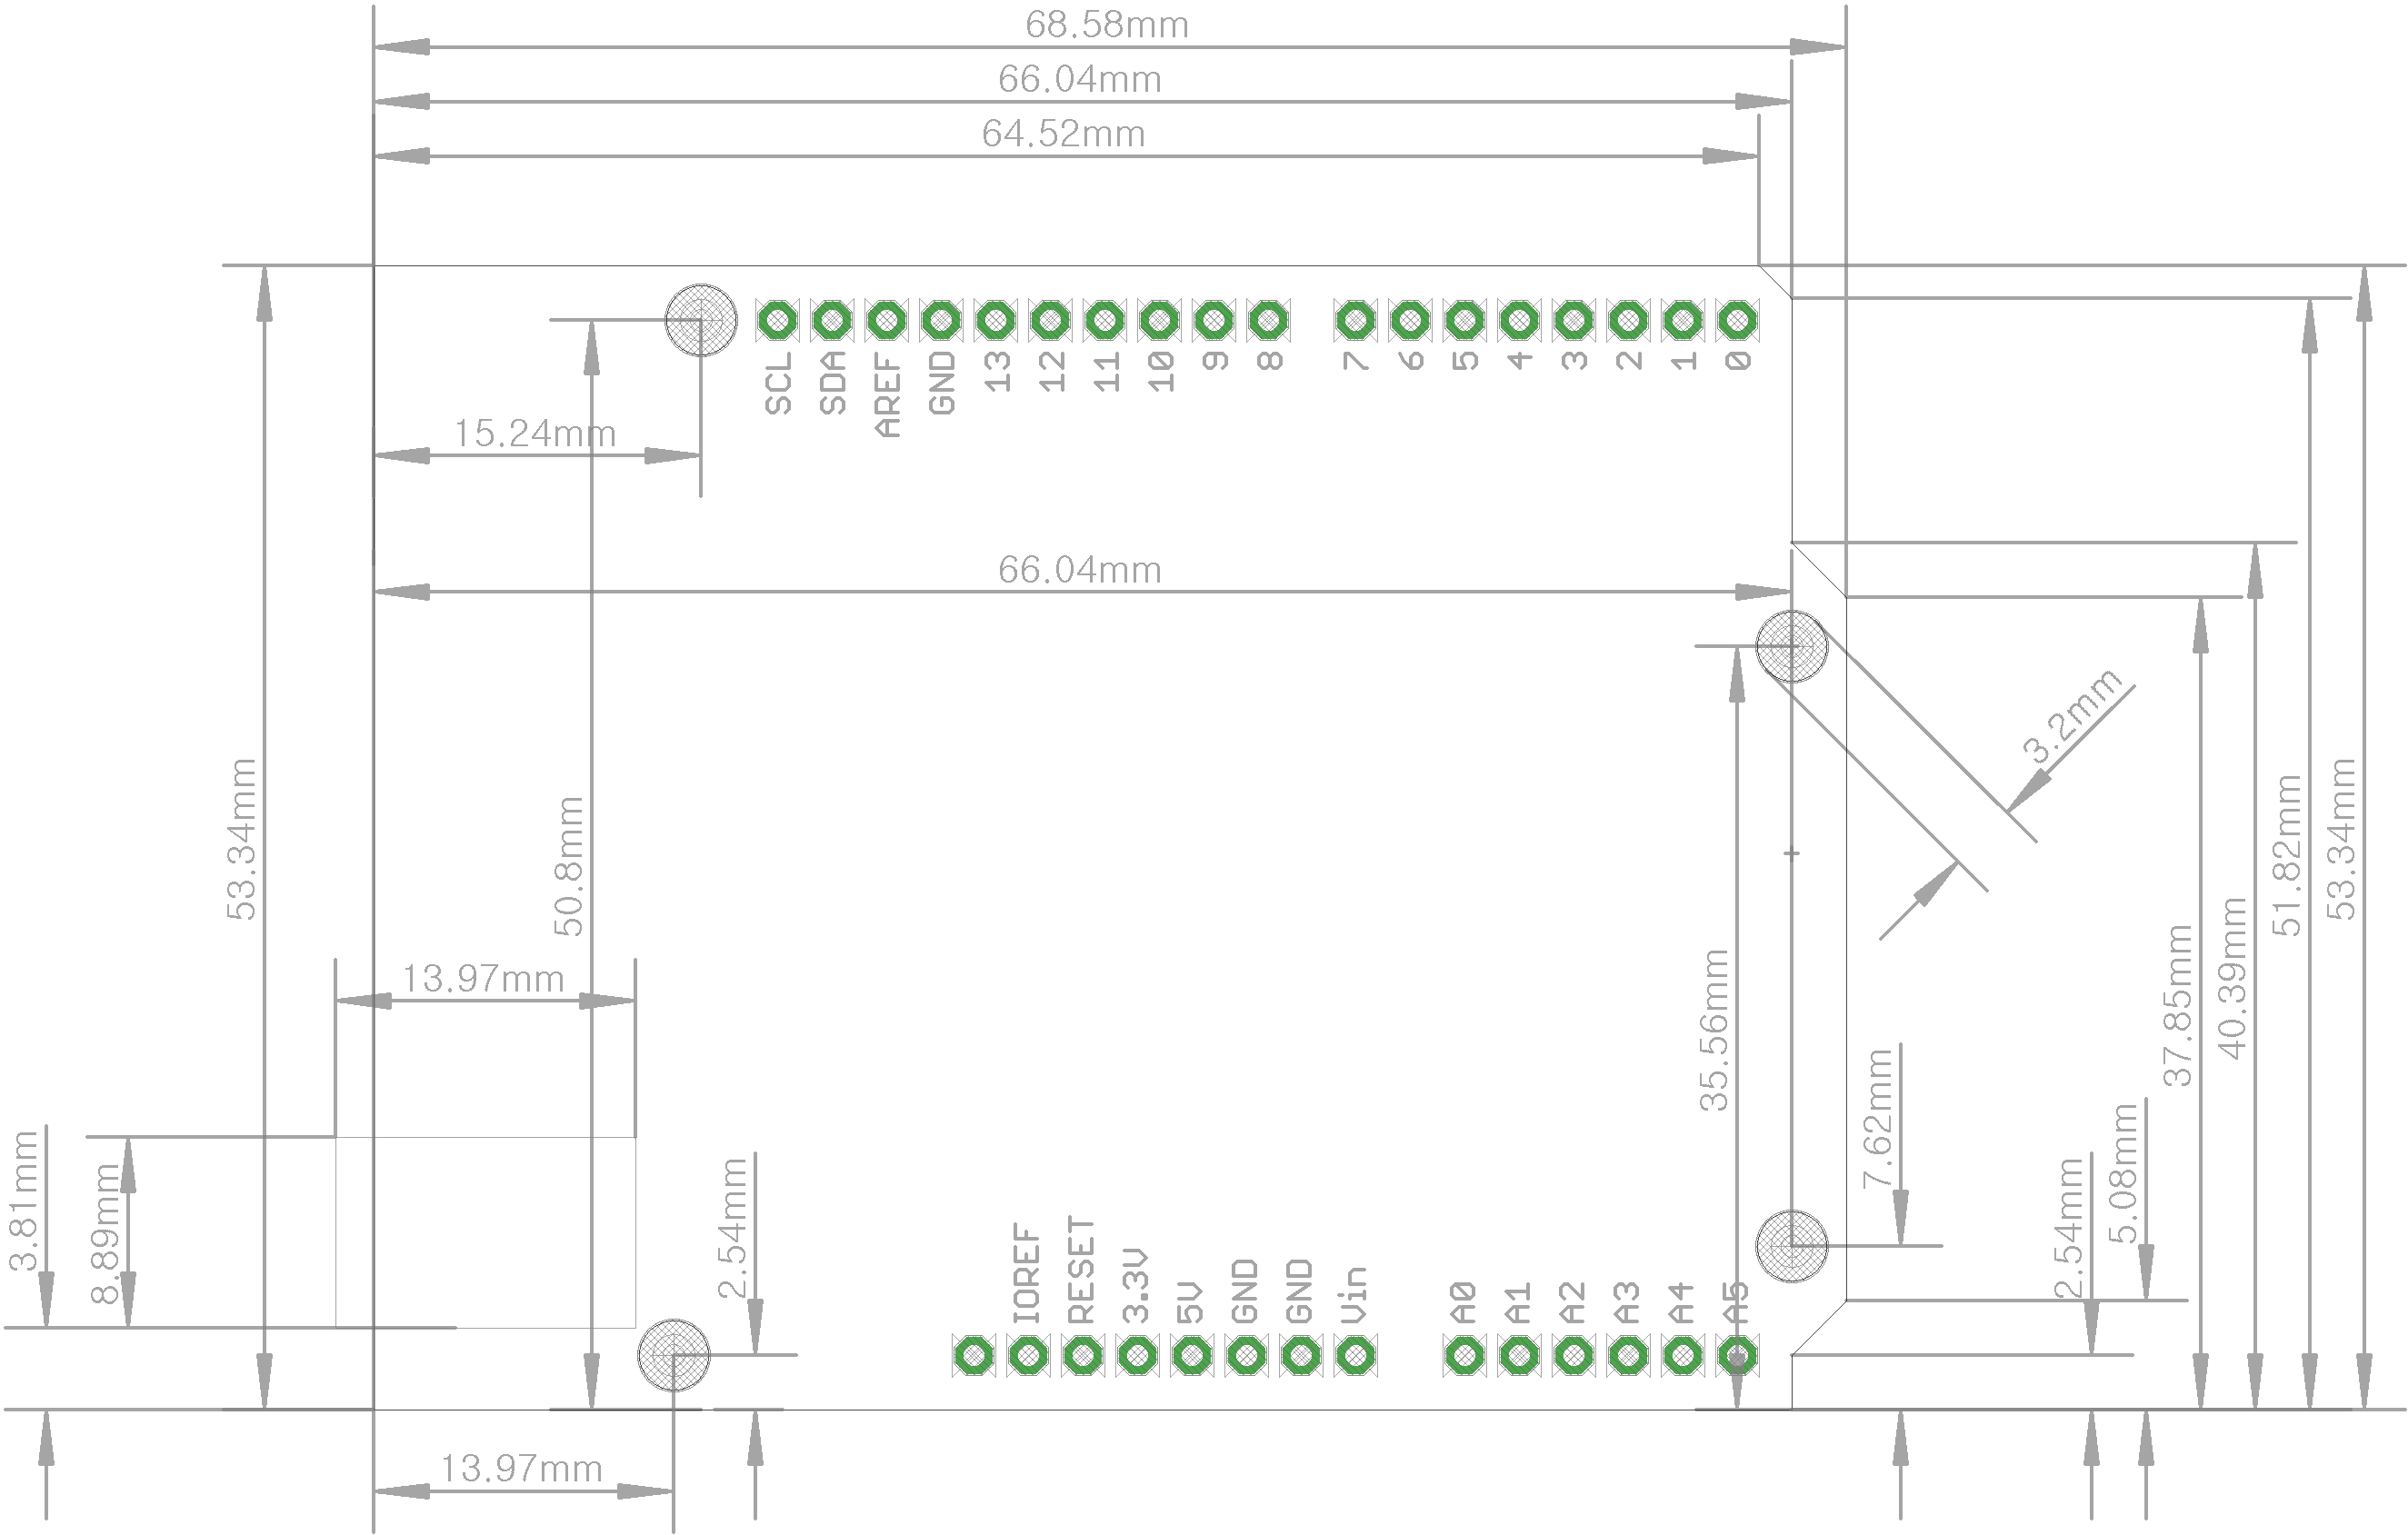
- PCB Size : 53 x 68.5mm
WiFi Features
- Single band 2.4GHz IEEE 802.11b/g/n
- Serial Interface : UART
- UART Max Baud : 921600 bps
- Soft AP : Enough memory retention, Wi-Fi Security (WEP, WPA/WPA2PSK), L2 Switching
- OTA(Over The Air F/W Upgrading)
- For more details refer to WizFi310 page.
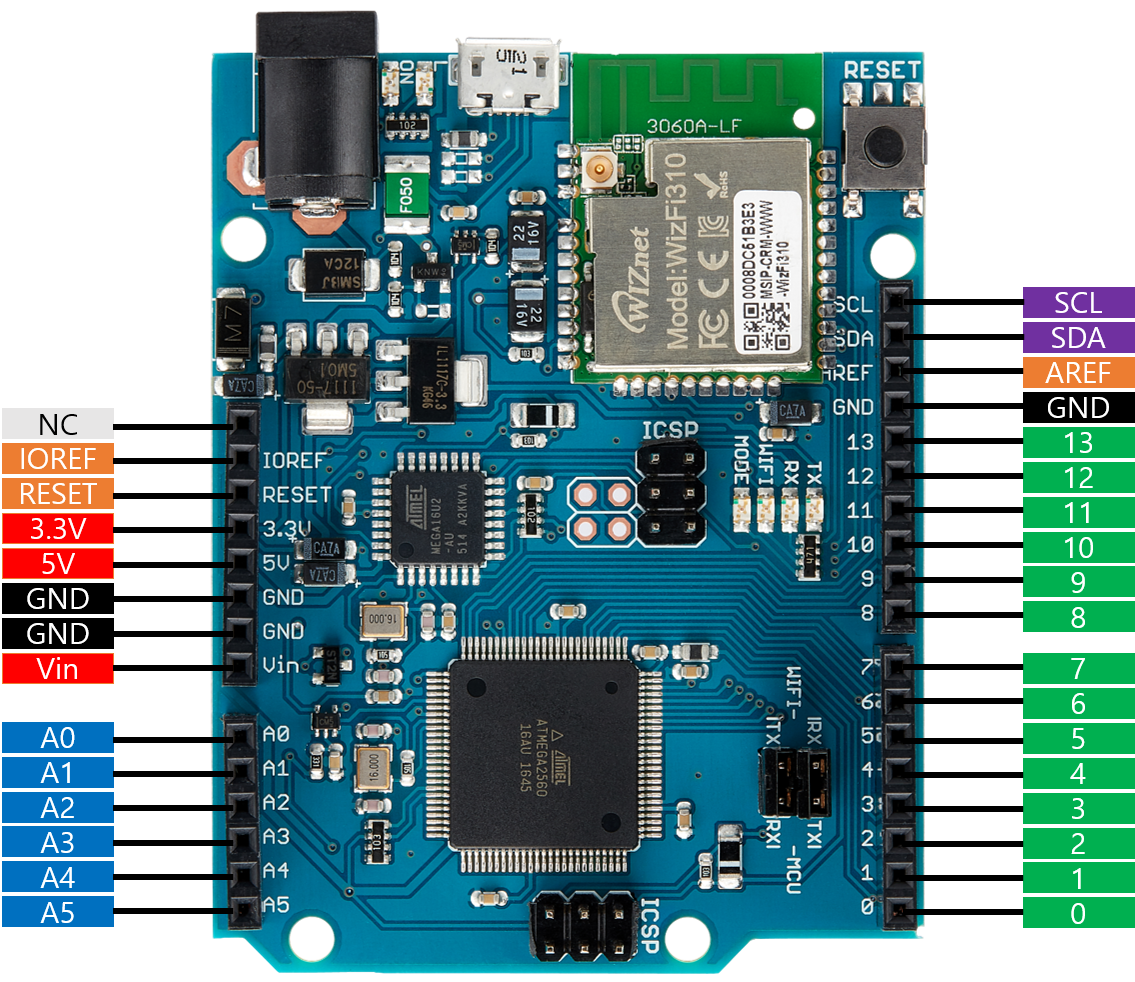
Pinout
Getting Started
Basic
WizArduino MEGA WIFI is compatible with Arduino MEGA 2560 board. Install Arduino IDE and connect your board. Choose Arduino MEGA 2560 when prompted to Select board.
For more details refer to next page.
WiFi
Hardware
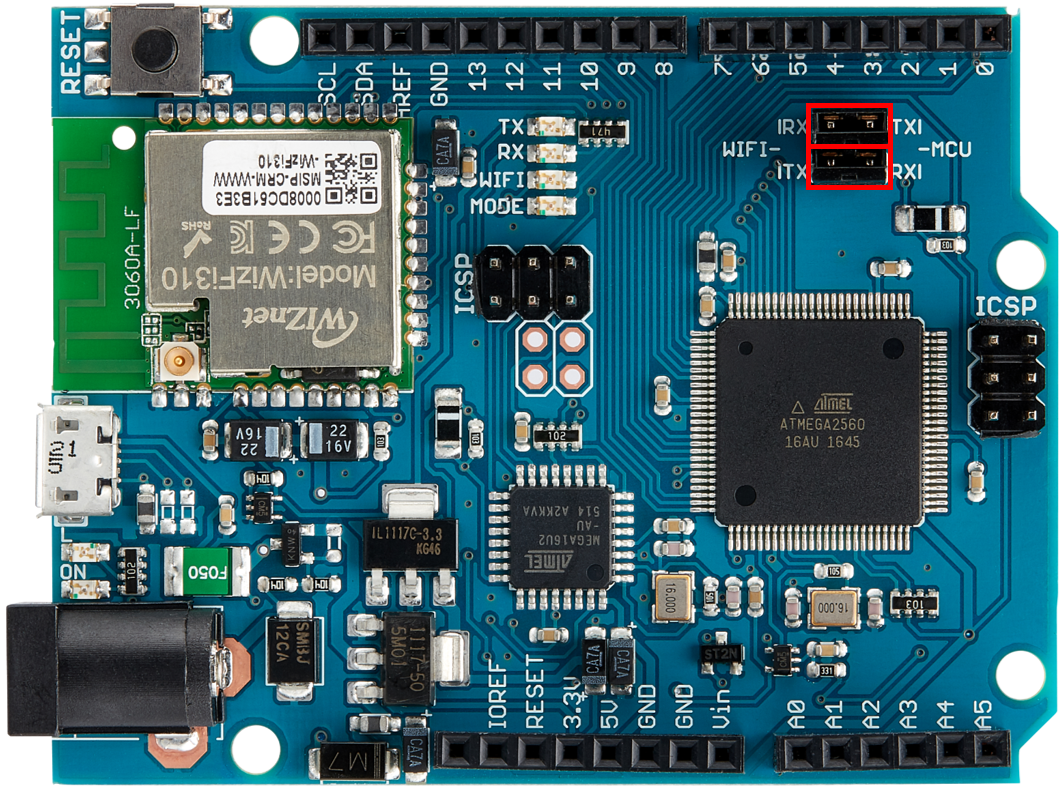
To use WiFi functions it is necessary to install jumper on 2x2 Pin Header as shown in image above.
| WiFi | MCU |
|---|---|
| RX | TX |
| TX | RX |
Software
WizFi310 is connected to the main chip (ATmega 2560) by serial (Serial #3) inside of WizArduino MEGA WIFI. It is necessary to initialize it as below.
#include "WizFi310.h"
void setup()
{
    Serial3.begin(115200);
    WiFi.init(&Serial3);
}
Please refer to Examples/IoT section for more information on WiFi usage.
WiFi Library
Users must use the library for WizFi310 to program WizArduino MEGA WIFI.
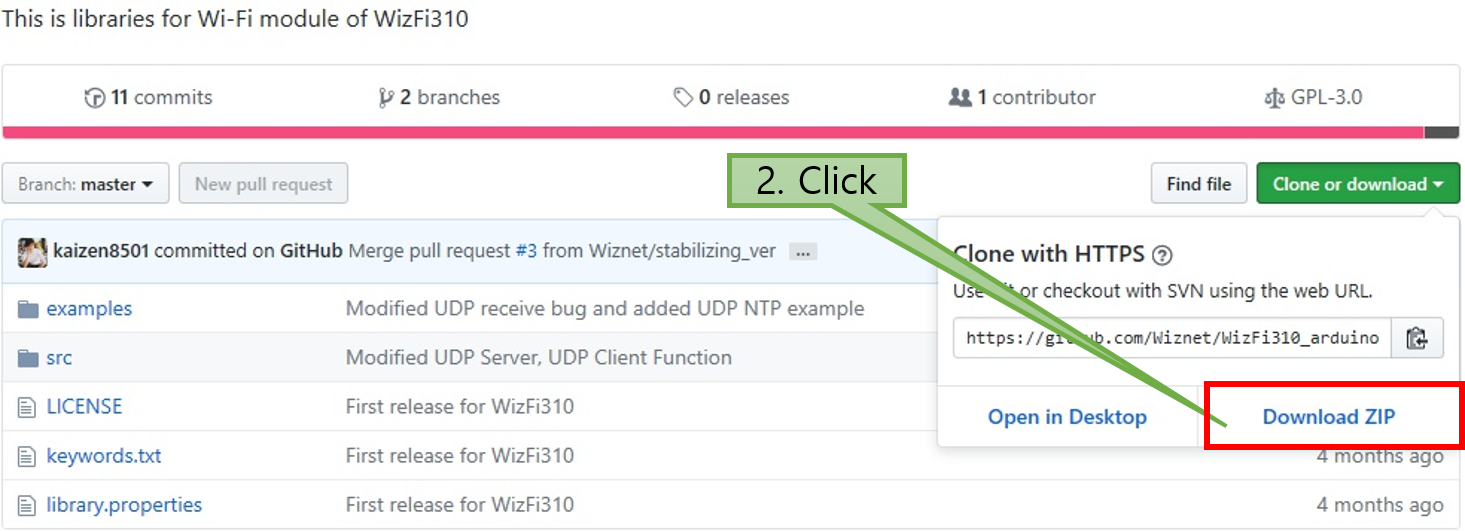
Refer to below guide for downloading and installing Arduino sketch from Github.
GitHub
-
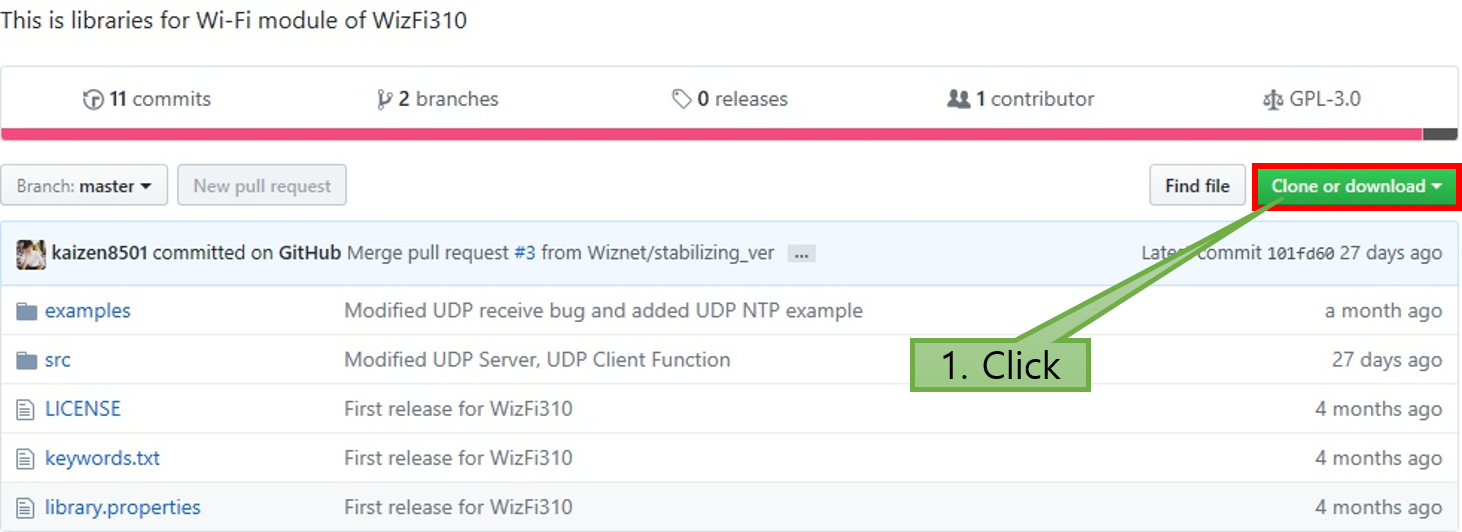
Download 🌎WizFi310 Arduino Library
-
Unzip downloaded file and copy to Documents/Arduino/Libraries
- There will be one more folder once archive is unzipped. Copy that folder
- \WizFi310\arduino\library-master\ WizFi310_arduino_library-master
-
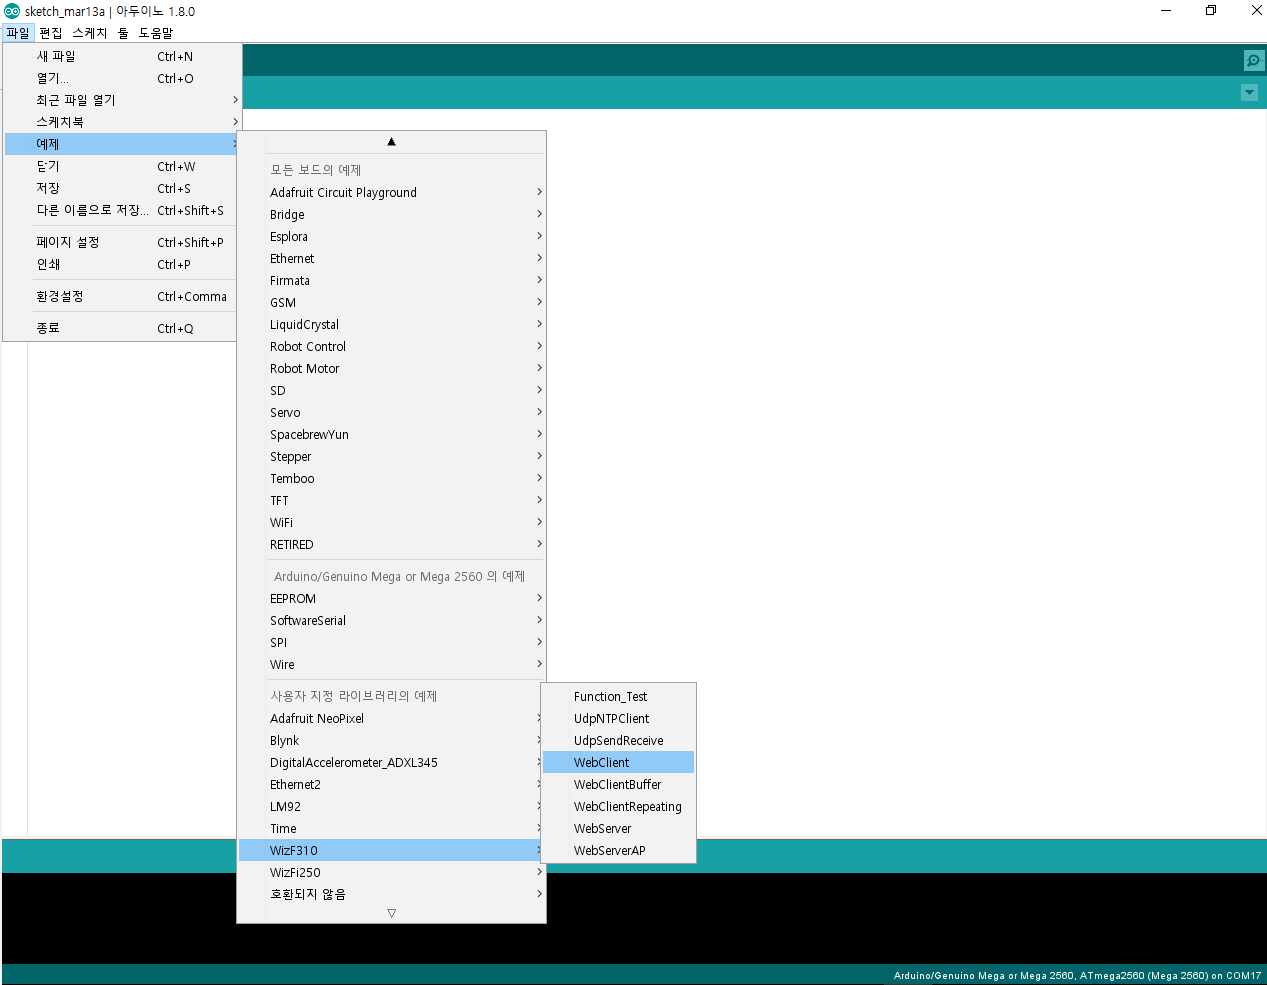
If you can see WizFi310 examples as shown below, then library was installed properly.
Sketch
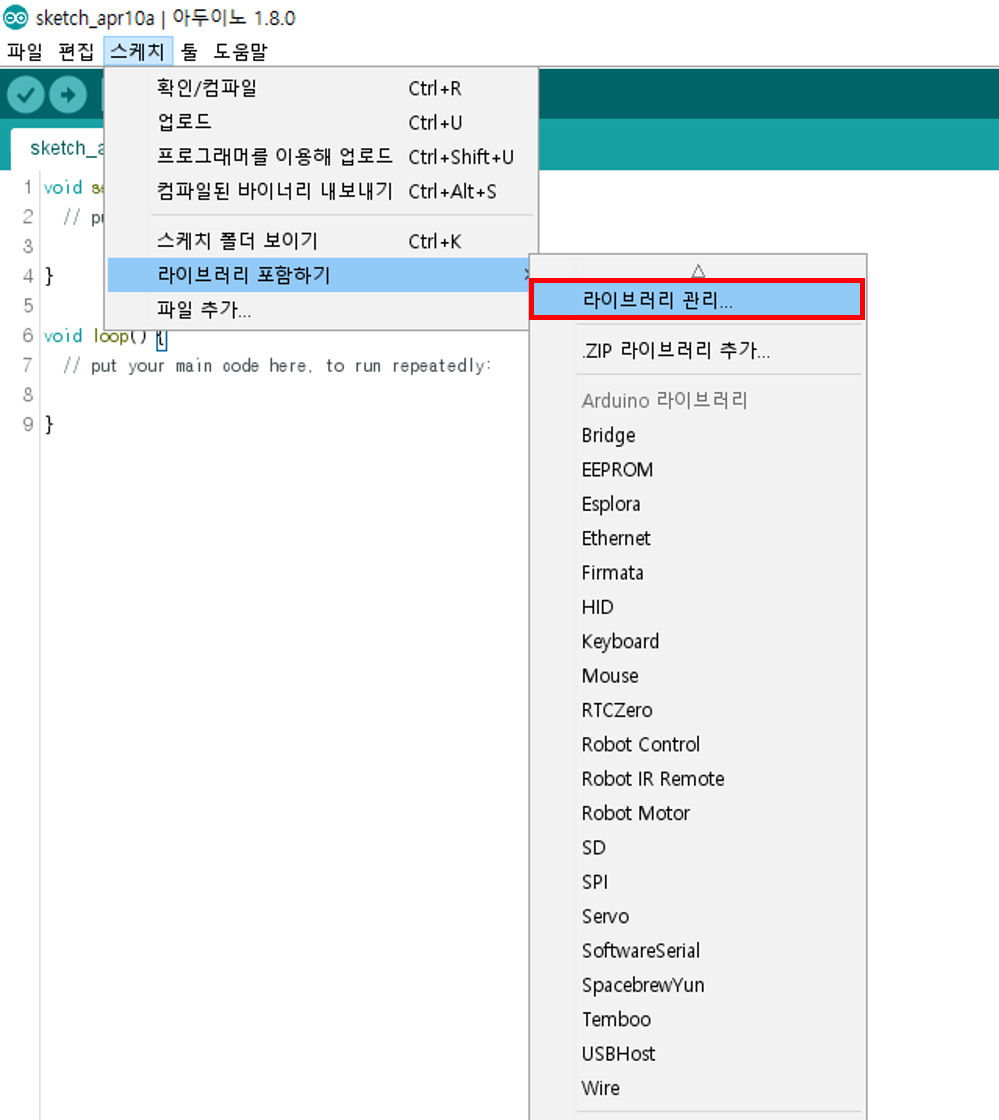
- In menu Sketch -> Include library -> Manage libraries
- Search for wizfi in pop-up window
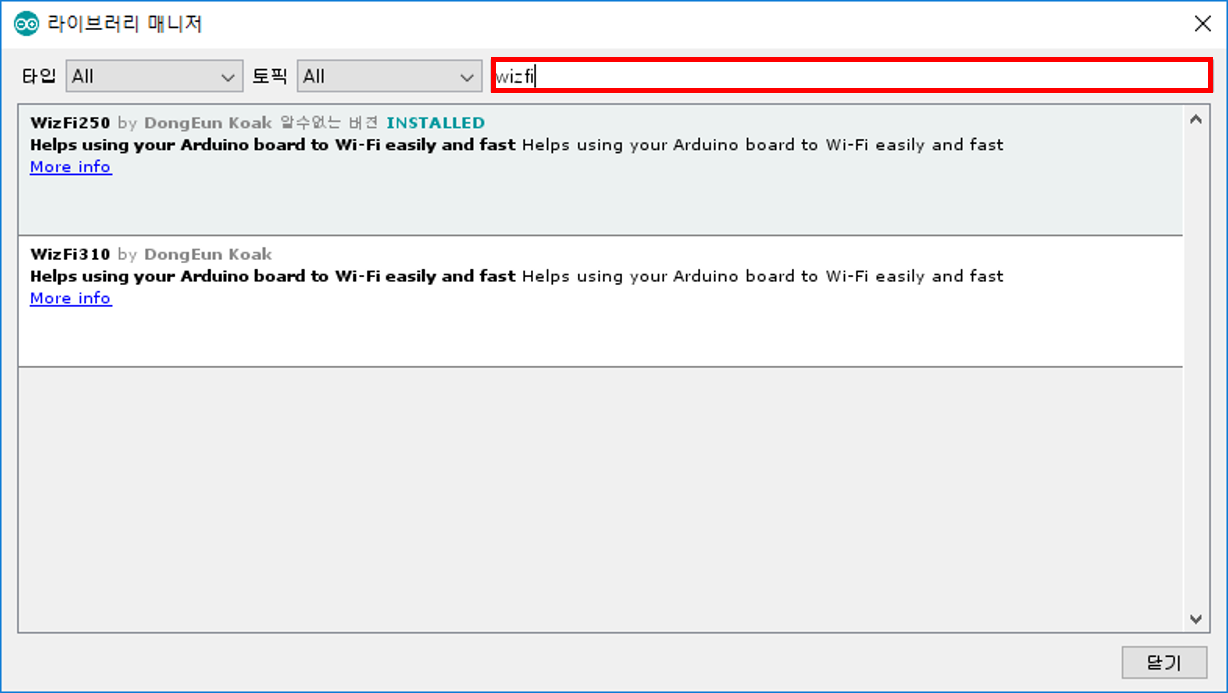
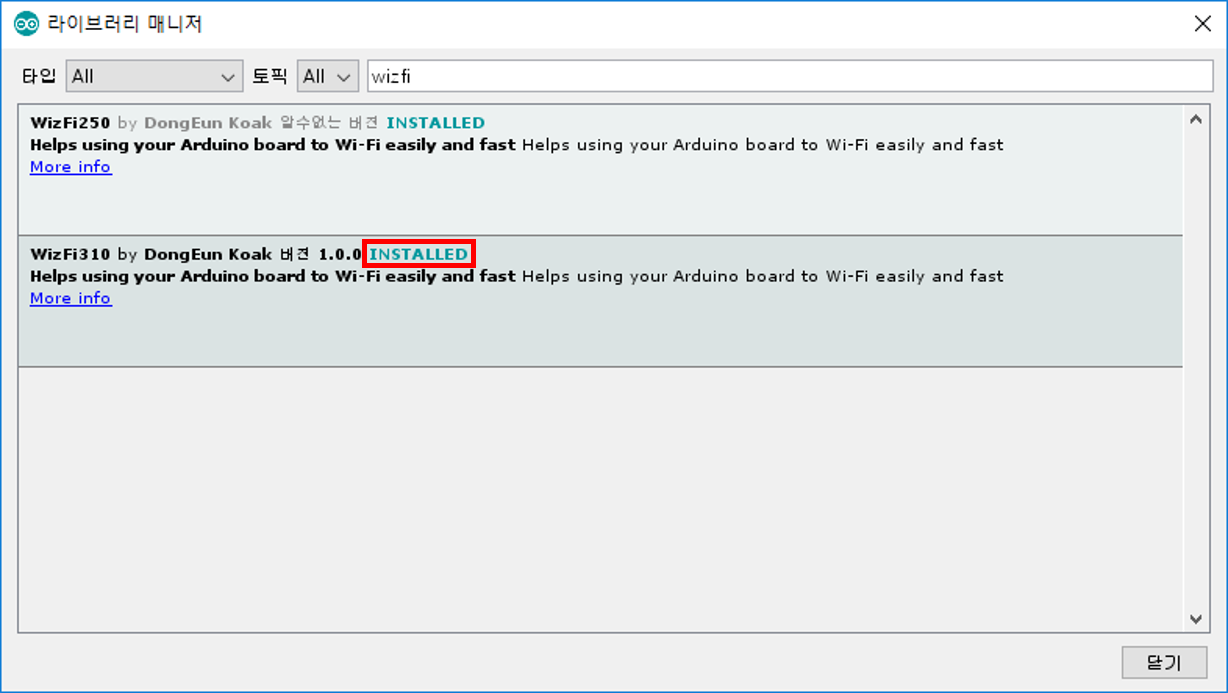
- Find and install WizFi310 library
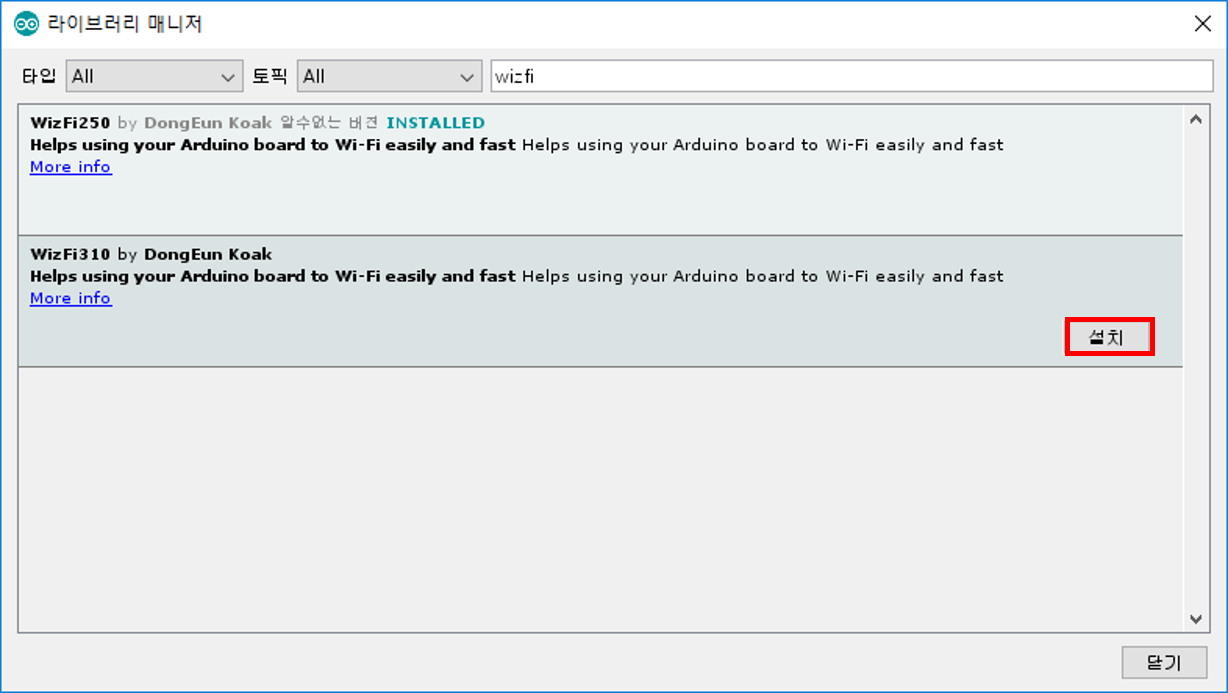
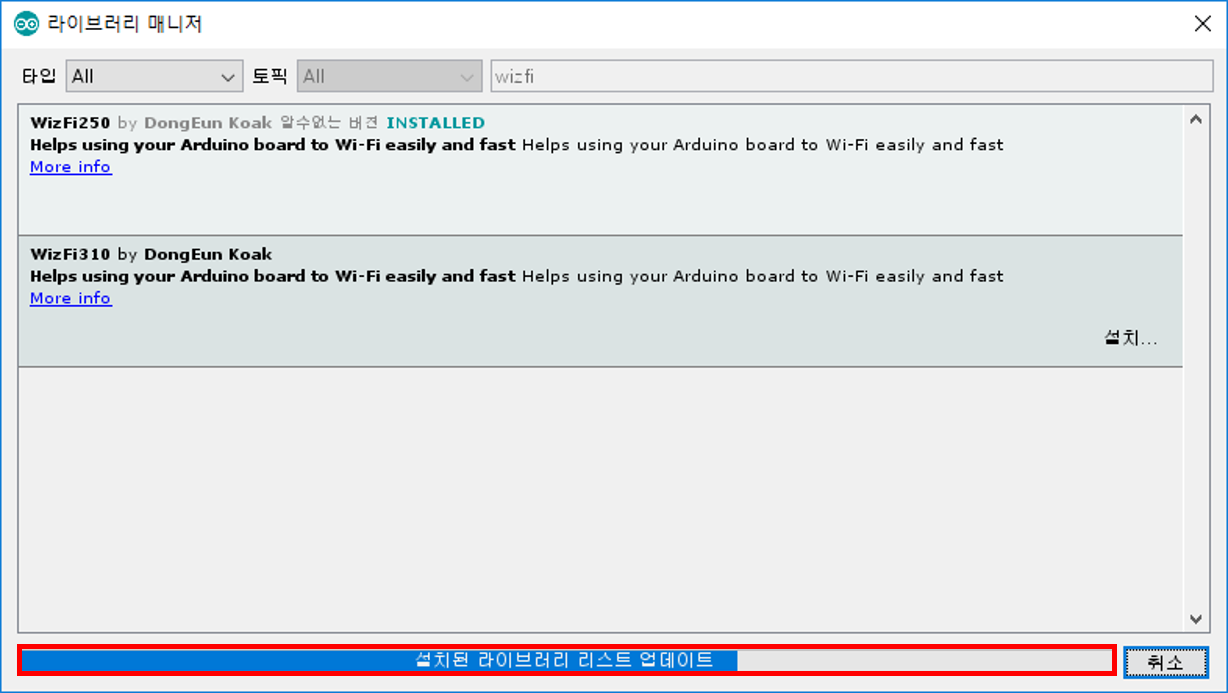
- Wait for installation and check sample projects.
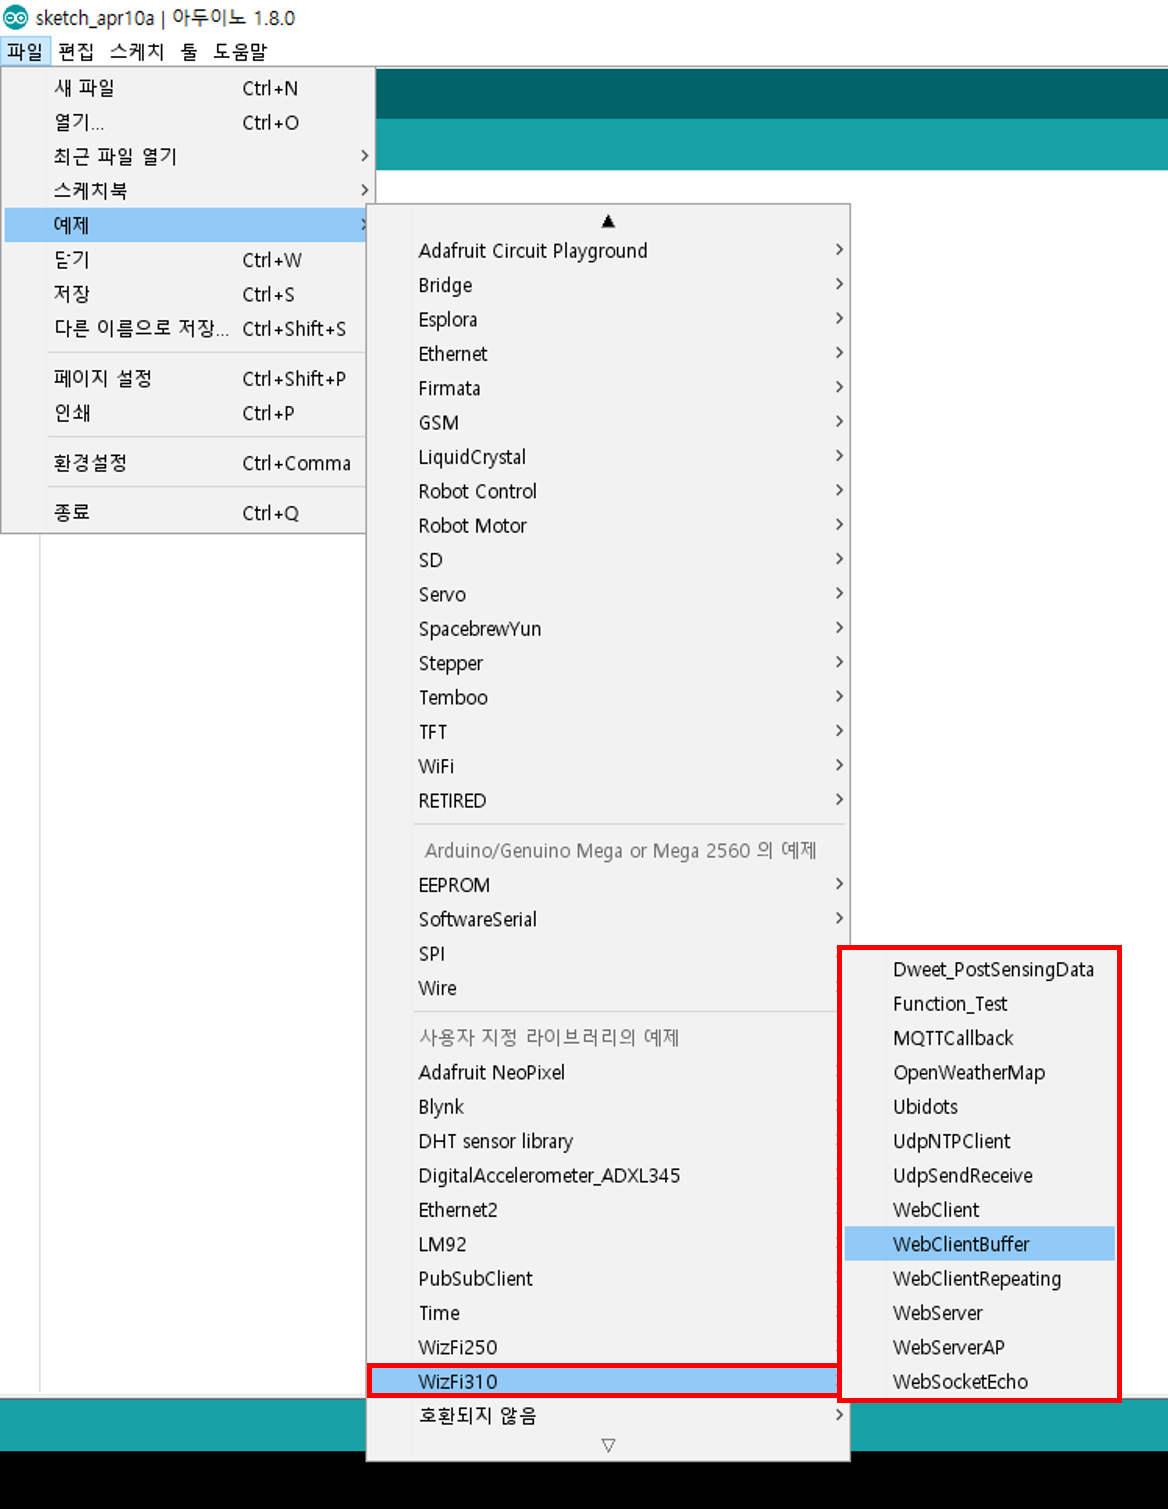
Examples
IoT
- 🌎Connect to ThingSpeak
- 🌎Connect to OpenWeatherMap
- 🌎Connect to Dweet.io
- 🌎Connect to CoAP
- 🌎Connect to Ubidots
- 🌎MQTT
- You can find more examples at 🌎WizFi310_arduino_library/examples
Maker Projects
- Coming Soon
Technical Reference
Schematic & Reference Design
Dimension
Part List
FAQ
What are the differences between WizFi310 and other WiFi modules?
WizFi310 description
There are many Embedded WiFi modules these days, and the technology has been leveled to some extent (except for some low-cost WiFi modules), so there is no special difference in specifications or features.
- Control using AT Command through UART interface.
- 802.11 bgn support.
- Support for WEP, WPA/WPA2, TKIP/AES.
- Support for Soft AP mode.
- It can be set up/controlled using a smartphone.
- TCP/UDP, SSL, MQTT/MQTTS, and multi-socket support.
- WizFi 310 also supports all of the above specifications.
However, it is a product developed directly by Wiznet, so we can say that its advantage is that WizFi310 can be easily connected to IoT platforms of domestic telecommunication companies such as SKT Thingplug and KT IoT Makers.
The Wiznet Academy provides training sessions for using WizFi310 with SKT Thingplug, which has a built-in ThingPlug connection, and KT IoTMakers is registered as the official Compatible Product (for the first time as a WiFi module).
It would be a particularly good choice for customers who want to connect to SKT or KT's IoT platforms through Wi-Fi.
What is WiFi range?
As a result of internal testing, WizFi310 signal can range up to 160m outdoors. (However, in this case, there could be a difference in performance depending on the antenna of the router used.)