WizArduino M0 ETH (ENG)
Overview
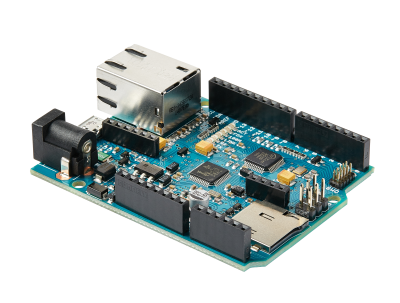
WizArduino M0 ETH is built on 🌎M0 board but adds 🌎W5500 TCP/IP Embedded Ethernet Controller, thus making it simple as Arduino UNO platform and applicable for IoT development.
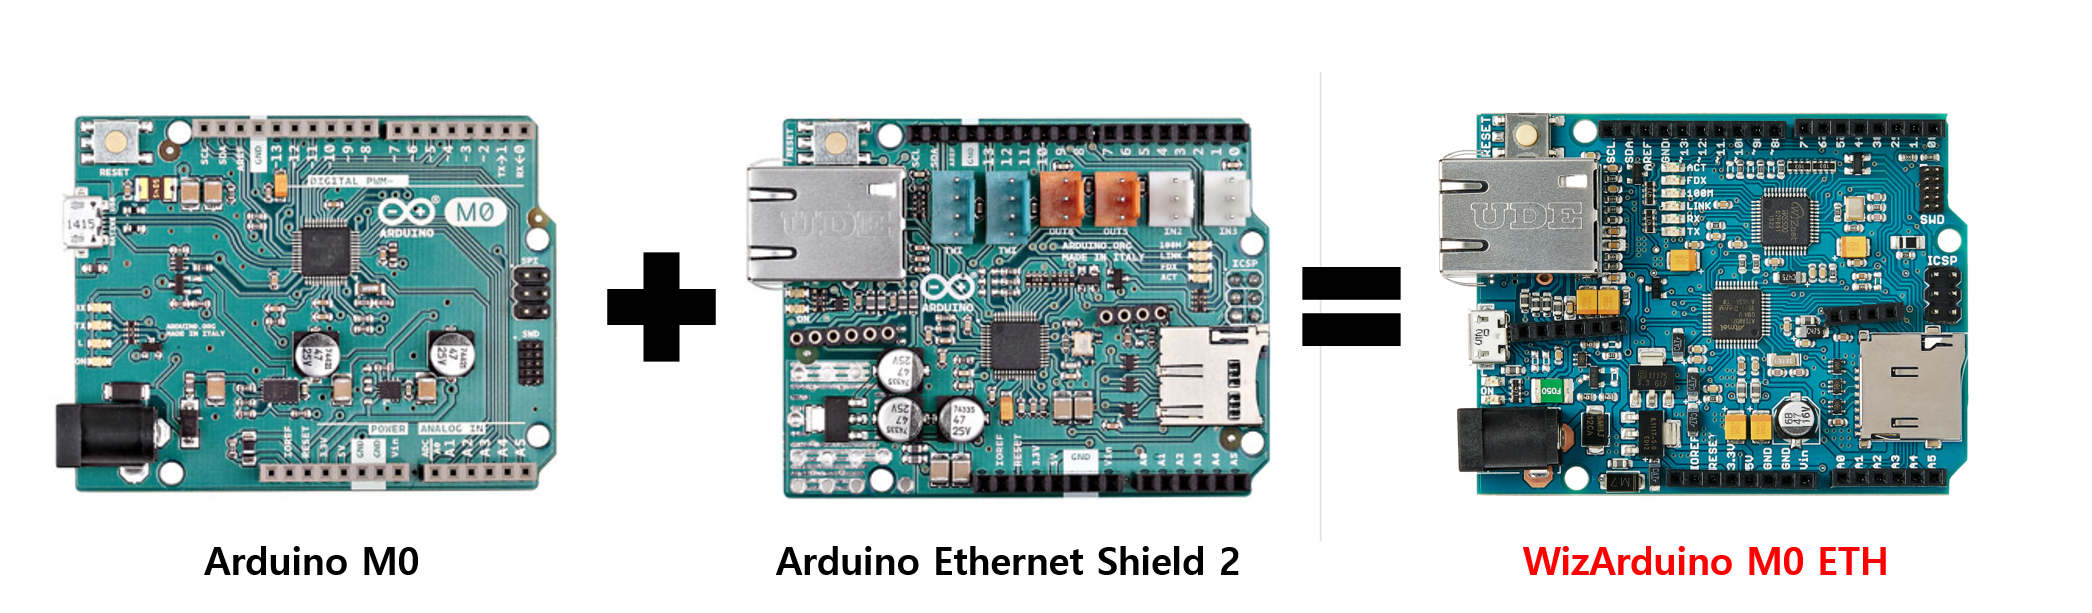
WizArduino M0 ETH is a board that combines Arduino M0 and Ethernet Shield 2, start any IoT, Home Automation, Robot, drone or any DIY project
Hardware Features
WizArduino Microcontroller
- Microcontroller : ATSAMD21G18, 48pins LQFP
- Architecture : ARM Cortex-M0+
- Operation Voltage : 3.3V
- Flash Memory : 256KB
- SRAM : 32KB
- Clock Speed : 48MHz
- Analog I/O Pins : 6 + 1 DAC
- DC Current per I/O Pins : 7mA (I/O Pins)
General features
- Ethernet : WIZnet W5500 Ethernet Controller
- Input Voltage : 7-15V
- Input Voltage PoE : 36 – 57V
- Digital I/O Pins : 20, with 12 PWM and UART
- PWM Output : 12
- Power Consumption : 80mA
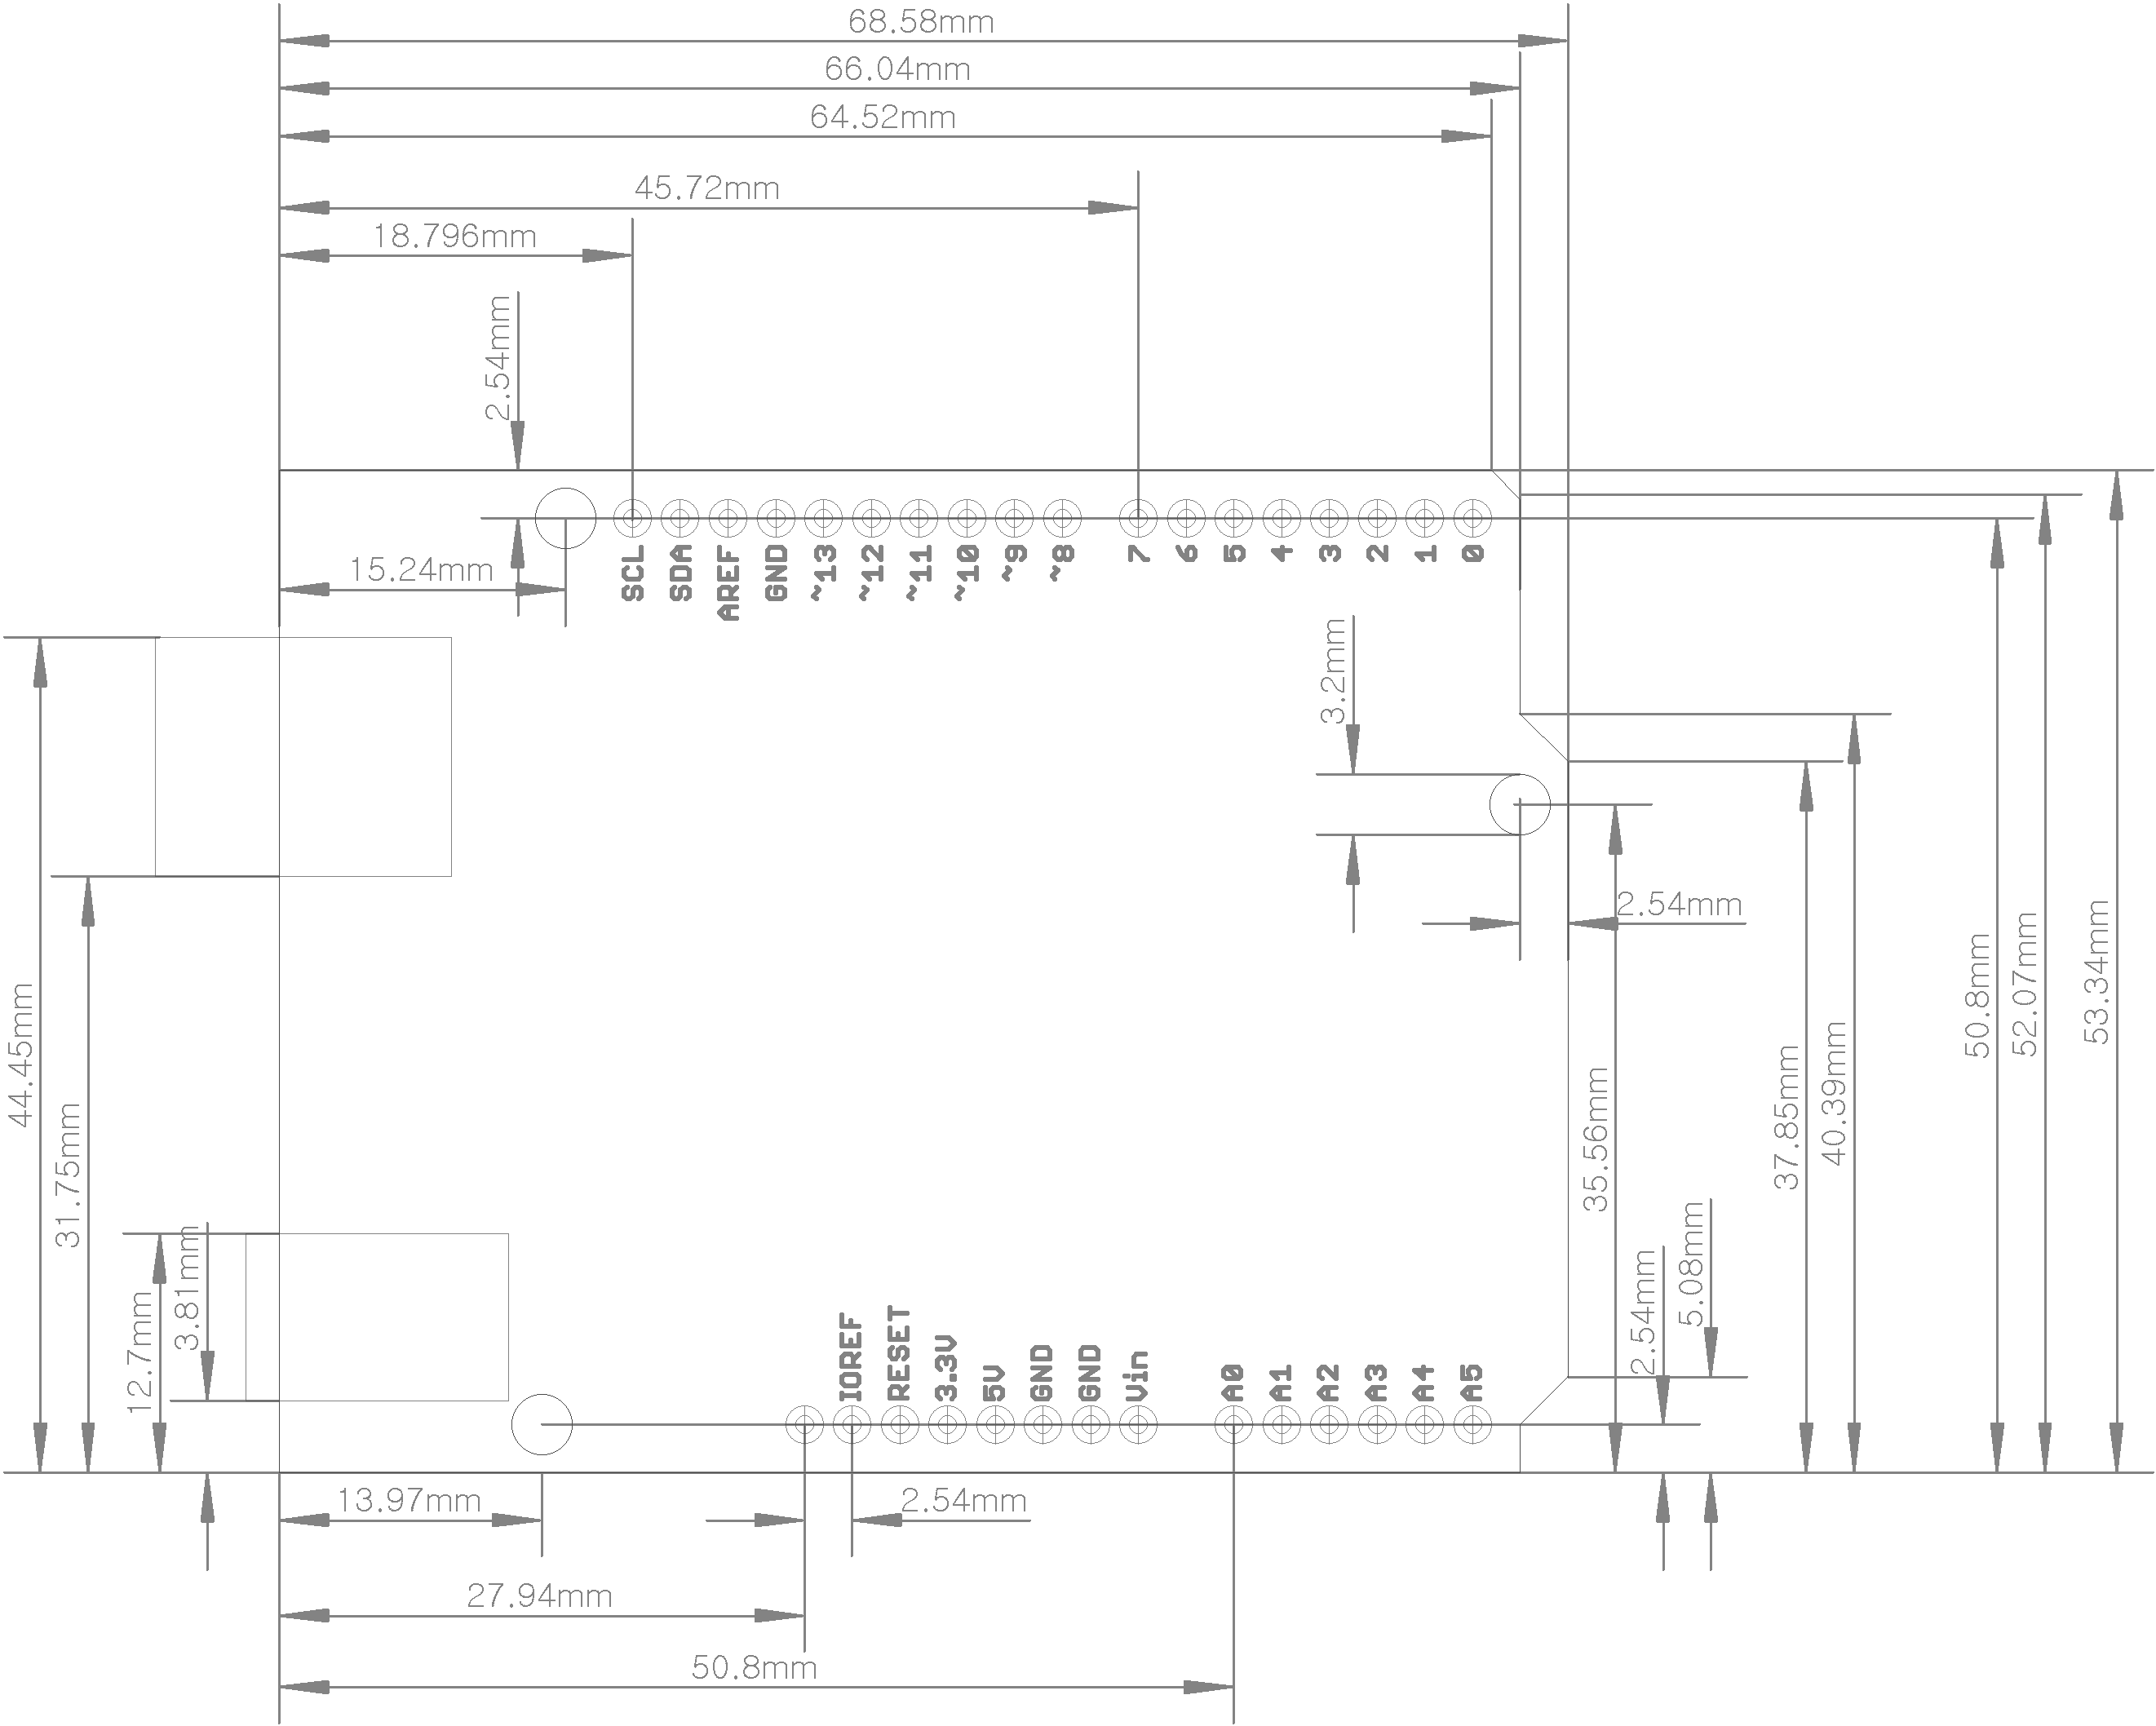
- PCB Size : 53 x 68.5mm
- Card Reader : Micro SD Card, with active voltage translators
- Weight : 28g
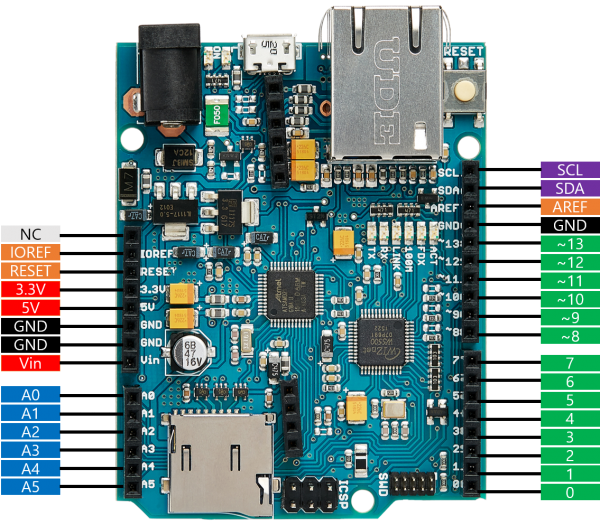
PinOut
Getting Started
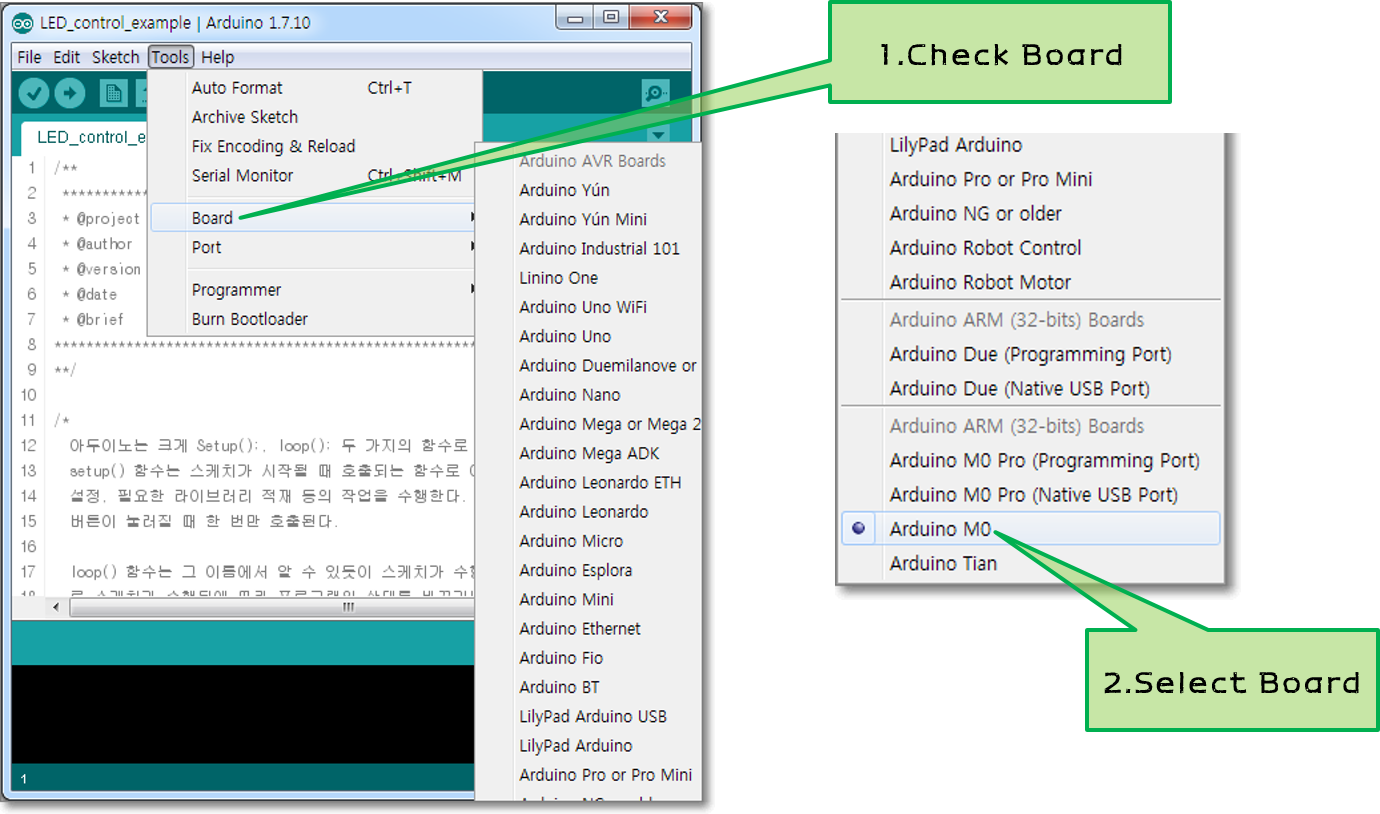
WizArduino M0 ETH is 100% compatible with M0 board from Arduino.org. Install Arduino IDE and try connecting your board. It is recommended to use Arduino IDE v1.7.5 and higher. Select Arduino M0 when prompted to select your board.
For more details refer to next page.
🌎Download the software WizArduino M0 ETH is pin compatible with Arduino UNO, thus you can use your program not only with WizARduino M0 ETH, but also with other ARduino boards too. But there are some important notes to check before.
Voltage
- The microcontroller mounted on the WizArduino M0 ETH operates at 3.3V. You should not apply more than 3.3V to input or output. If you use it with a typical Arduino board that operates at 5V, WizArduino M0 ETH could be damaged.
- The power of the WizArduino M0 ETH can be supplied by USB connectors or DC plugs.
- A linear voltage regulator is built-in, so when supplying power to an adapter with a high voltage, overheating may occur.
Serial port on the M0
- WizArduino M0 ETH has one USB port.
- Called Native USB, it connects directly to the SAMD21 MCU, a microcontroller of WizArduino M0 ETH.
- This port is also used as a virtual port as "SerialUSB" in Arduino programming.
ADC and PWM resolutions
- WizArduino M0 ETH supports 6 ADCs (12-bit) and 12 PWM (8-bit).
For more details please refer to next page.
Examples
Before programming with WizArduino M0 ETH, there are few points to be checked.
Checkpoint
Select board
- As mentioned in Getting Started, WizArduino M0 ETH is 100% compatible with Arduino.org's M0 board. Select Arduino M0 when prompted to Select board.
Serial message
SerialUSB
- As mentioned in Getting Started, WizArduino M0 ETH supports one USB port and connects with a USB cable to access virtual serial ports using Serial USB through programming.
- Please use the code below when using the serial message with the port.
void setup() {
SerialUSB.begin(9600);
while (!SerialUSB);
SerialUSB.println("Hello world");
}
Serial5
- WizArduino M0 ETH supports Serial5 using pins 0, 1 in addition to Serial USB.
- Please use the code below when using the serial message with the port.
void setup() {
Serial5.begin(9600);
while (!Serial5);
Serial5.println("Hello world");
}
For more details refer to 🌎Serial ports and 🌎Start with Arduino M0.
Ethernet
- As mentioned in Overview, WizArduino M0 ETH is a board that combines Arduino M0 and Ethernet Shield 2.
- To use the Ethernet function, you need to add the Ethernet2.h file as below.
- When using the Ethernet function, pin 10 is assigned for Ethernet control, thus it can't be used.
#include <SPI.h>
#include <Ethernet2.h>
SD Card
- When using the SD Card function, pin 4 is assigned for SD Card control, thus it can't be used.
Example
This example sketch was checked on v1.7.5.
Basic
IoT
- TCP LOOPBACK
- TCP LOOPBACK LED
- VERY SIMPLE TCP LOOPBACK
- WEBSERVER LED
- SIMPLE WEBSERVER
- WEATHER STATION
- DWEET IO
Maker Projects
- Coming soon
Technical Reference
Schematic & Reference Design
Dimension
Part list
FAQ
How to recover a board blocked?
Rescue Guide for Microcontroller ATSAMD21G18A
If board is operating normally, press Reset and check in the device manager for changes from Arduino M0 (Bootloader Mode) Native Port (COMxx) to Arduino M0 Native Port (COMxx).
However, an unexpected error may fail to change to Arduino M0 Native Port (COMxx) after being searched with Arduino M0 (Bootloader Mode) Navy Port (COMxx). Therefore, in Arduino Sketch, there are cases where the sketch file cannot be uploaded because the port on the board cannot be searched. Regarding the above failures, Arduino.org provides the Recovery Guide.
If the above failures occur, please follow the above recovery guide or the following information.
- Connect the board to the PC.
- Run Arduino Sketch Program.
- Go to File -> Preferences.
- In the Preferences menu, show detailed output during the following actions: Compile, Upload Check after choosing.
- Terminate Arduino Sketch Program and rerun it.
- Select Tools-Board-Arduino M0 in the menu
- Select File-Example-Basic-Blink for the menu.
- Select the upload button.
- Press Reset on the board when you see the COM Port List while checking the log.
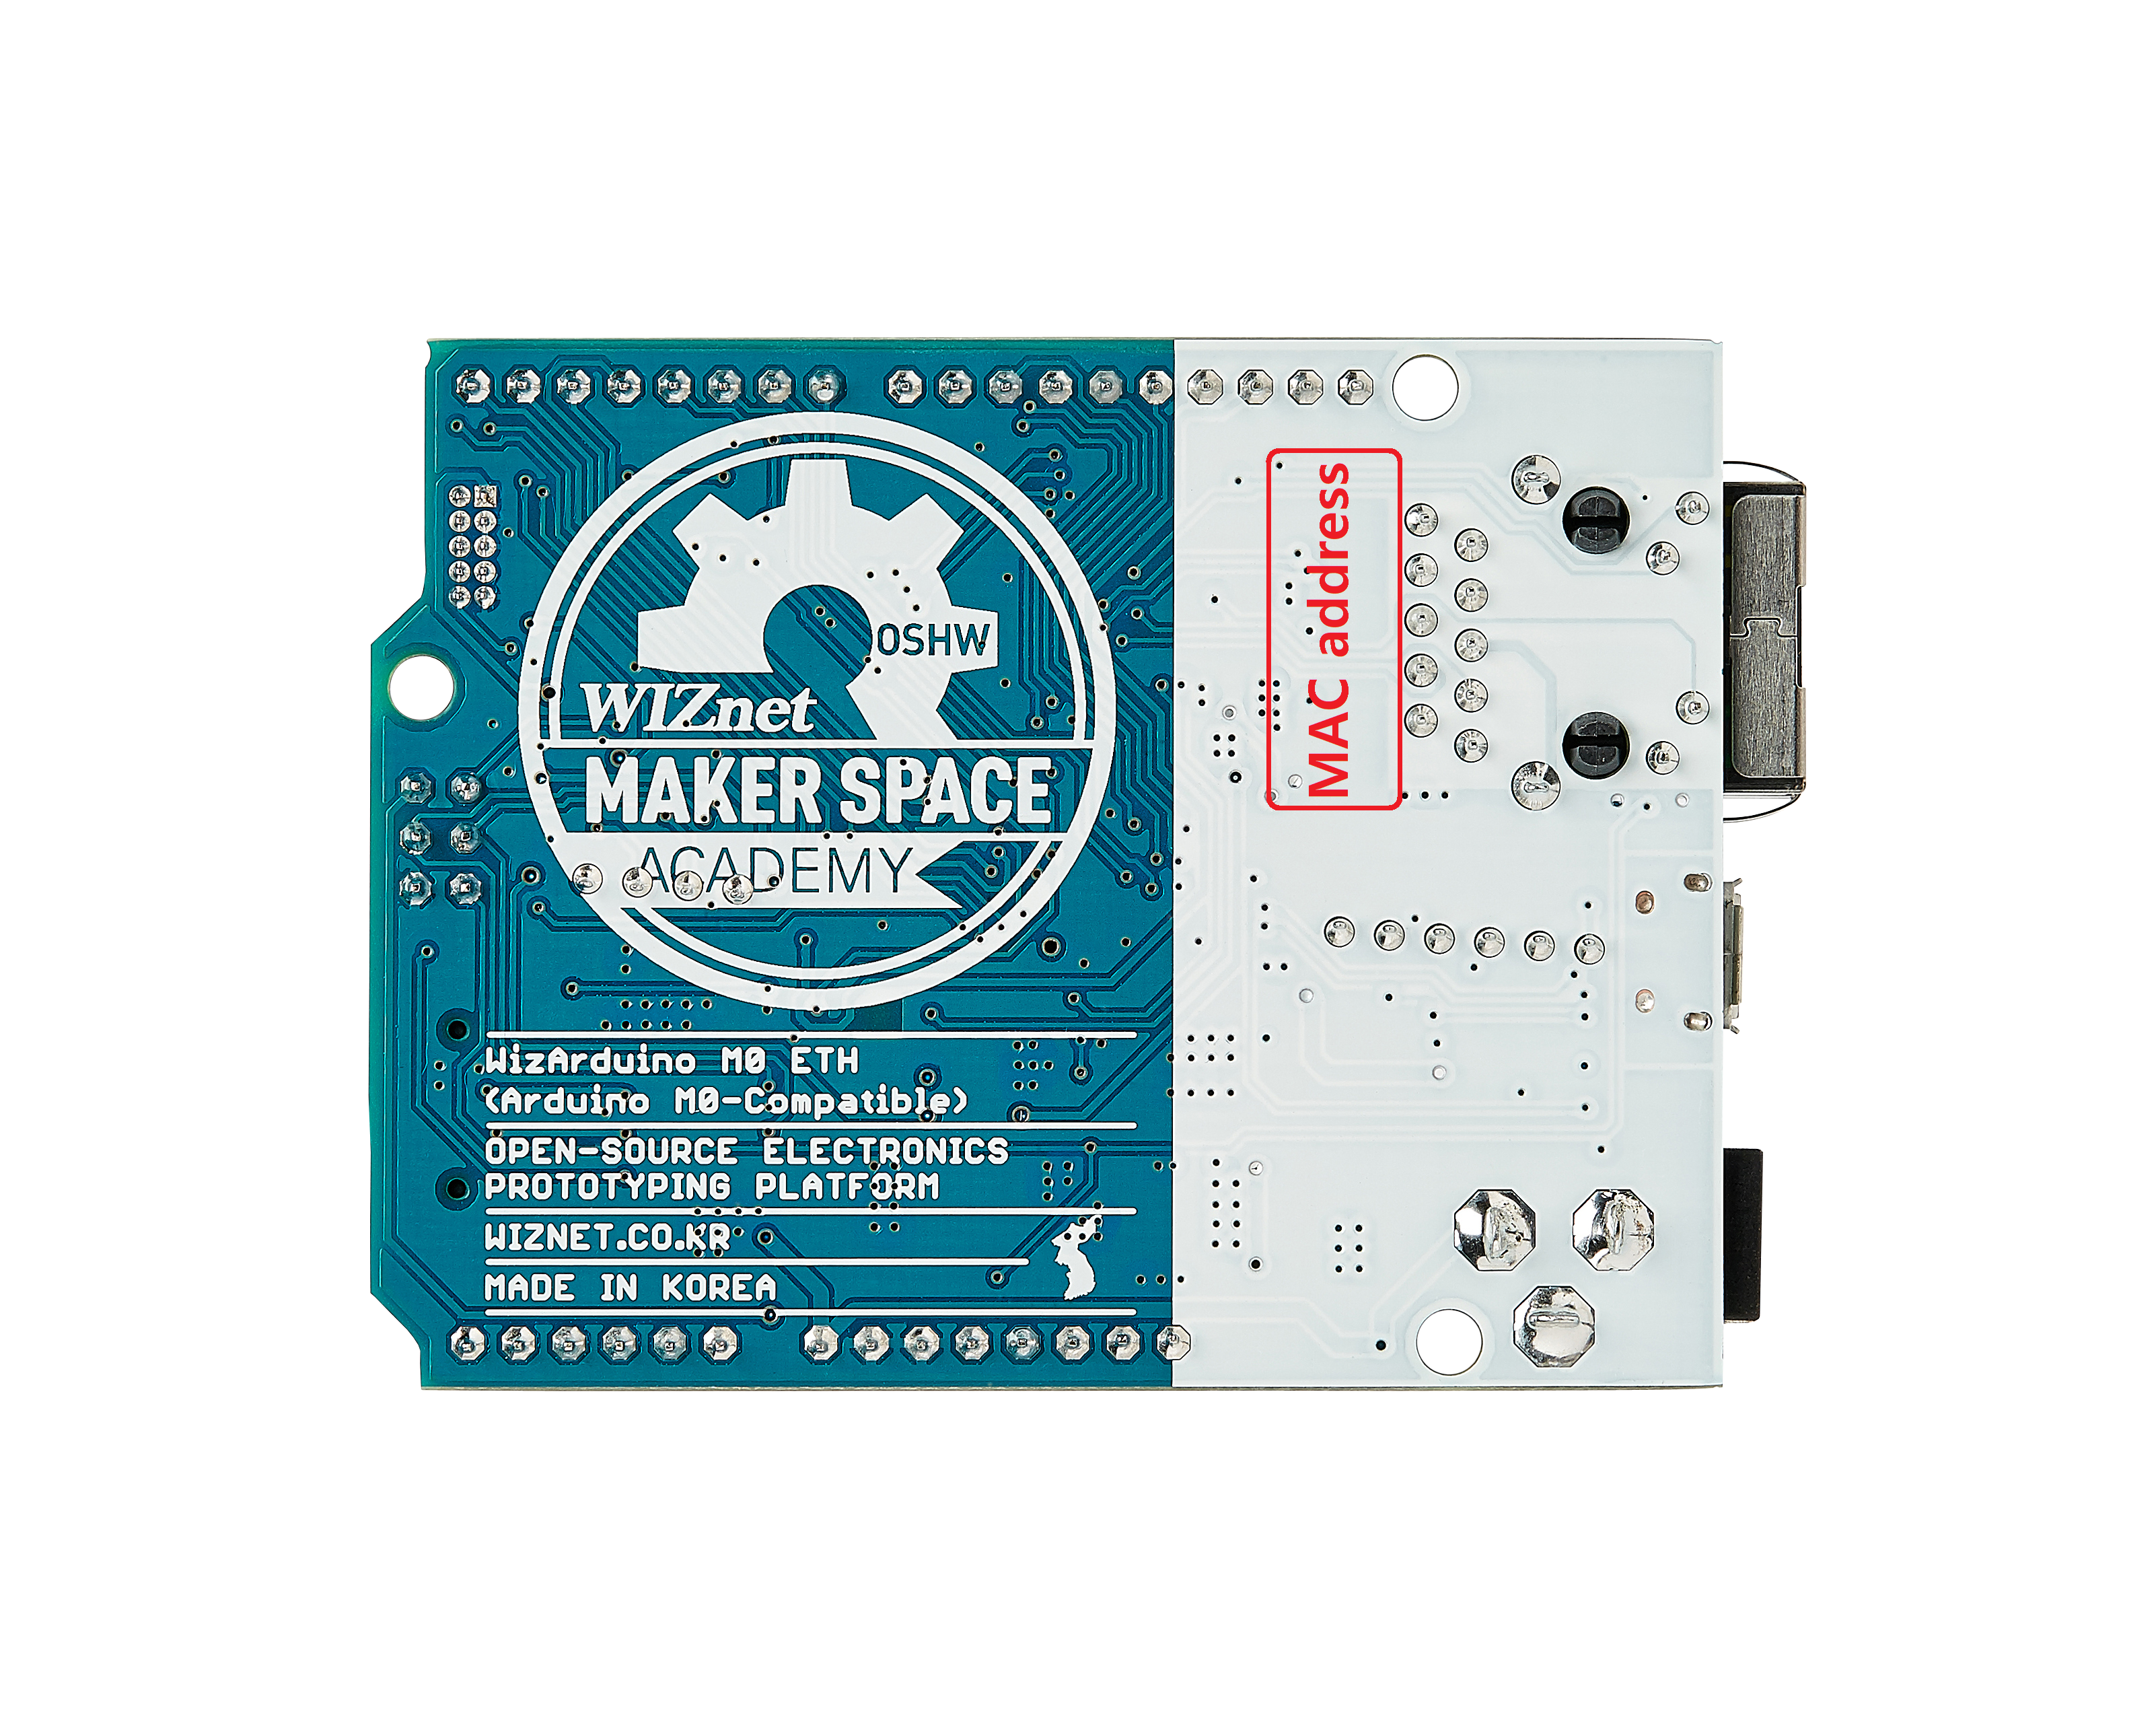
Where is the MAC address?
Every Ethernet device has its own physical address. The MAC address required for Ethernet communication with WizArduino M0 ETH is provided on a sticker, shown as below.
When creating a network application, check the MAC address and enter the MAC address as shown in the code below.
byte mac[] = {
  0x00, 0x08, 0xdc, 0x??, 0x??, 0x??
};
How do I get a POE module?
WizArduino M0 ETH has a pinheader in the center of the board for mounting POE module.
Possible module for installation is Ag9700(Ag9712-2BR, Ag9700 SIL Package, OutPut Voltage : 12.0V) from Silvertel
Among domestic please check products of local company PowerTelNet.