How to make Surf 5 Projects
Surf 5 Github Link
If you haven't downloaded the Surf 5 project yet, Click the link below to access GitHub and download it.
How to make Surf 5 Project in VS Code
1. Launching VS Code
Step 1
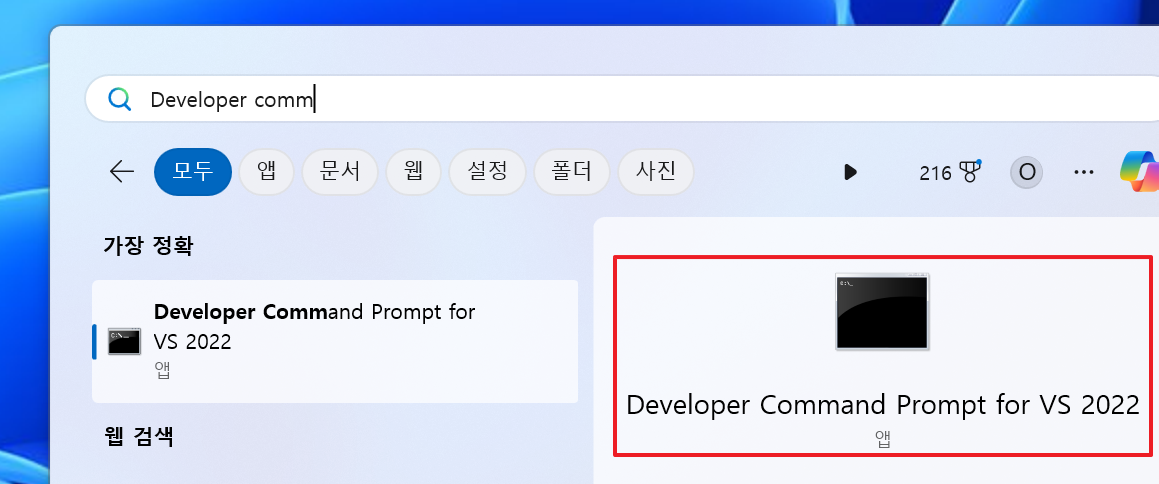
In 'Developer Command Prompt for VS 2022', you must call the code command to run VS Code. Execute 'Developer Command Prompt for VS 2022' in the Windows search bar below.
Step 2
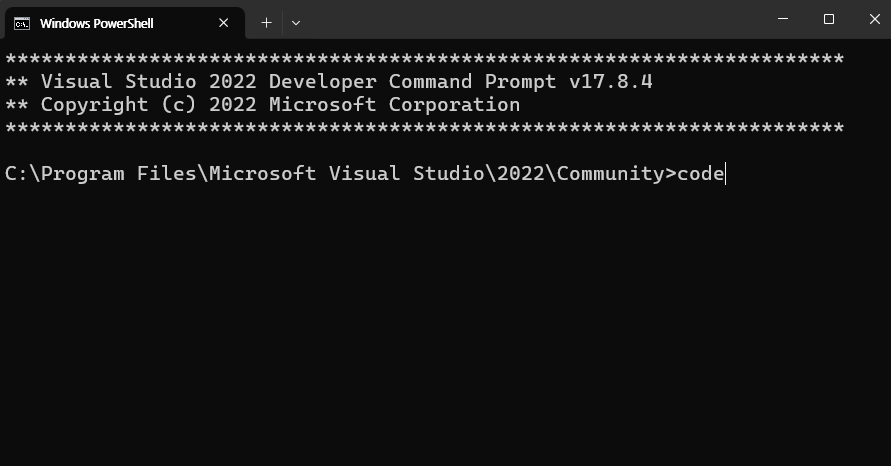
Call the 'Code' command to execute VS Code.
Step 3
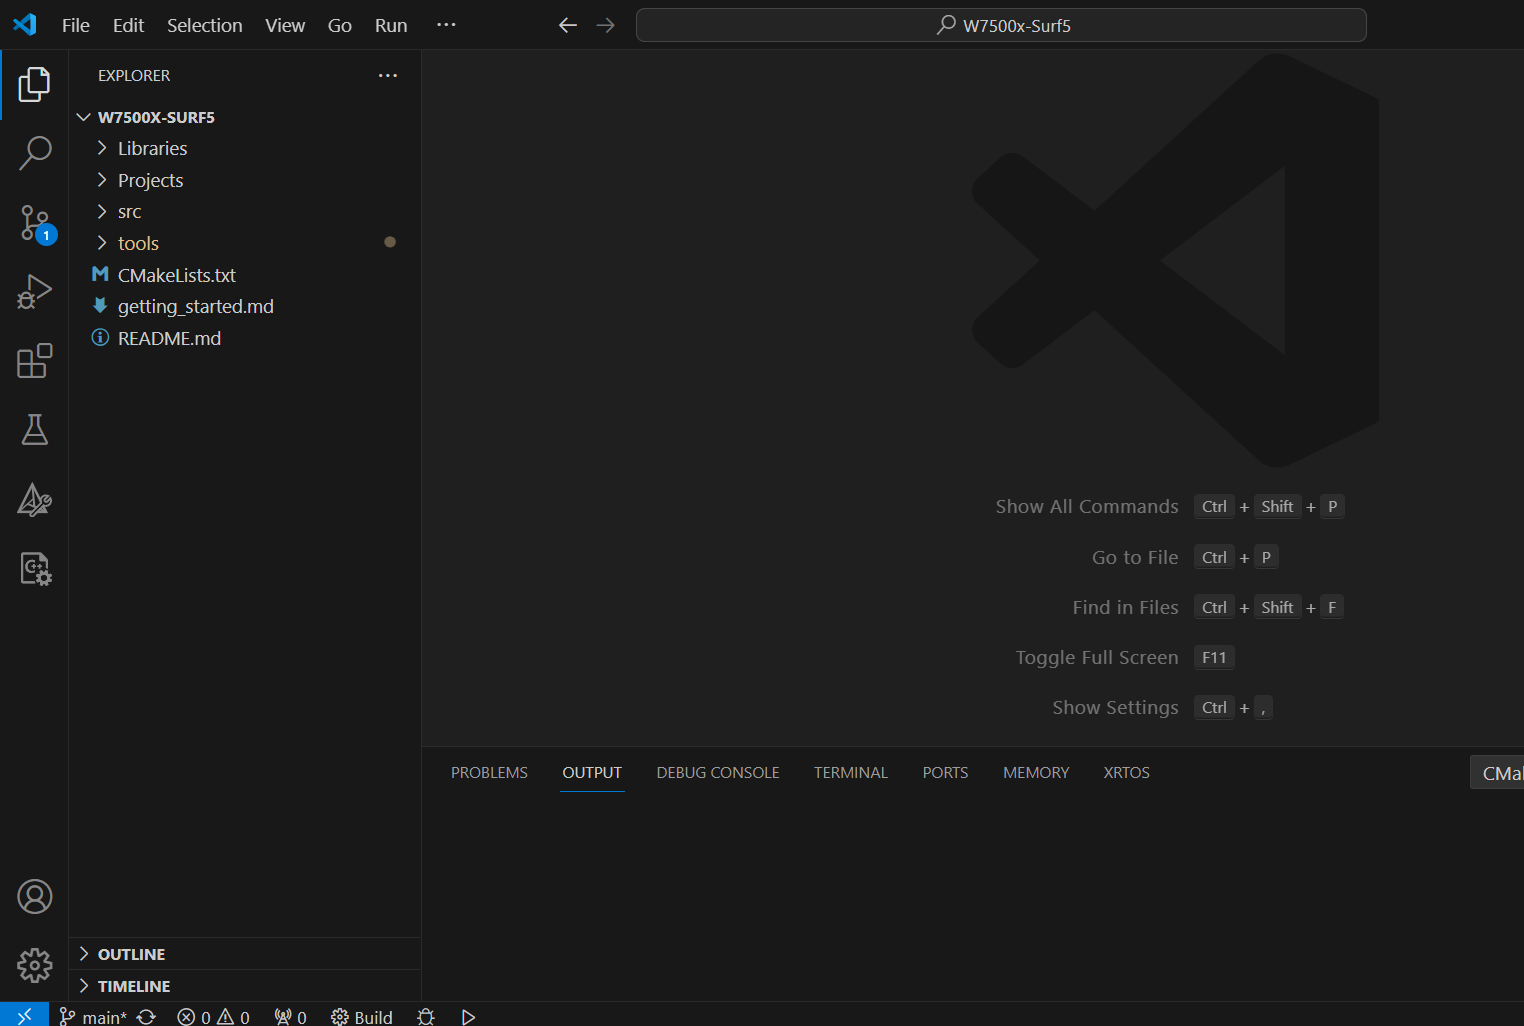
Load the project folder of Surf 5 in VS Code.
2. Installing Extensions in VS Code
Search for and install the three extensions shown in the image below in the extension program search bar.

3. Save the CMake Extension Settings for the stored workspace.
Step 1
In CMake Tools, go to "the gear icon (settings) -> Extension Settings
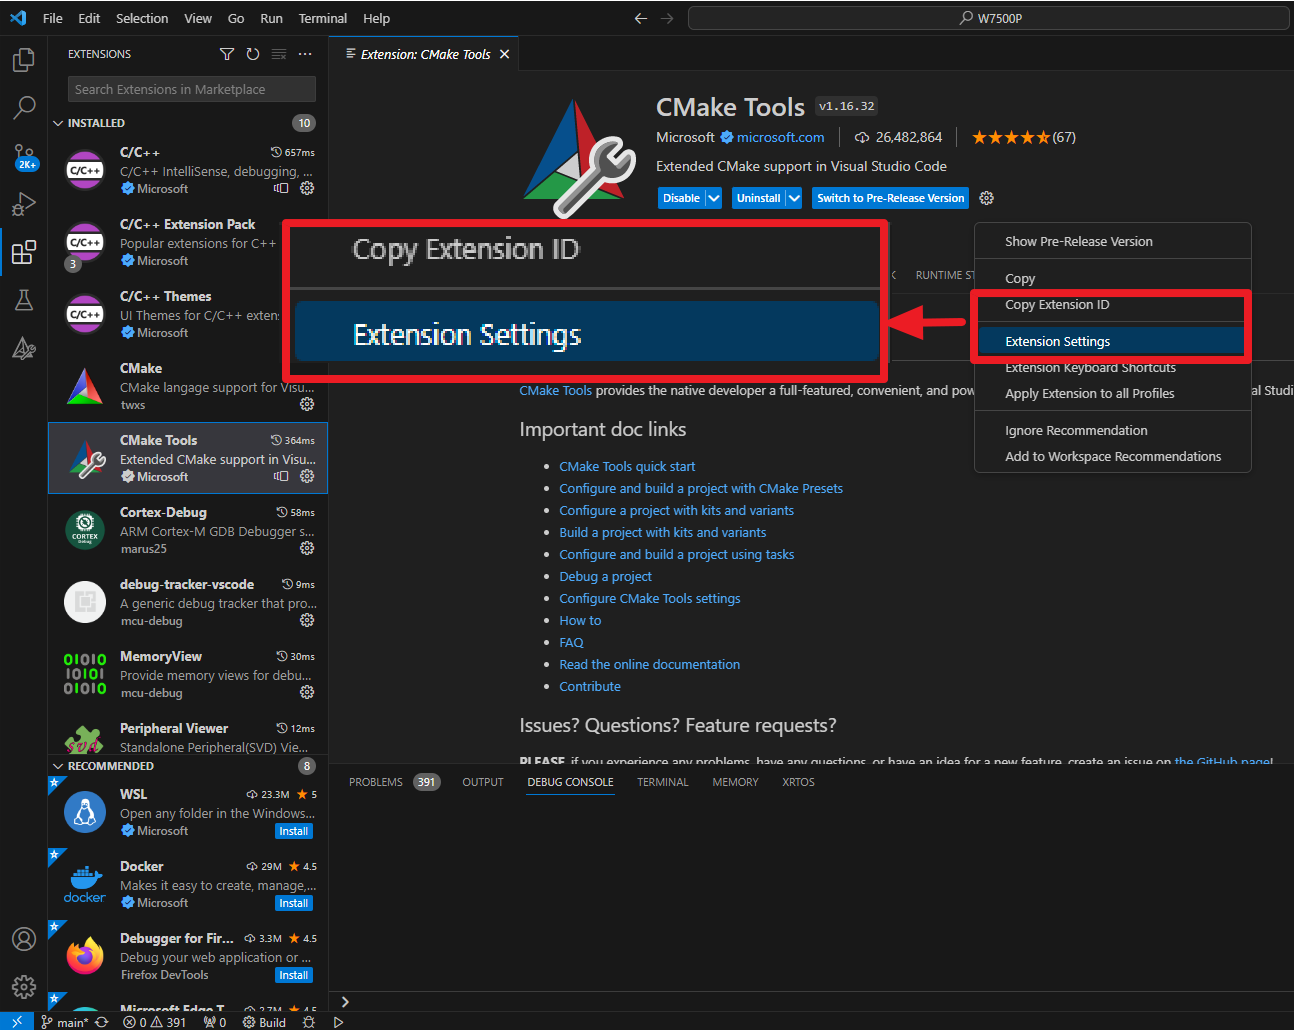
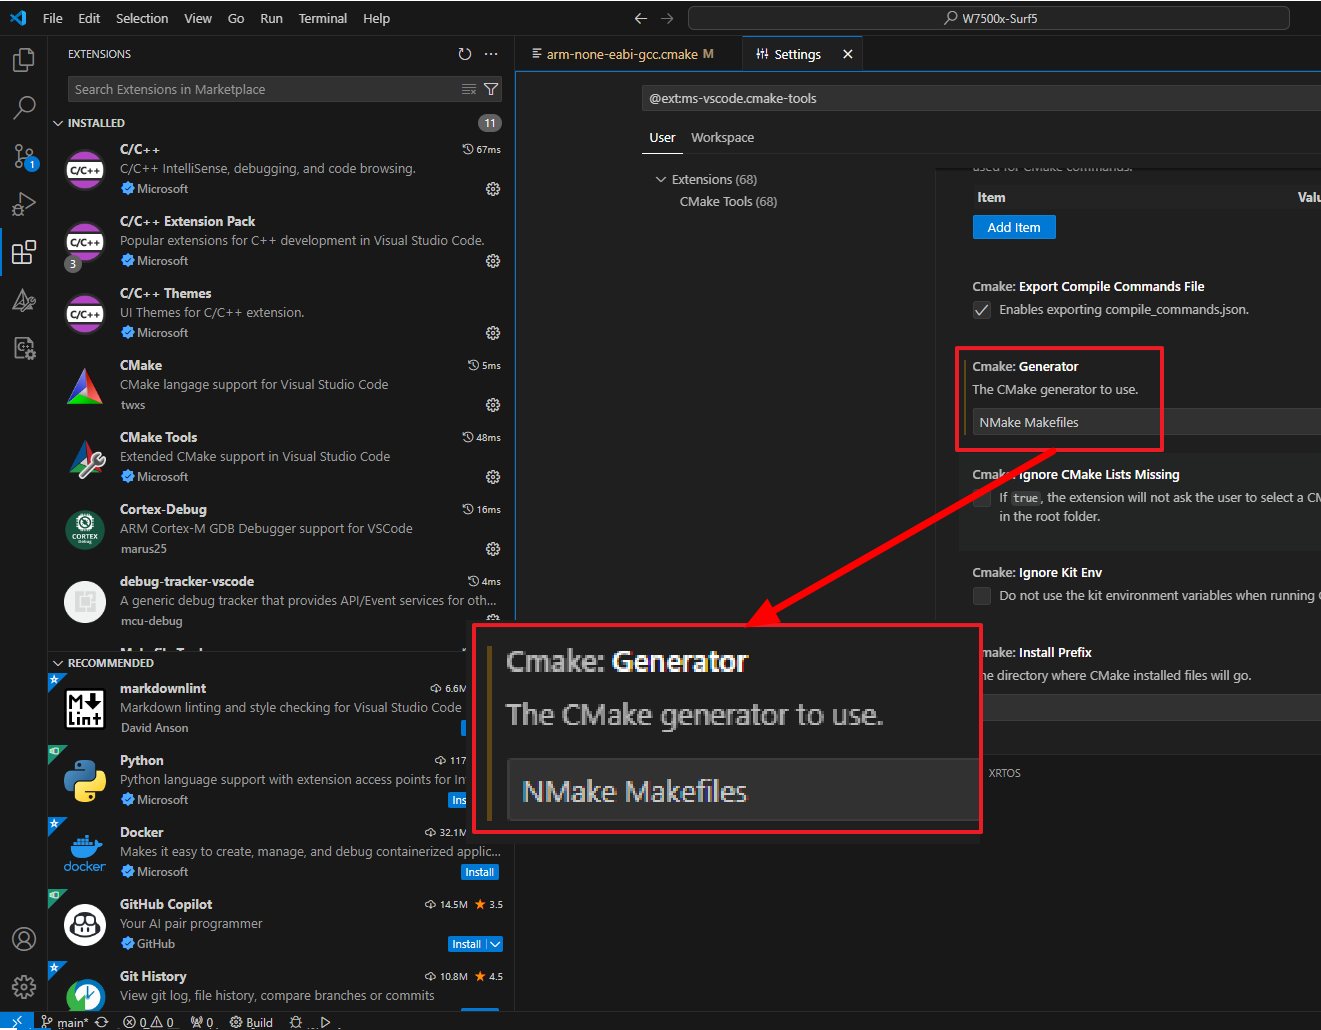
Step 2
enter "NMake Makefiles" in the "CMake: Generator" field. make sure to check the case sensitivity of "NMake Makefiles".
| CMake: Generator |
|---|
| NMake Makefiles |
4. Modifying the contents of the 'arm-none-eabi-gcc.cmake' file
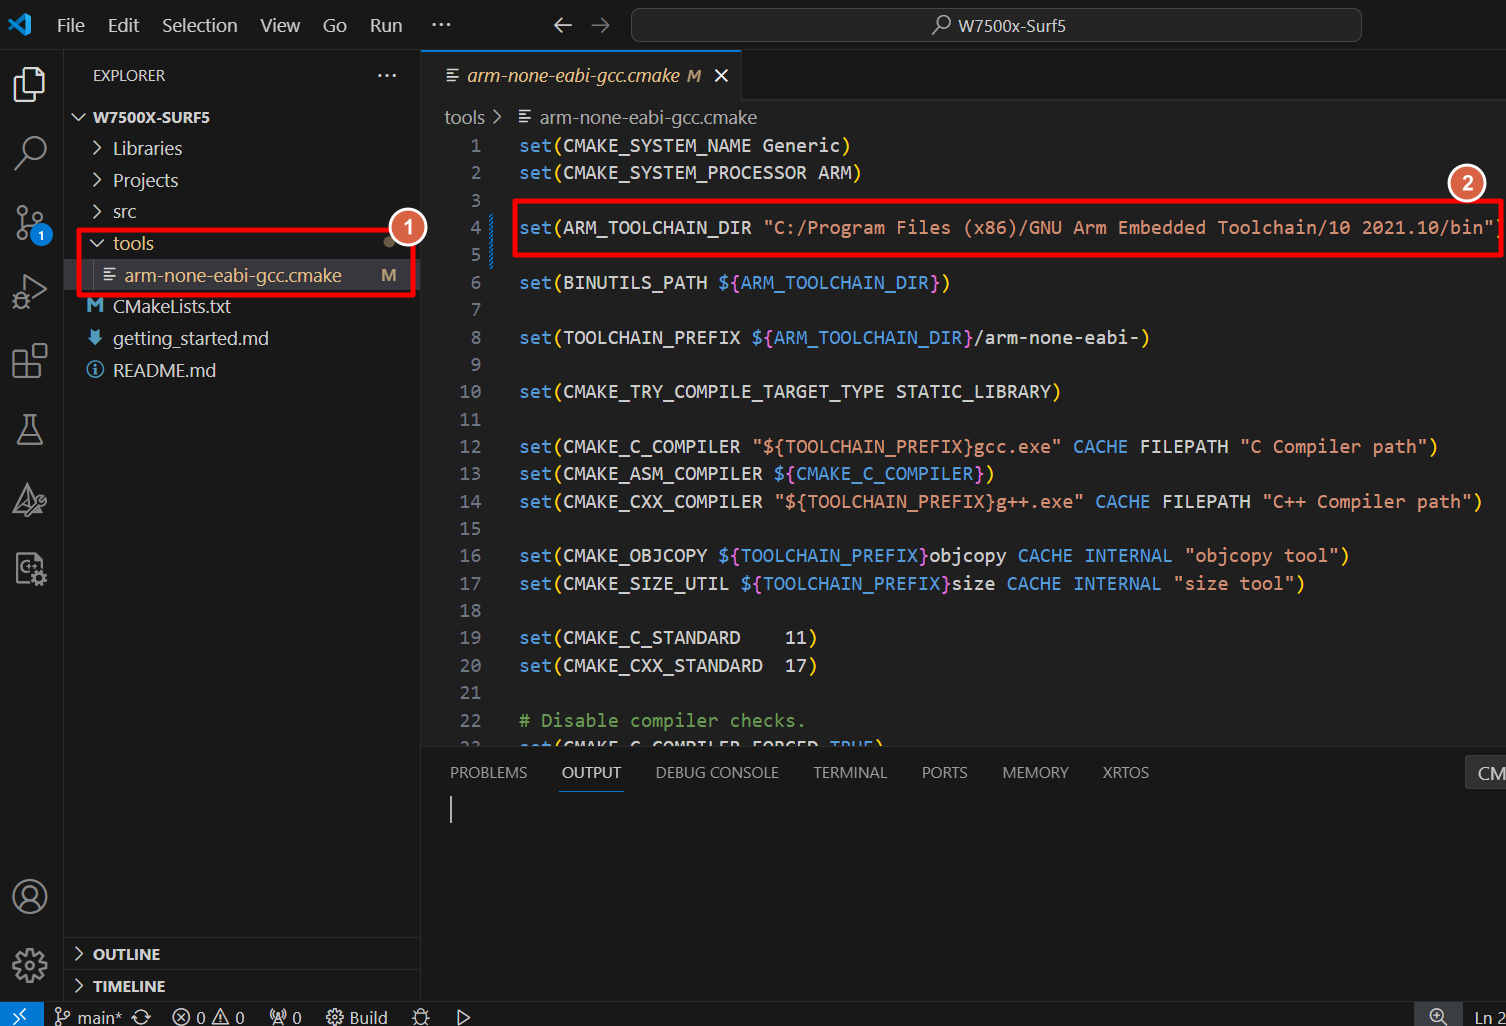
Within the 'arm-none-eabi-gcc.cmake' file in the tools directory, you need to specify the 'ARM_TOOLCHAIN_DIR' path. 'ARM_TOOLCHAIN_DIR' is located inside the path where your GNU Arm Embedded Toolchain executable is installed. Find your path and enter it.
When setting the path, be sure to delete the backslash () and enter it as a slash (/).. You may refer to the example code below.
| arm-none-eabi-gcc.cmake |
|---|
| set(ARM_TOOLCHAIN_DIR "C:/Program Files (x86)/GNU Arm Embedded Toolchain/10 2021.10/bin") |
5. Build Project in VS Code
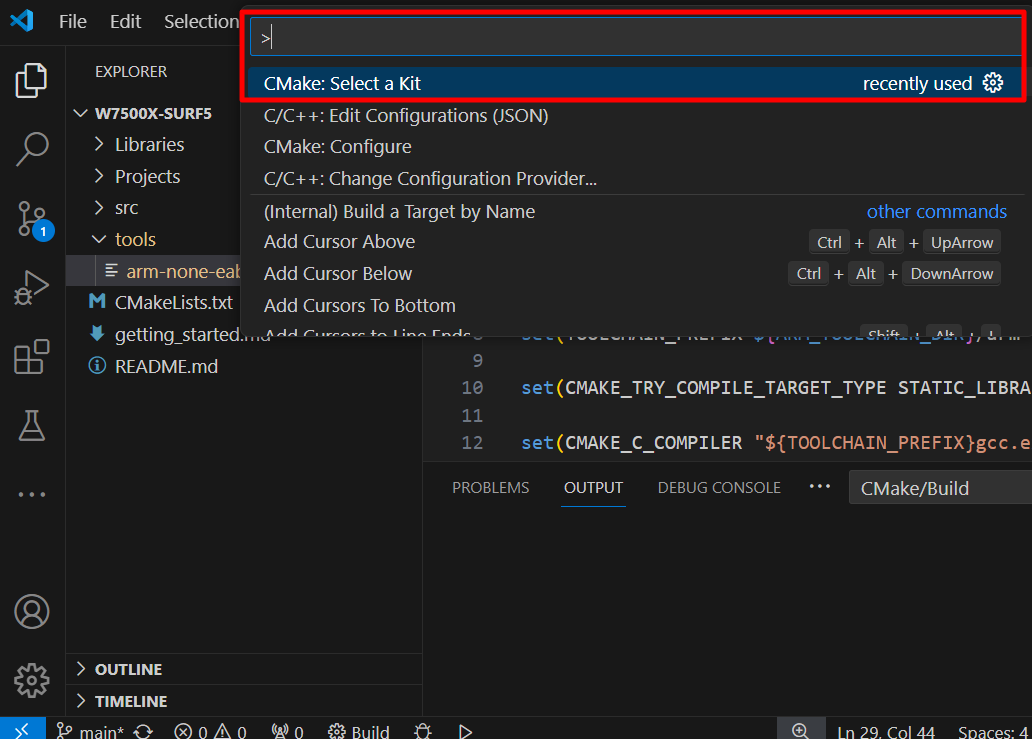
Step 1
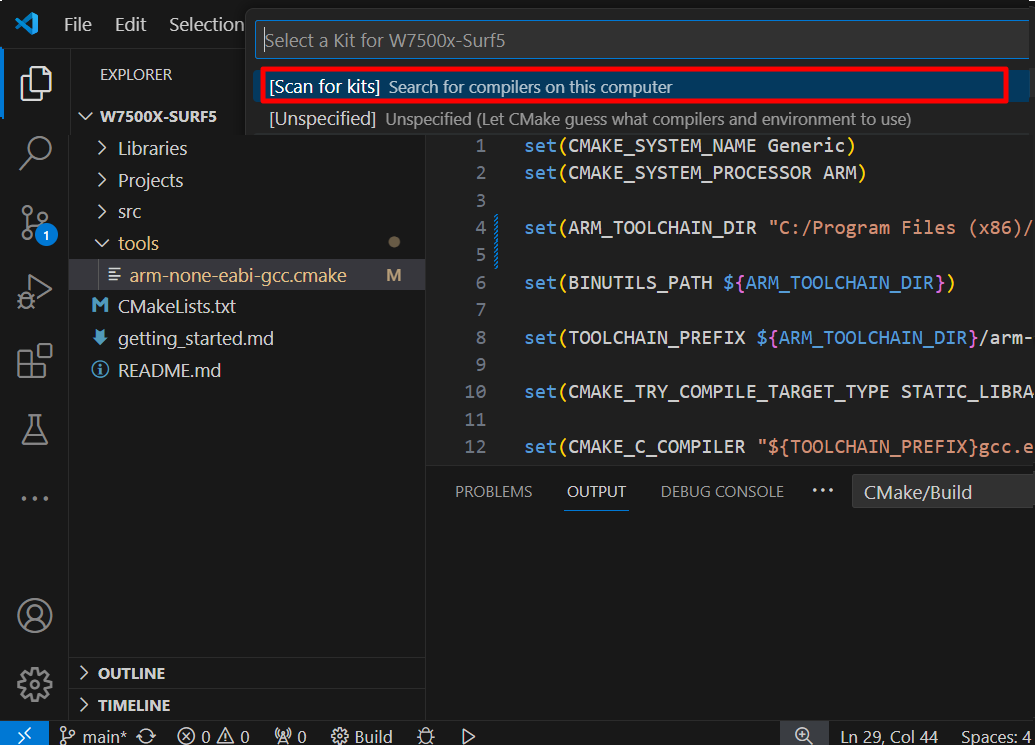
Press the F1 key, and then click on "CMake: Select a Kit".
Step 2
click on "[Scan for Kits]".
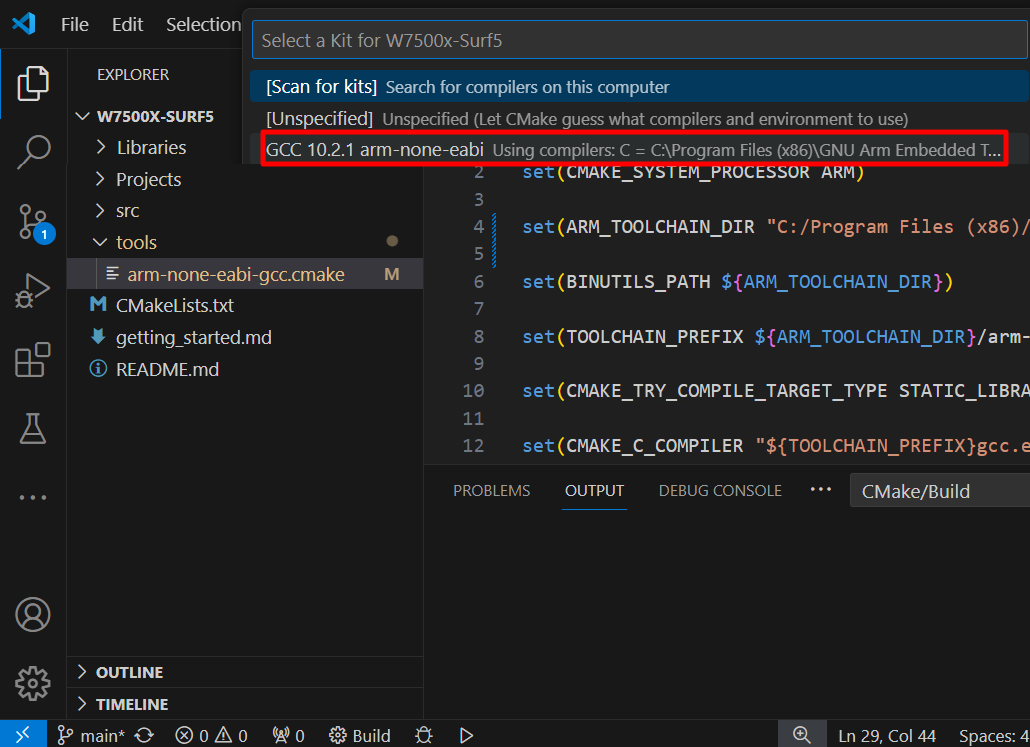
Step 3
Select "GCC 10.x.x arm-none-eabi" to configure the kit.
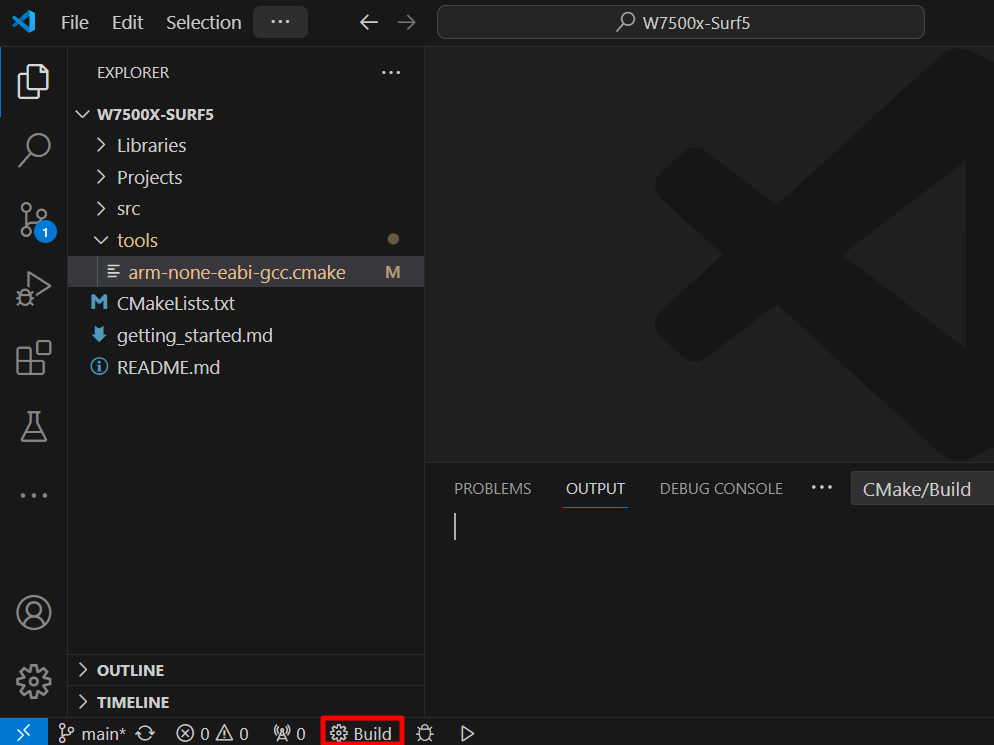
Step 4
Click the "Build" button at the bottom or press F7 to start the build process.
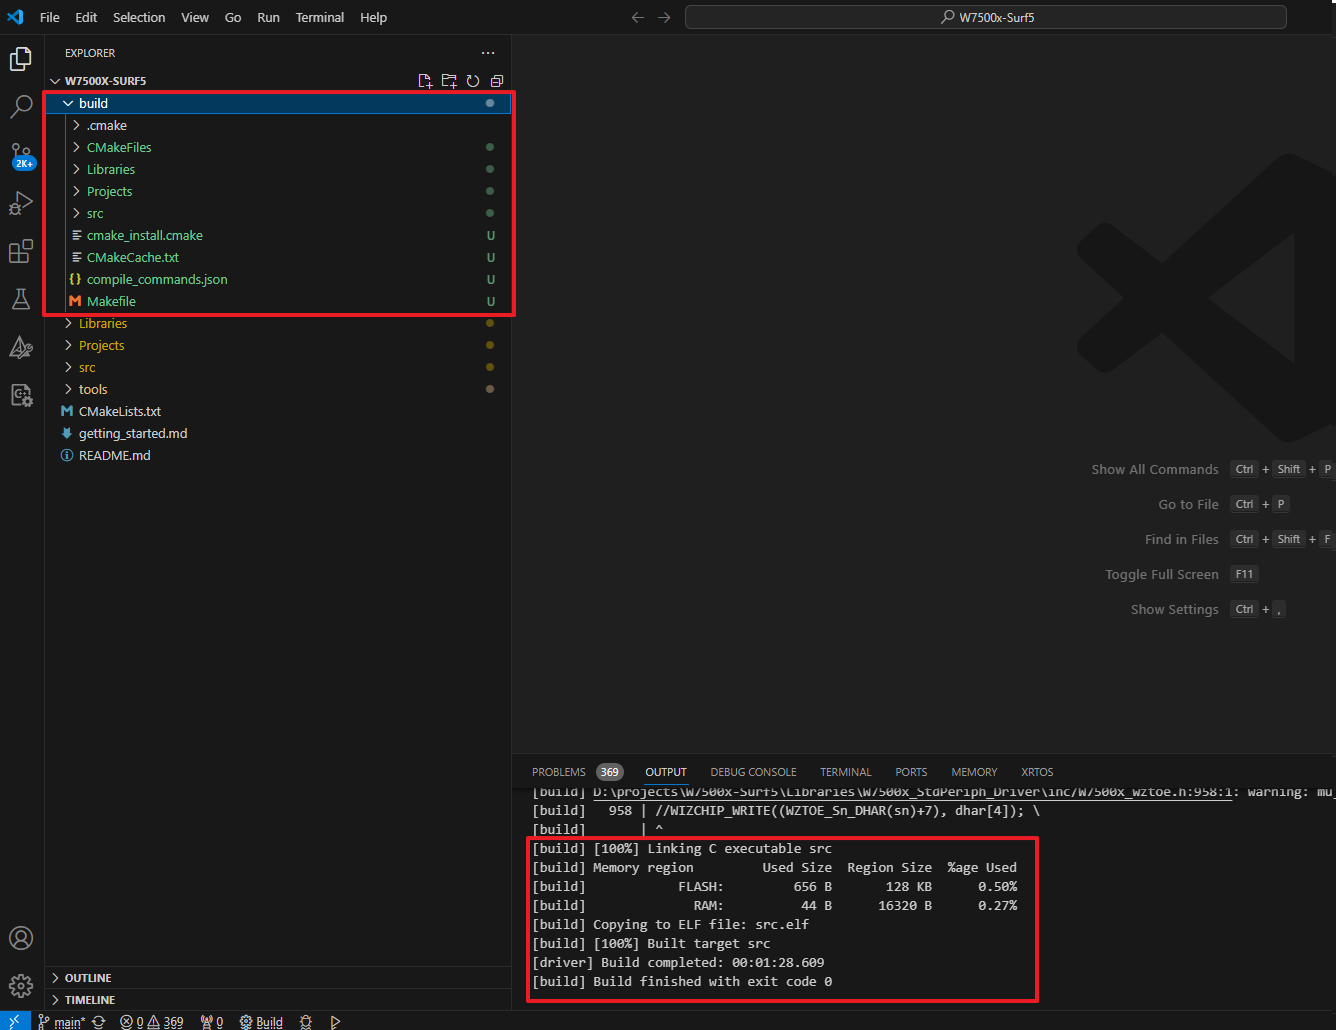
Step 5
Once the build is completed, you will see a message like the one above in the OUTPUT window.
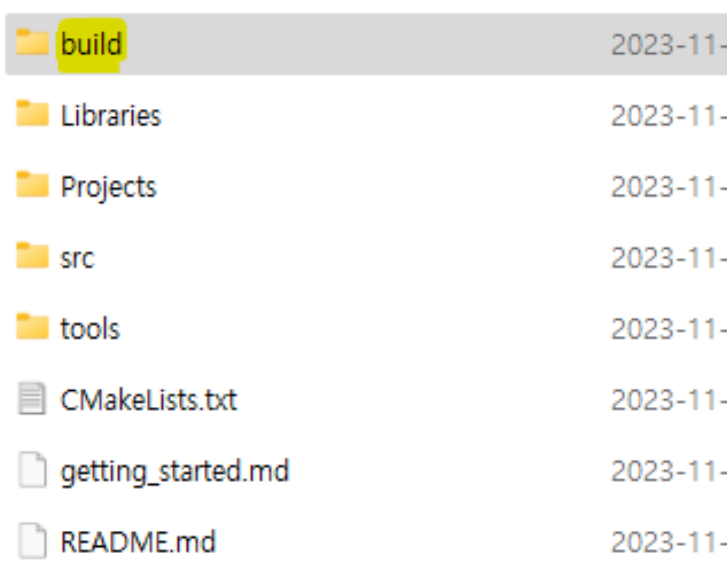
You will also be able to confirm that the Build directory has been created. The project folder within the Build directory contains the generated bin files. You can save these bin files to your Surf 5 and use the project.
Step 6
Flash the .bin file of the desired project in the 'build' directory to Surf 5 Project. If you want to know how to flash .bin files to Surf 5, refer to How to use ISP tool
[How to solve Surf 5 build error in VS Code]
If the build is still not working despite configuring Visual Studio Code settings, follow the steps below.
Before solving the error, Did you by any chance not install the programs required to build the Surf 5 project in VS Code?
Please check the following link to ensure that the programs needed for the build have not been installed.
How to install VS Code for Surf 5
Step 1
Please recheck the path for the code section marked in red in the photo below. And when writing the code, make sure to enter the path with slashes(/) instead of backslashes.
Step 2
Click on the gear icon of the CMake Tools extension pack to go to 'Extension Settings'. Check if the code in the 'CMake: Generator' section is 'NMake Makefiles' as shown in the photo below. Also, make sure to enter this code with the exact case sensitivity.
Step 3
Next, delete the "Build" directory. Deleting this directory should not pose any issues for the build process.

Step 4
Press the F1 key, and then click on "CMake: Select a Kit".
Step 5
Select "GCC 10.x.x arm-none-eabi" to configure the kit.
Step 6
Rebuild now. If you have completed the four steps above perfectly, try building the project again within VS Code.
GCC 10.x.x arm-none-eabi' compiler is not appearing
This issue may be due to the compiler's path not being added to the environment variables during installation. Follow the steps below to add the path of the compiler.
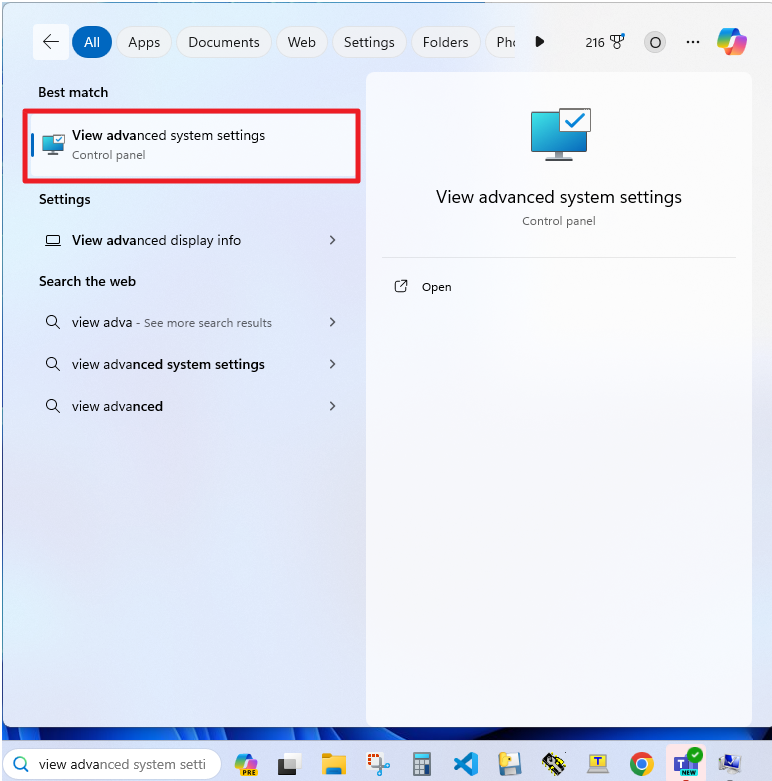
Search for 'View advanced system settings' in the Windows search bar and click on it.
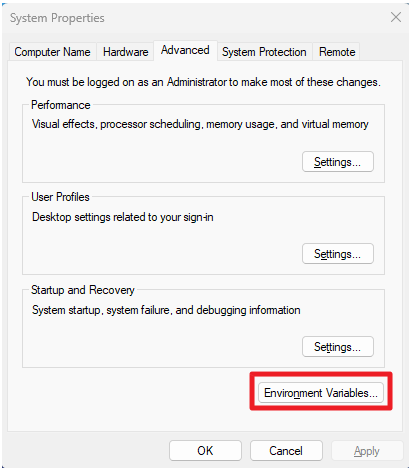
In System Properties, click on 'Environment Variables ...' below.
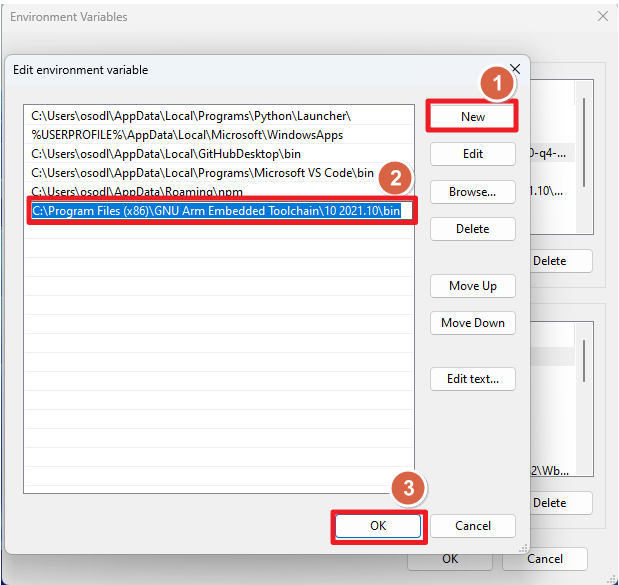
Select 'Path' in the 'User variables for xxx' category and press 'Edit...'
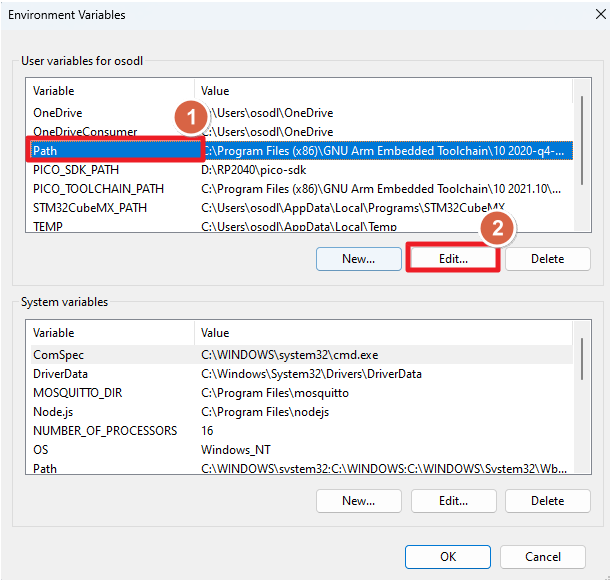
Press 'New' to add the toolchain directory and press 'OK'.
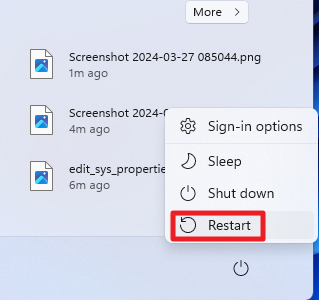
If you have added the variable, restart your PC or laptop.
In 'Developer Command Prompt for VS 2022', you must call the code command to run VS Code.
And in VS Code, load Surf 5 project and press 'F1' and click on 'CMake: Select a Kit'.
Click on [Scan for Kits].
Check the added compiler below and build it.
How to make Surf 5 Project in Keil 5
1. Download Keil 5 & Compiler for Keil 5
If you haven't installed the Keil 5 development environment and the compiler for Keil 5 (version 5.37 or later) yet, click the link below to install them first.
2. Set-up Compiler in Keil 5
Step 1
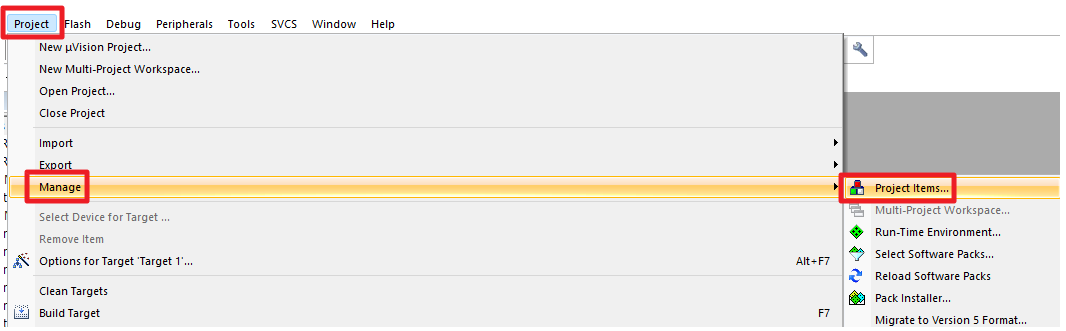
Run Keil 5 and click on the "Project' -> 'Manage' -> 'Project Items..." tab at the top.
Step 2
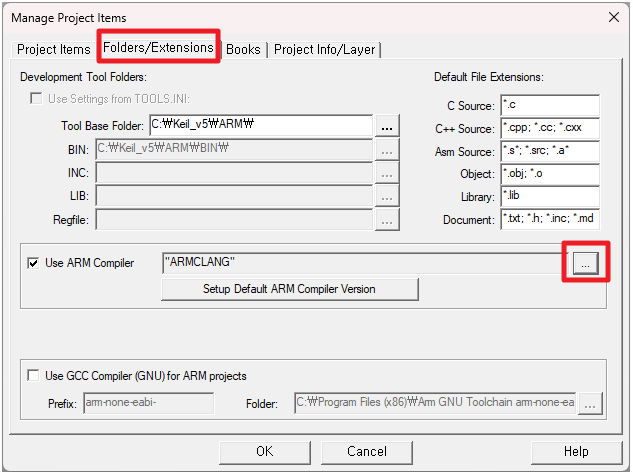
Click the "..." button under the 'Folders/Extensions' tab.
Step 3
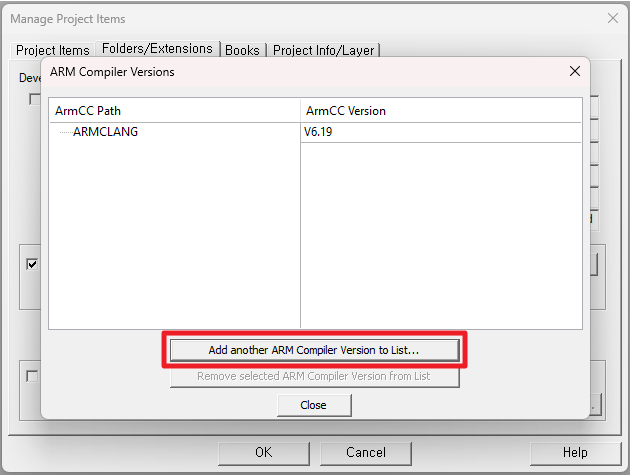
Click the "Add another ARM Compiler Version to List..." button.
Step 4
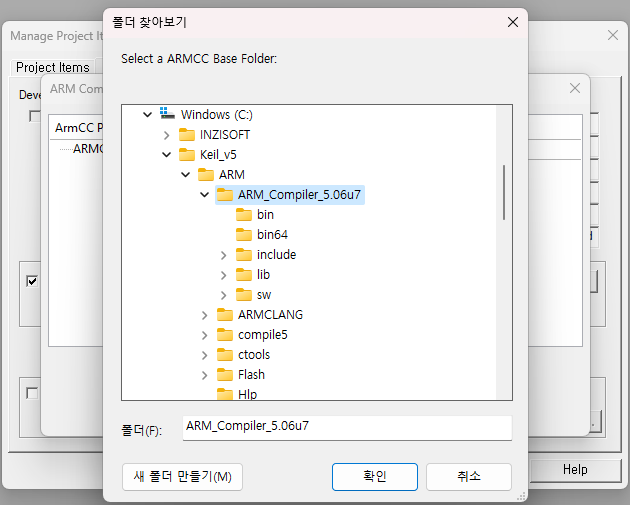
Set the path to the installed compiler for the latest version of Keil 5 (version 5.37 or later). If you haven't installed the compiler for the latest version of Keil 5, refer to [Install Keil 5 for Surf 5].
Step 5
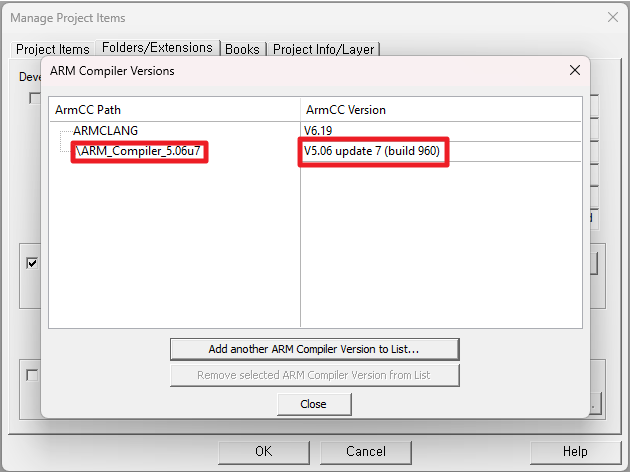
Verify that the compiler has been added and click the "Close" button.
Step 6
Press the "OK" button to complete the compiler path setup.

3. Build Surf 5 Project in Keil 5
Step 1
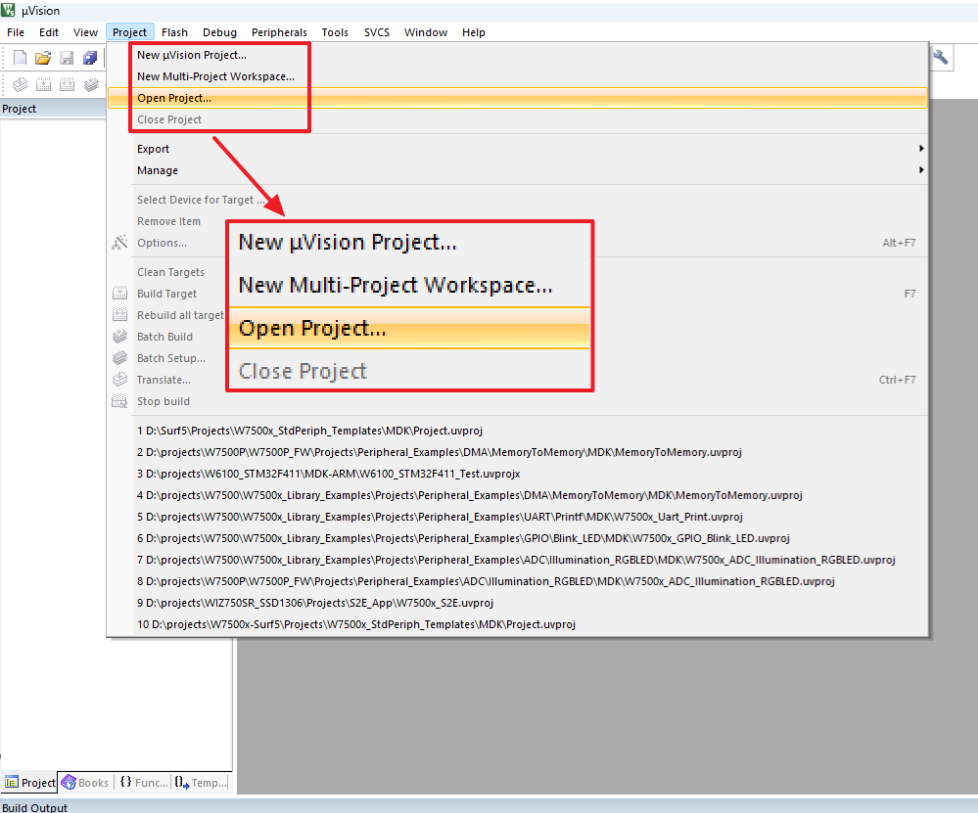
within the 'Project' tab at the top, click on "Open Project..."
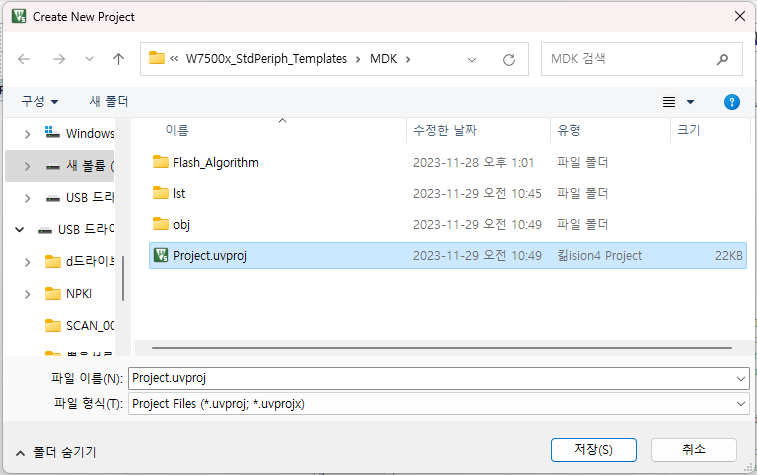
Step 2
Open the project by selecting "Project.uvproj" from the path "...\w7500x-surf5\Projects\W7500x_StdPeriph_Templates\MDK" where the project files exist in the Surf 5 library.
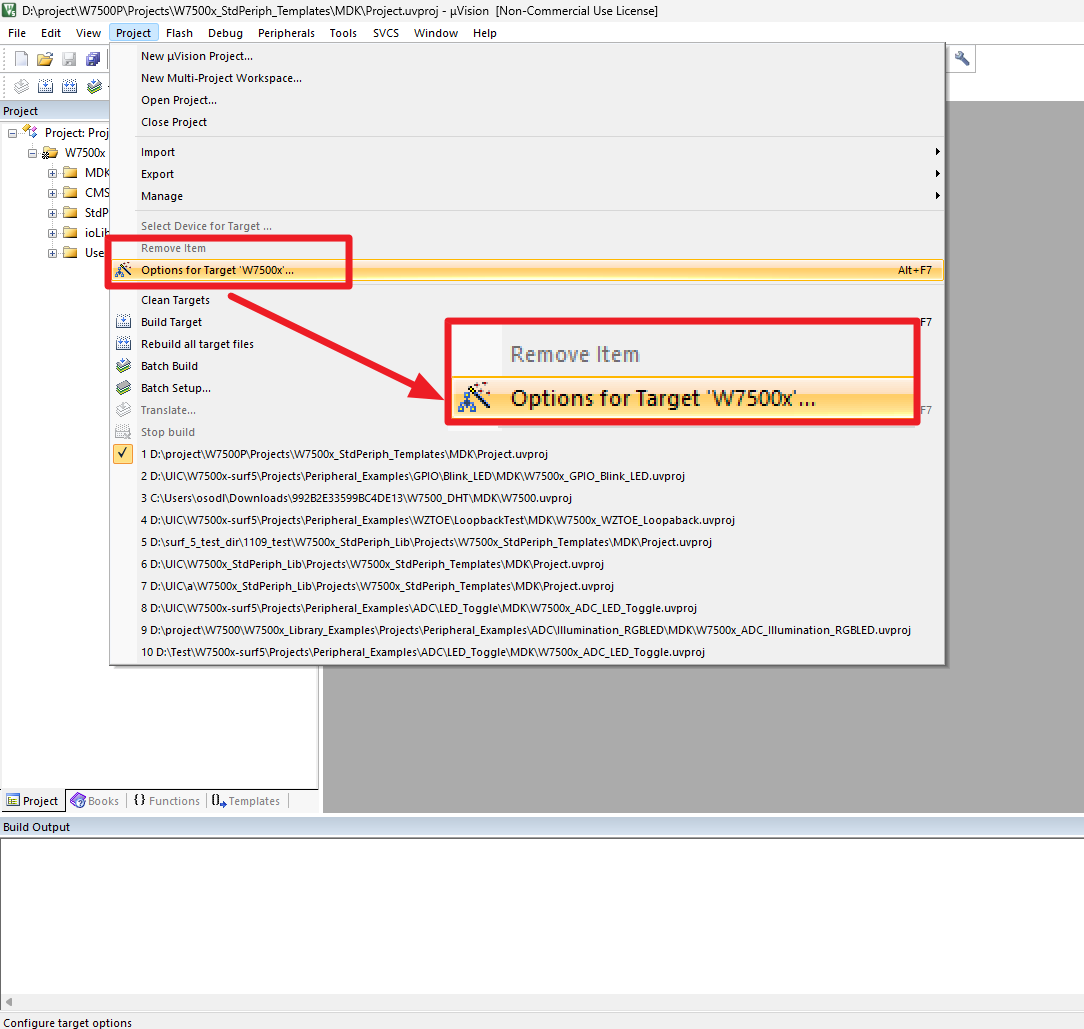
Step 3
Within the 'Project' tab at the top, click on "Options for Target 'W7500x'..."
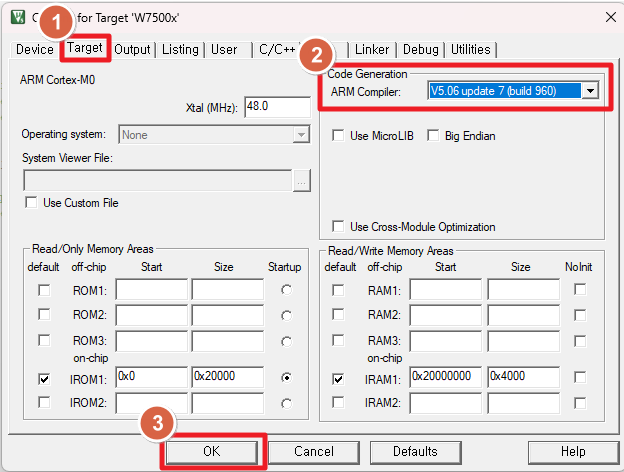
Step 4
Go to the "Target" tab at the top, set the ARM Compiler under Code Generation to "V5.06 update 7 (build 960)", and click the "OK" button
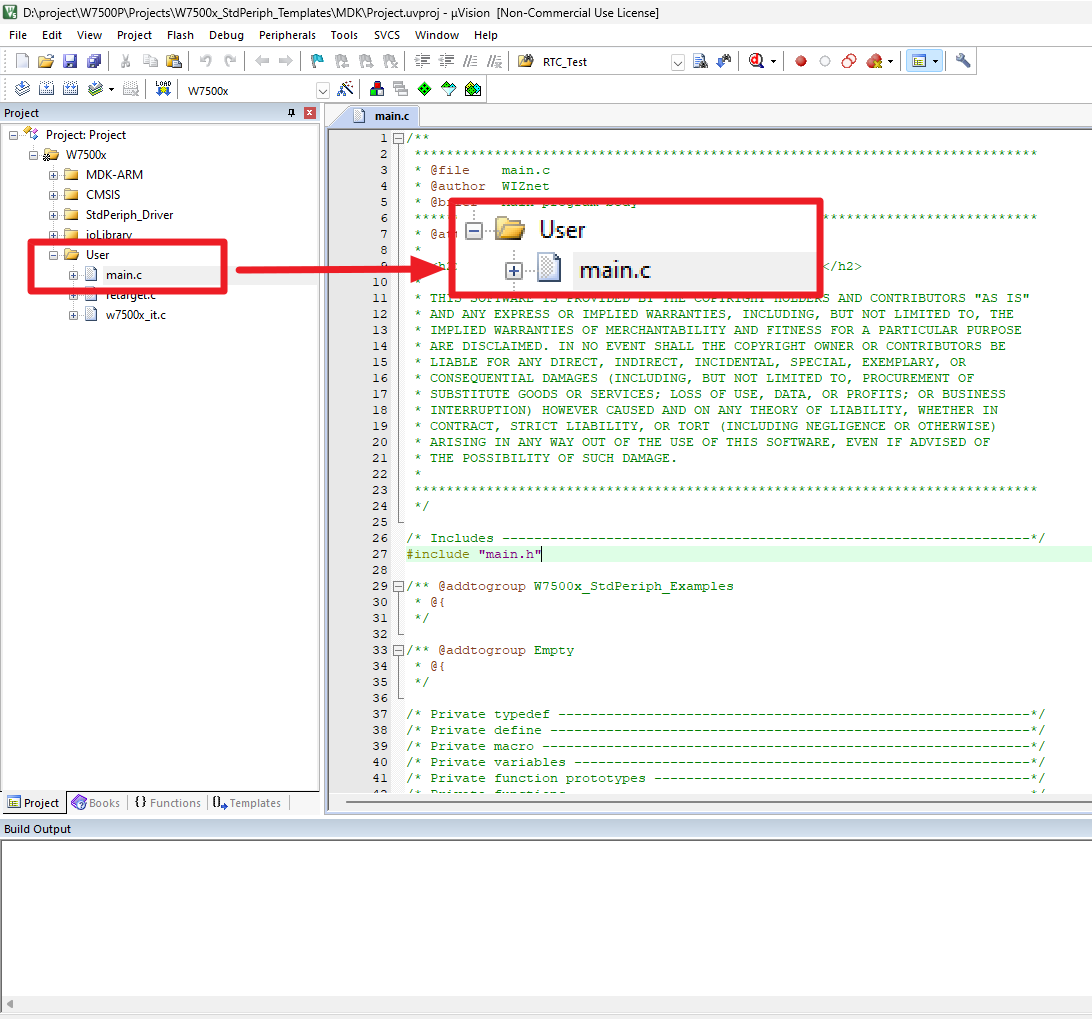
Step 5
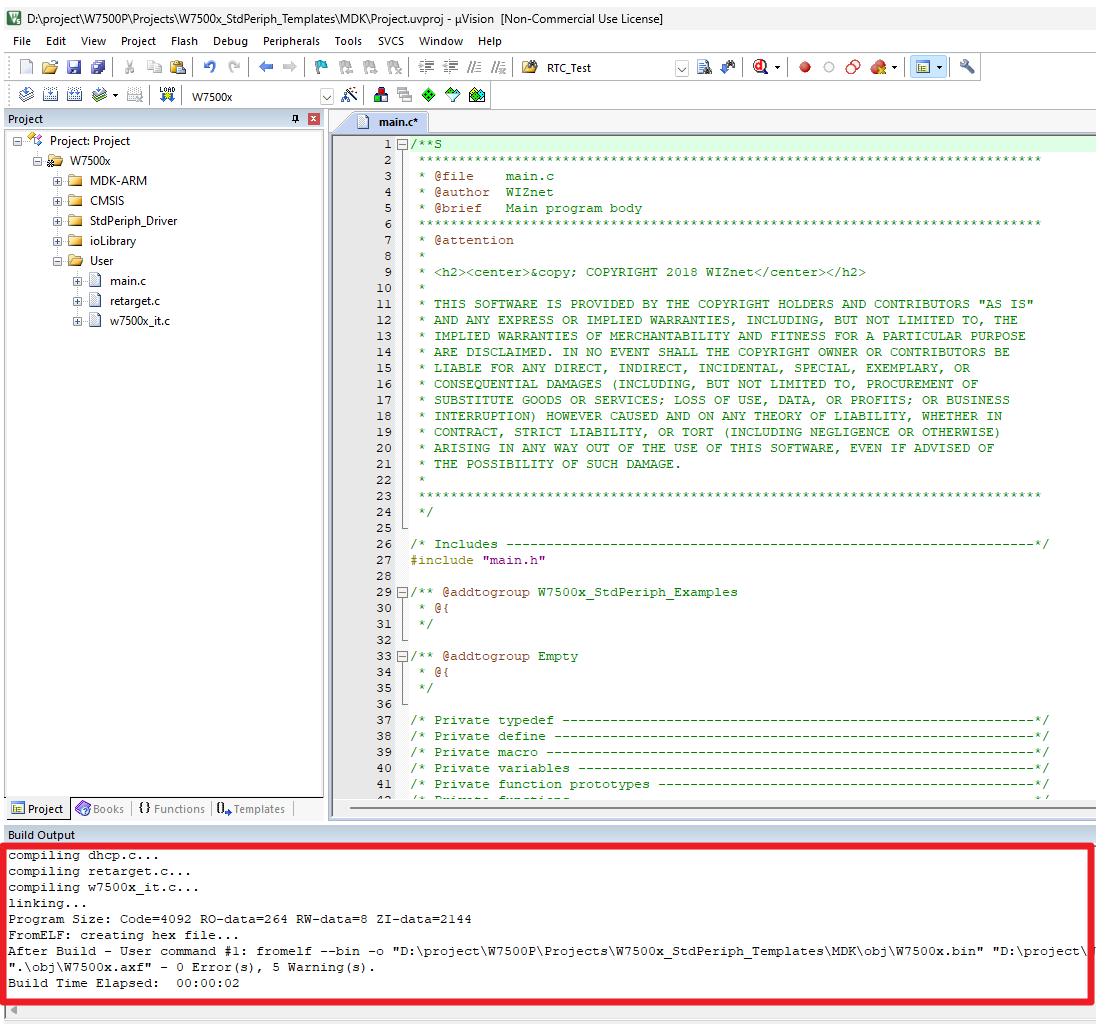
In the Keil 5 project, click on "main.c" in the "User" folder to open the file.
Step 6
Press the "F7" button to complete the build.
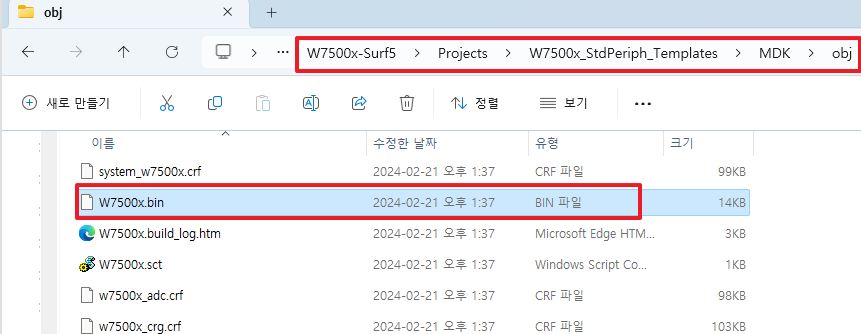
Step 7
Flash 'W7500x.bin' file of the desired project in the 'obj' directory to Surf 5 Project. If you want to know how to flash W7500x.bin file to Surf 5, refer to How to use ISP tool