Getting Started Guide(Eng)
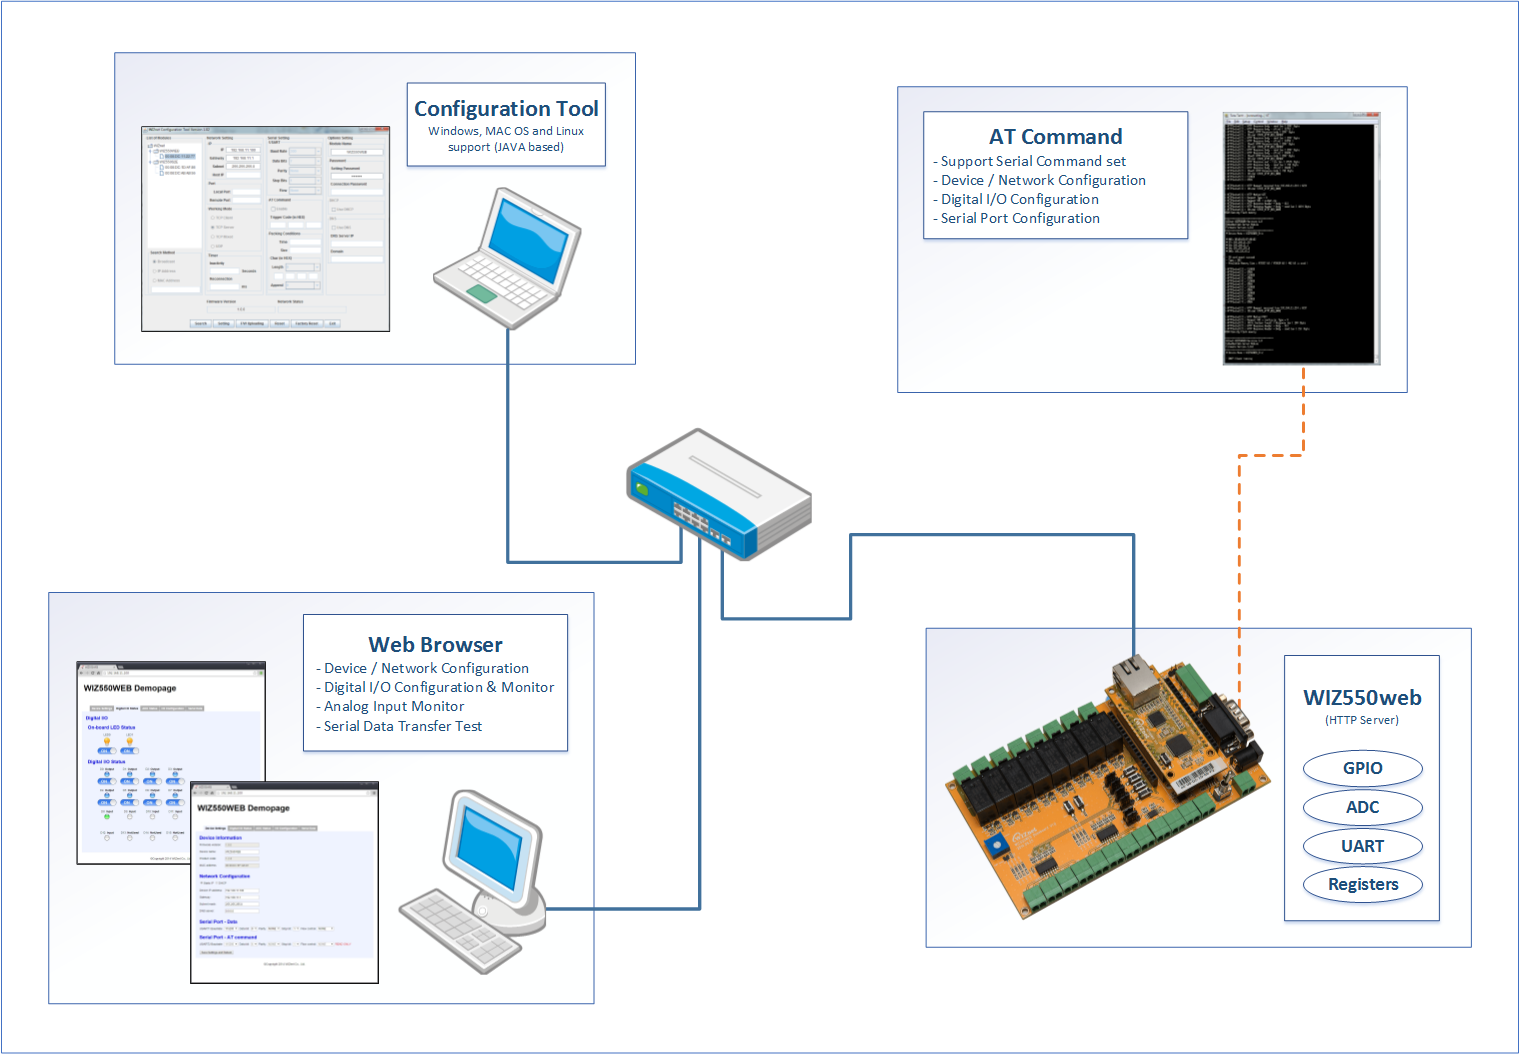
WIZ550web is an embedded Web server module based on WIZnet’s W5500 hardwired TCP/IP chip, Users can control & monitor the 16-configurable digital I/O and 4-ADC inputs on module via web pages. WIZ550web provides the firmware & web page examples for user’s customization.
This page describes the following topics:
- Product Preview
- Hello world
- Product contents
- SD card initialization
- Data flash initialization
- Serial debug message
- WIZ550web Basic operations and CGI
- Basic Webpage Demo
- Examples for WIZ550web customization
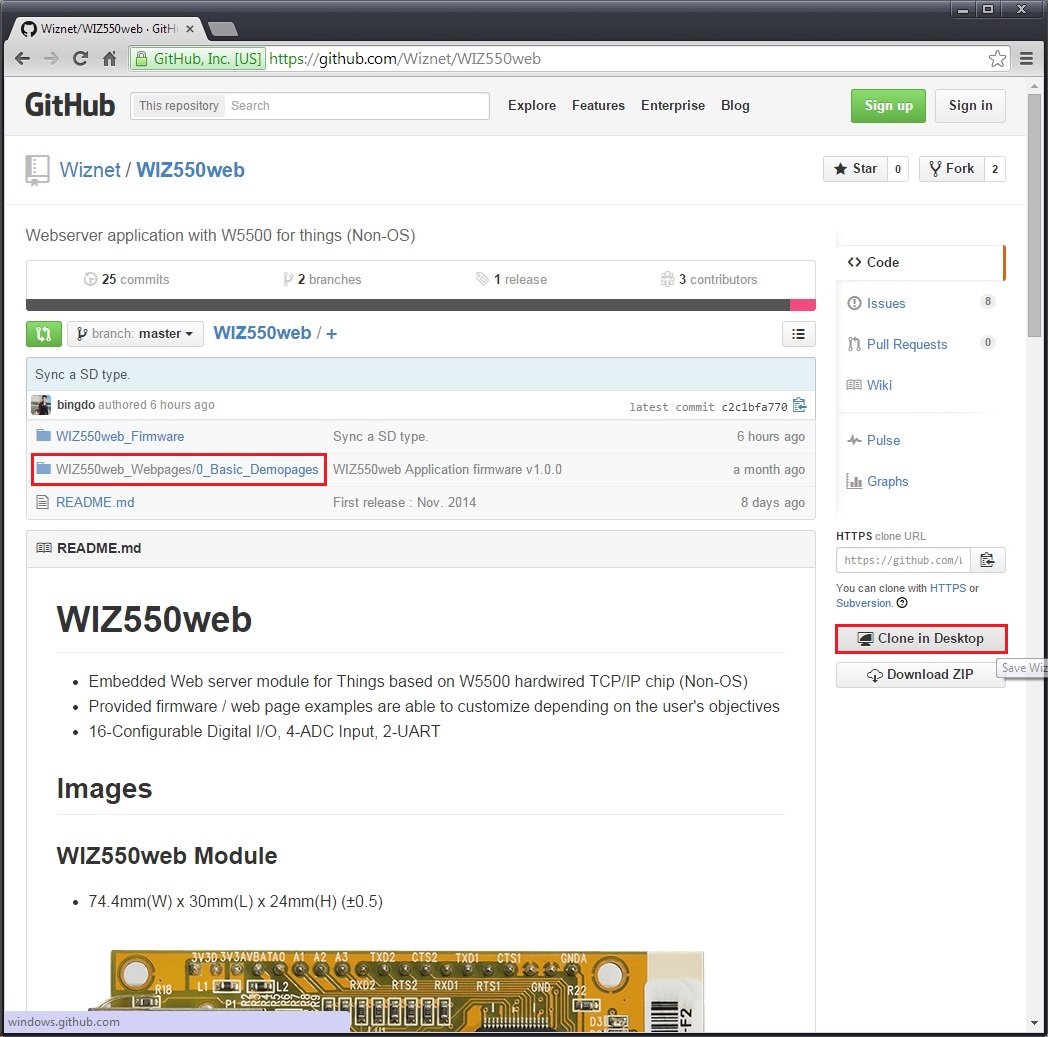
Users can download the following source codes from the 'WIZ550web GitHub Repository'
- Firmware source code (The projects base on Eclipse IDE)
- Application / Boot layer Firmware
- Demo webpage
WIZ550web GitHub Repository
🌎https://github.com/Wiznet/WIZ550web
WIZ550web GitHub Page
Develop Environment
- Eclipse IDE for C/C++ Developers, Kepler Service Release 2
- ARM GCC 4.8.3 (2014q1)
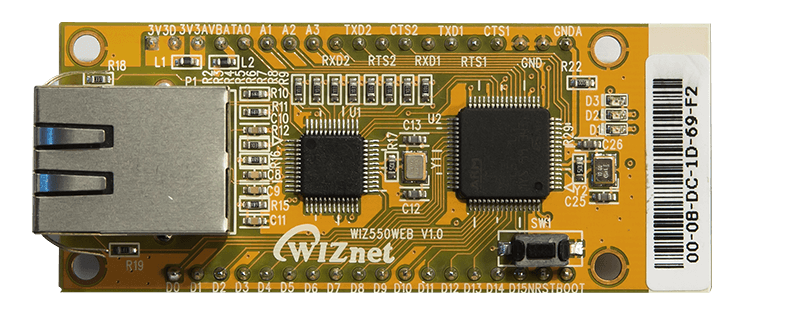
Product Preview
Hello World
Product Contents
Part No: WIZ550web
- WIZ550web module x 1
Part No: WIZ550web-EVB
- WIZ550web module x 1
- WIZ550web baseboard x 1
- LAN cable x 1
- Serial cable x 1
- 12V Power adapter x 1
WIZ550web module & EVB support microSD card
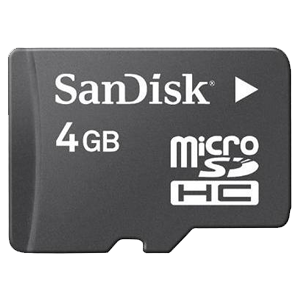
- Provides Sandisk 4GB microSD card but can be substituted with different product that has same features depends on manufacturer.
Recommend to use listed SD card in case of using different SD card.
| Vendor | Capacity(Bytes) | Type | Class |
|---|---|---|---|
| Sandisk | 2G | SD | n/a |
| ::: | 4G | SDHC | 4 |
| ::: | 8G | SDHC | 4 |
| Samsung | 4G | SDHC | 6 |
| Transcend | 4G | SDHC | 4,10 |
SD card Initialization
The WIZ550web uses a Micro SD card as a storage media for web content. The SD card isn't included with module. The SD card supports FAT[1] file system format and we recommend to use FAT32.
The process for using the SD card as a storage media for web content of WIZ550web is described below.
The process for using the SD card (for Windows)
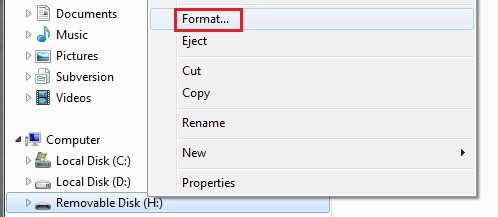
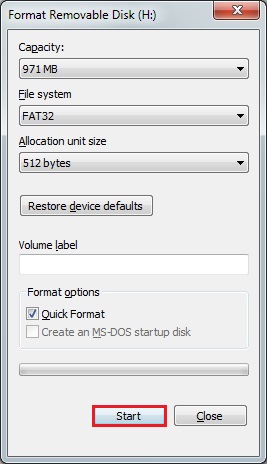
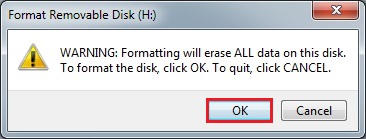
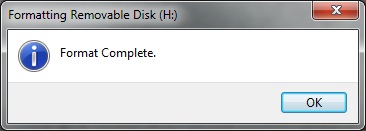
- Format a Micro SD card with FAT32 file system
Insert the Micro SD card into an SD card reader and format it with the Windows explorer
- Download the demo web page from WIZ550web GitHub repository
- Copy the demo Web page to the Micro SD card

-
Insert the Micro SD card into the SD card slot of WIZ550web
-
After powering up the module you can access the webserver.
Data flash Initialization
We support storage method of data flash as well as SD card after v1.1.0 release. https://github.com/Wiznet/WIZ550web/releases
- You can use one of a SD card and a data flash. The mount priority of a SD card is higher than a data flash.
- If you wish to use a SD card, you must copy the web page to a SD card and insert a SD card into a slot.
- If there is no SD card after 3 seconds, you can use a data flash.
- You must have the initialization process of data flash.(at least once)
- When SW1 and SW2 are pressed at the same time, the data flash is initialized by FatFs. And reset a target.
- You must copy the web page to a data flash by FTP client tool.(ALFTP)
Refer to WIZ550web+FatFS+FTPServer Project Tutorial
Refer to WIZ550web+WindowsFTP Tutorial.
Need to apply a commit cfce843.
Refer to WIZ550web+LinuxFTP Tutorial
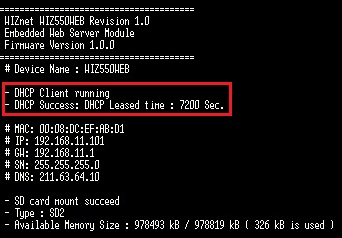
Serial Debug Message
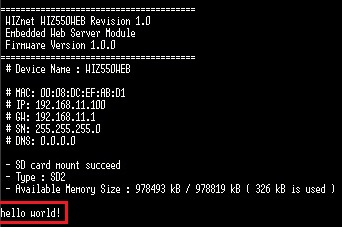
When power is applied to the WIZ550web module, the serial debug message is print out via UART1 port. This message contains information such as the device name, network configurations, and SD card info.

The module will not work during the initialization routine of the WIZ550web firmware if either the PHY link status or SD Card mount is not operational.
Please check the following if the module is not working.
- LAN cable connection and Link status (Act LED of the LAN port)
- SD card mount status (insertion)
The factory default setting of UART1 is as below and the user can change settings through the demo web pages & AT commands.
- 115200-8-N-1
- Baud Rate : 115200
- Data Bit : 8
- Parity : NONE
- Stop Bit : 1
- Flow Control : NONE
WIZ550web Web Server
Web Server Basic Operations
Common web servers and browsers communicate as follows.
- Web browser (user's Webpage) sends HTTP request to web server
- Web server processes the user's request and prepare the results
- Web server sends HTTP response to web browser
- Repeat step 1 ~ 3 above
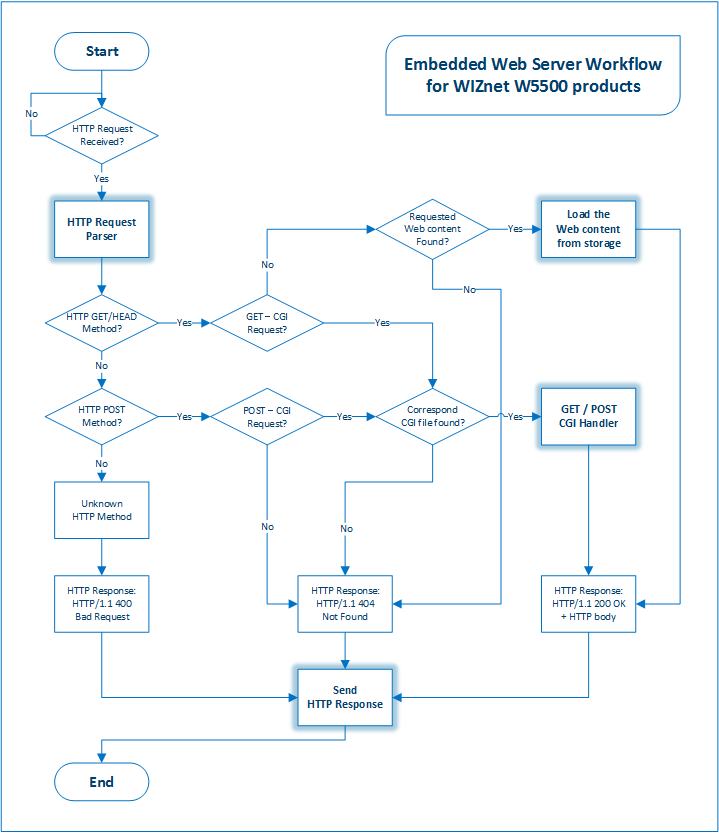
Therefore, Web server (HTTP server) of WIZ550web is consists the following processes and operates as the flowchart below.
- HTTP Request Parser
- Parse the HTTP Request
- Web Content (web resources) Loader
- Find the requested web content from the web content storage (e.g., SD card) and prepare the response
- HTTP Response Sender
- Send the HTTP response to web browser
- Response vary depending on the processing results
- Successful HTTP requests : HTTP/1.1 200 OK
- The requested resource could not be found : HTTP/1.1 404 Not Found
- CGI Handler
- Process the User's requests from web browser
- CGI is the used to set the I/O status or to get the I/O status
information
CGI for WIZ550web
WIZ550web uses CGI to configure the network or monitor and control the I/O.
CGI is an acronym for 'Common Gateway Interface’ and it operates the server's program and receives results of the client via web. CGI is not dependent on a particular language or platform because only the configuration and policies between the web page and the server needs to be satisfied.

CGI for WIZ550web consists the 'Request name + .cgi' using HTTP GET/POST request method. The CGI for each HTTP methods are handled as below.
GET
- The method for getting the values from web server
- Passed in the form of a JavaScript callback function parameters
- Same structures as JSON
- The function name in the HTTP response body must be the same on the Web page's JavaScript Callback function name
- e.g., If the 'function IoStatusCallback' is Javascript function
name in the Web page, web server must pass the data as next;
IoStatusCallback({"din":[{"v":"1"}, {"v":"0"}], "led":[{"v":"1"}, {"v":"0"}]})
POST
- The method for putting the changed values to web server
- Values are passing by the Web form element
- Name-value pairs; Each pair is separated by '&' and the
Name/value of a pair is represented by '='
- e.g., 'Pin : 1, Val : 1' => 'Pin=1 & Val=1'
Each requests are handled by AJAX techniques for efficient data processing in the limited resources embedded web server. The advantage is that the server avoids the full web page reload and reduces the load on the server.
Basic Webpages Demo
The Screenshots of Basic Demo Web Page were captured from Google Chrome Browser version 37
Provided basic demo web page of WIZ550web is in tab style of one HTML page (index.html). The configuration and purpose of each tabs are as below.
- Device Settings: Device information, Network / Serial Port
configurations
- Device Information
- Network Configuration
- Serial Port (for Data & Debug / AT commands)
- UART1 : Data/Console/Debug/Program port (RS232 on the dev board)
- UART2 : AT command port (RS485/422 on the dev board)
Digital I/O Status: Indicates Digital I/O's Direction and Status
- On-board LED Status
- Digital I/O Direction / Status: When the I/O is output direction, users can be set On/Off
-
ADC Status: Displays the Analog input value changes into a bar graphs
- Analog Input Signals
-
I/O Configuration: Digital I/O's Direction and Alias settings
- Digital I/O State and Alias Configuration
- Digital I/O Settings Factory Default
-
Serial Data: Serial data transfer examples via Webpage to UART1.
- Serial Tx (Web to UART1) / Rx (UART1 to Web)
- Only the Tx is implemented in the released code.
Device Settings
The 'Device Settings' tab is configured as below.
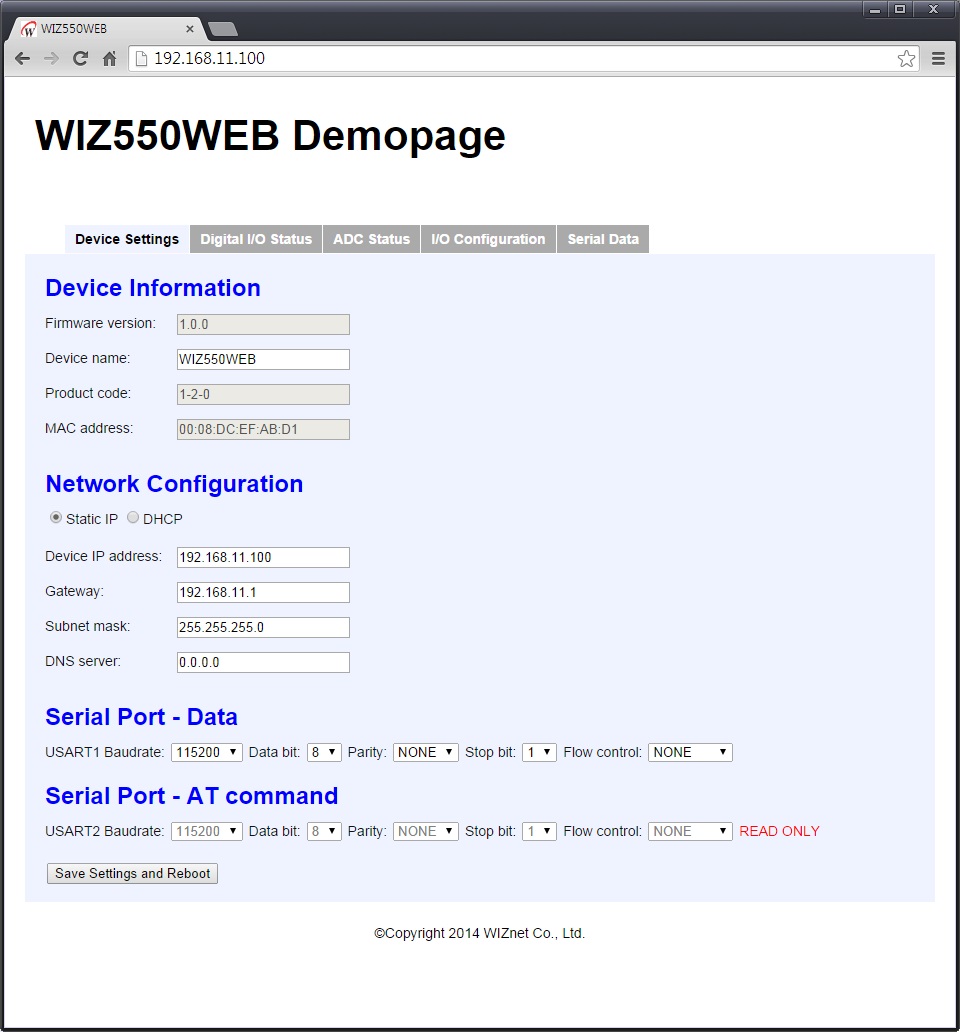
The user can check the device information like MAC address / Firmware version and set the network information (IP address, DHCP options and etc.), serial port configuration through the 'Device Settings' tab. After adjusting the settings, if the Save Settings and Reboot button is pressed, the configurations is saved and the WIZ550web module reboots. Please note that the module will change the settings after reboot.
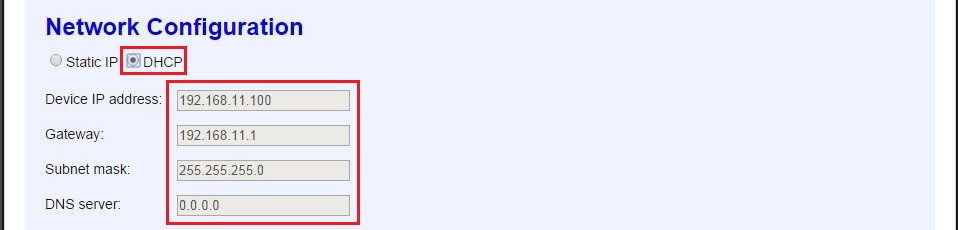
If the 'DHCP' option has enabled (DHCP Enable: IP address allocated from DHCP server), Network information HTML input tag is disabled and attribute changed to disabled. If the user successfully allocated the IP address from DHCP server after module reboot, the modified debug message is output to terminal as below.
Digital I/O Status
The 'Digital I/O Status' tab is configured as below.
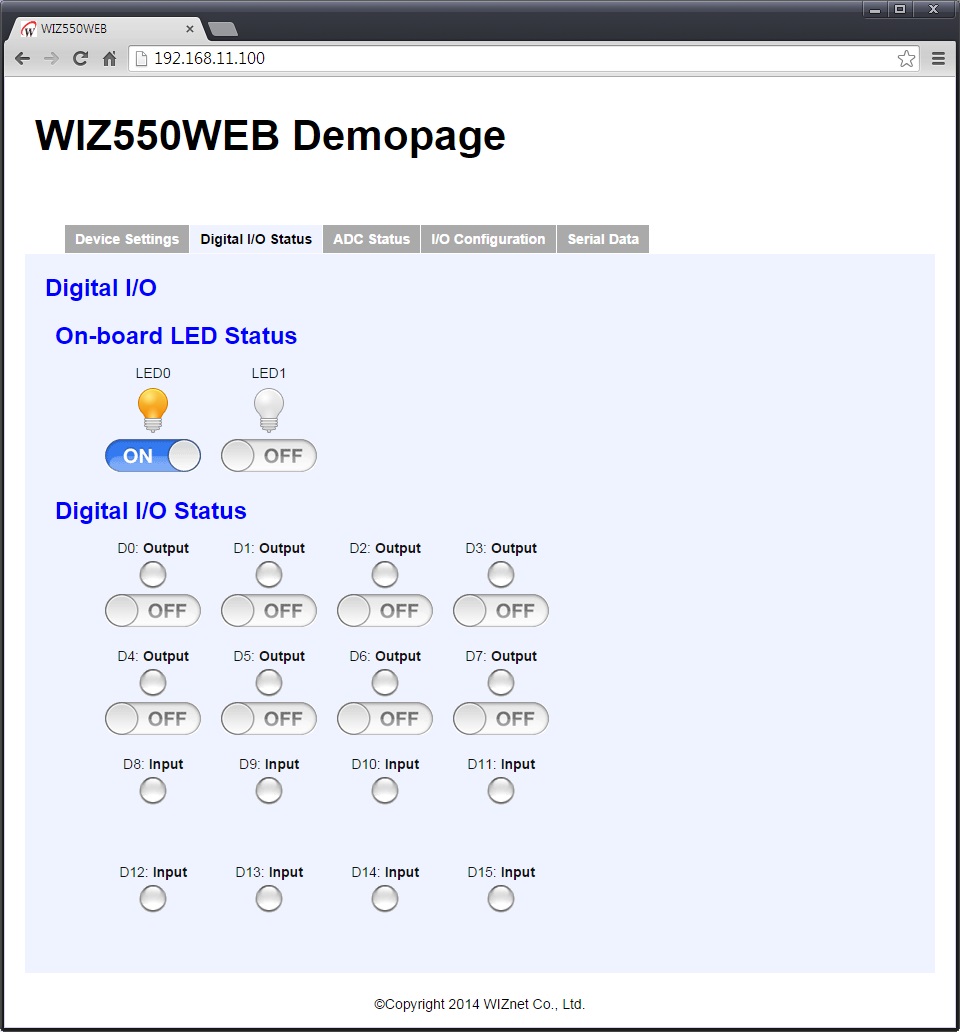
On-board LED WIZ550web's LEDs can be control by On/Off button in web
page.
Digital I/O Status Digital I/O Status indicates the current status.
When the I/O is output, users can set On/Off. Each I/O information are
configured as below.
- Pin number (e.g., D0): Direction (Input / Output / NotUsed)
- Status LED Images
(
 Blue LED /
 Green LED /
 Off)
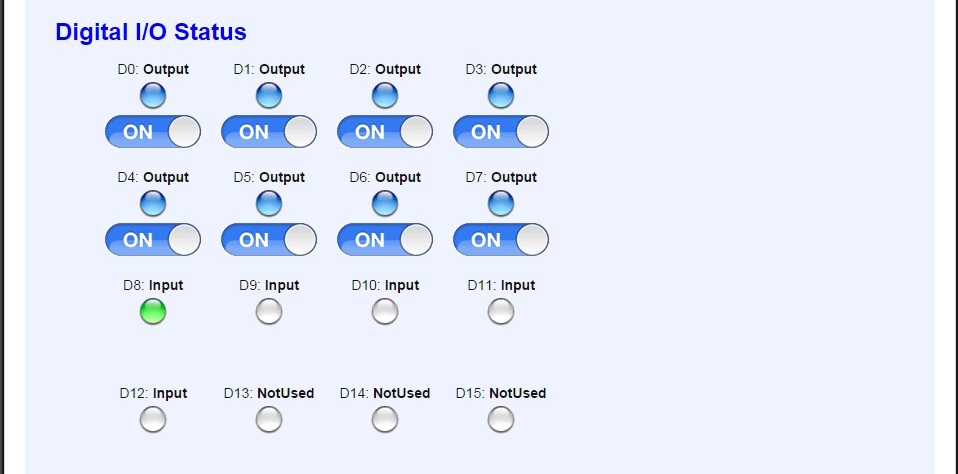
Off) - On/Off Buttons (for Output directions) For 'Input',
- On/Off button is not indicated. If the input signal is 'high', the
'green LED' is turned on.
For 'Output', - On/Off button is indicated. If the output signal is 'high', the 'blue
LED' is turned on.
For 'NotUsed', - On/Off button is not indicated. turned off the LED (off LED).
Users can set each I/O directions in 'I/O configuration' tab. See below for digital I/O status setting examples.
ADC Status
The 'ADC Status' tab is configured as below.
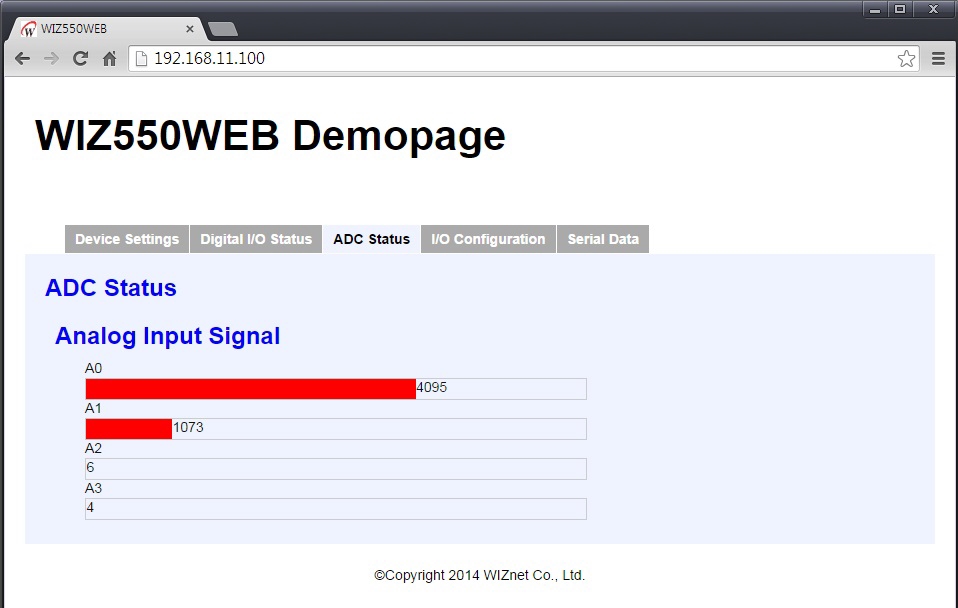
The Analog input signal through ADC changes into a bar graphs is displayed in real-time.
WIZ550web baseboard is equipped with Potentiometer and Temperature sensor on A0 / A1. For example, by adjusting the value of the Potentiometer (A0), users can see the changes in the graph as below.
I/O Configuration
The 'I/O Configuration' tab is configured as below.
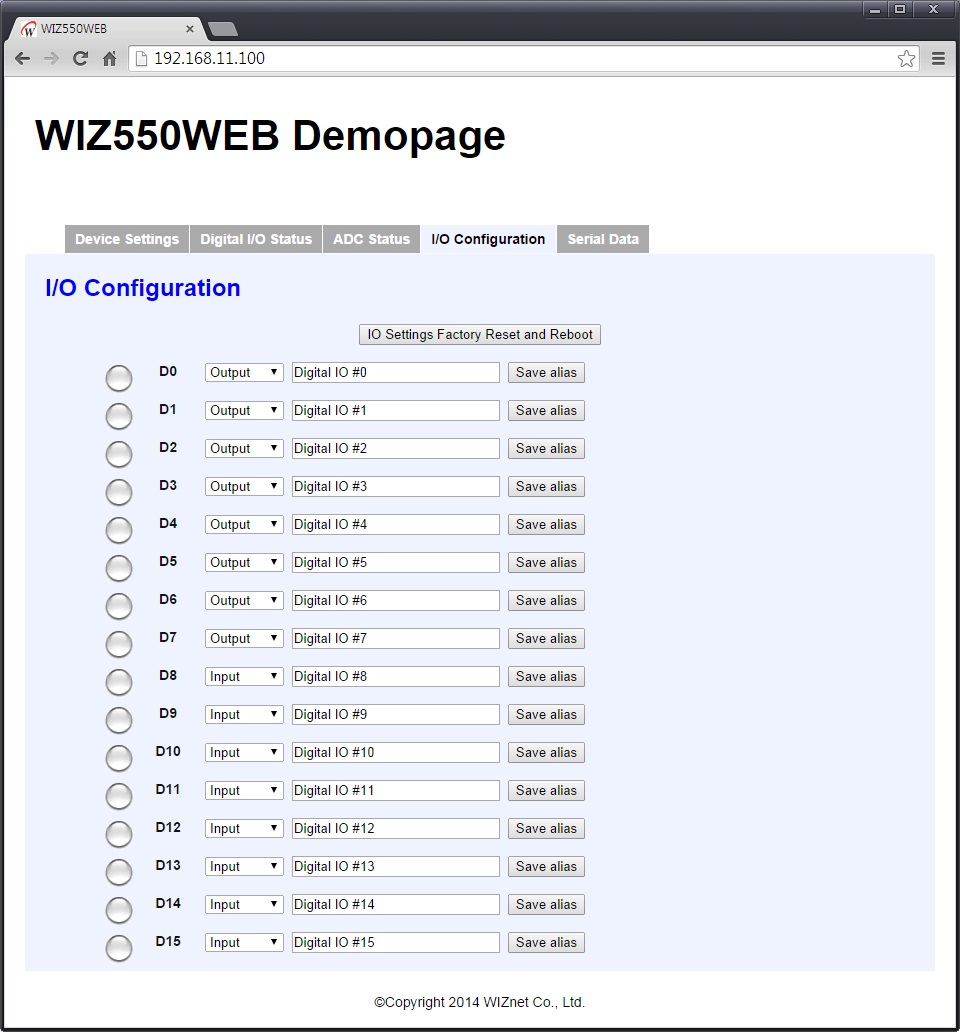
Change of the I/O Directions and Aliases setting will be reflected immediately. Each I/O's LED images are the same as I/O status page (Blue / Green / Off).
Only when the 'Not Used' option is selected, the red 'X' is displayed for visibility.
When you press the IO Settings Factory Reset and Reboot button, the WIZ550web module factory reset is executed, and is rebooted. Please note that the module is rebooted into default settings.
If you change the various settings, it is displayed as below.
Serial Data
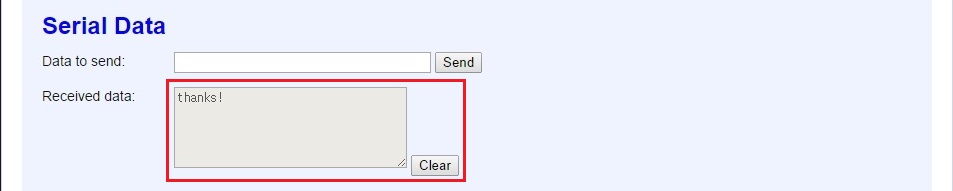
The 'Serial Data' tab is configured as below.
In this page, user can test the 'Serial data input/output through Webpage to UART1' (Serial data Tx/Rx) functions.
Type 'hello world!' in the 'Data to send' input box and then press the Send button.
 Serial terminal shows the string from web page through UART1.
On the contrary, if the user types the string on serial terminal, the 'Received data' box in web page shows the typed string.
Note
Favicon
Favicon is a complex word of 'favorites' and 'icon', and is displayed as a small icon in the address bar / tabs of web browser (e.g., Google Chrome, MS Internet Explorer). By using this, the user is able to know the provider of the web page. The example basic demo web pages include 'favicon'.
![]()
User can add the 'Favicon' as the following steps
- Create the target image to 16x16 sized icon and save in the name of 'favicon.ico'
- Move the 'favicon.ico' to web content storage
- Insert the link code at the top of the 'index.html' page
e.g., <link rel='shortcut icon' href='/favicon.ico' type='image/x-icon'>
WIZ550web Customizing
Basics
WIZ550web provides basis for user customized web server. Users can implement an embedded web server which can control the I/O by modifying the firmware source code and web pages.
Function of the Web server can be a variety of combinations depending on the user's application; I/O monitor / control, transfer the string to UART, MCU and W5500 chip register control, Etc.

Therefore, users need to modify the firmware source code (C language) and web pages (HTML and JavaScript).
In this page, we provide a description on how to get the I/O's status (value) of WIZ550web module and set the new value through examples of the basic demo web page.
Users can learn how to control the H/W (I/O, UART, Registers and Etc.) using the web page. If users need to add additional functions, use the same method described on this page.
WIZ550web Web I/O Examples
This Section is UNDER CONSTRUCTION.
Check back soon.
-
FAT: File Allocation Table
as File system format, because it used by the majority of memory card manufacturers and should be supported by most computers. There are FAT12/16/32. FAT32 in WIZ550web supports up to 4G Byte for one file. -
JSON: JavaScript Object Notation
-
AJAX: Asynchronous JavaScript And XML
AJAX is a group of interrelated Web development techniques used on the client-side to create asynchronous Web applications. With Ajax, Web applications can send data to and retrieve from a server asynchronously (in the background) without interfering with the display and behavior of the existing page.JavaScript and the XMLHttpRequest object provide a method for exchanging data asynchronously between browser and server to avoid full page reloads.