How to write the firmware into WIZwiki-W7500
There are four ways to write firmware into WIZwiki-W7500.
- Using the CMSIS-DAP (Drag and Drop)
- Using the CMSIS-DAP (through Keil uVision5)
- Go to ISP tool manual & Program download
- Using the SWD Debugger
Examples Binary
Using the CMSIS-DAP (Drag and Drop)
-
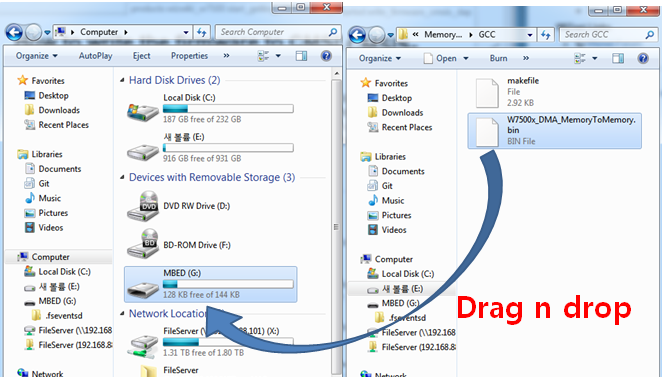
When you connect the USB cable to the WIZwiki-W7500, The PC recognizes it as a removable disk named MBED.
-
You "drag and drop" or copy the firmware to the removable disk - the firmware writing progress has completed.
-
After completing the firmware writing, open to check the removable disk.
-
If "fail.txt" file is exists in the removable disk, it means writing the firmware has failed.
-
After pressing the Reset button (SW1) of WIZwiki- W7500, please repeat the steps from step 2.
Using CMSIS-DAP Debugger
CMSIS-DAP does support USB cable and Debugger as well. You need to Set Flash Algorithm to use CMSIS-DAP Debugger in Keil.
To Follow
-
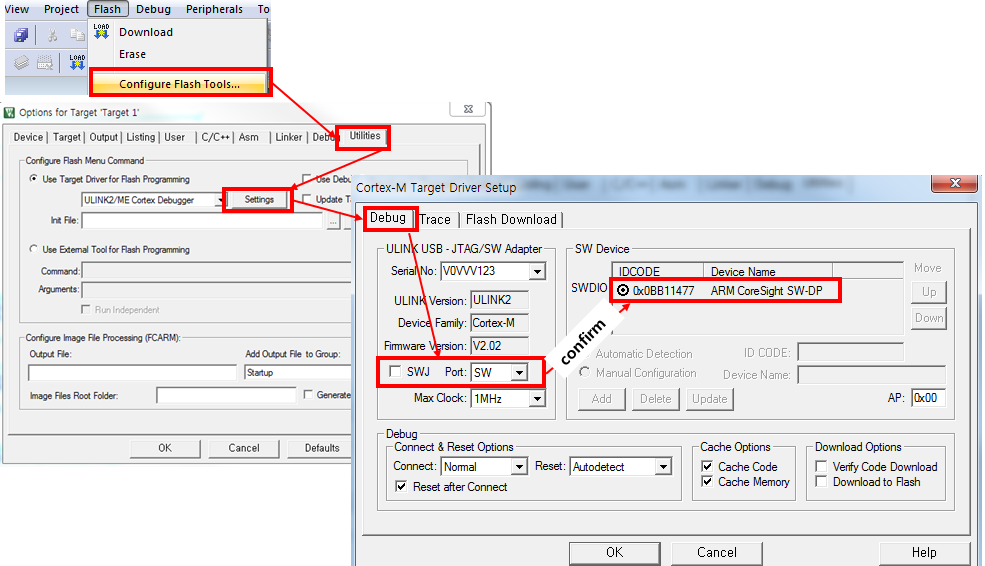
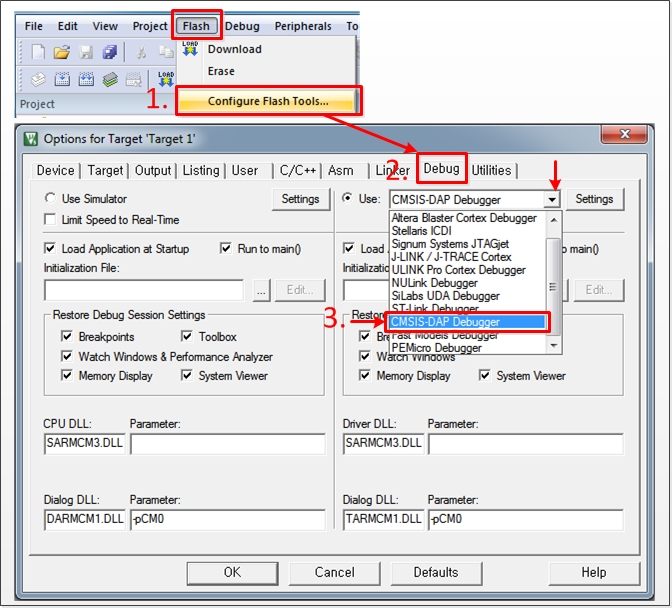
Click 'Flash' in top menu and open 'Configure Flash Tools'. Set 'Debug' on top menu with choosing 'CMSIS-DAP Debugger'.
-
Click 'Utilities' and choose 'CMSIS-DAP Debugger'. Open 'Settings' menu and unchecked 'SWJ' in Debug menu. Then confirm 'ARM CoreSight SW-DP' set on SW Device.
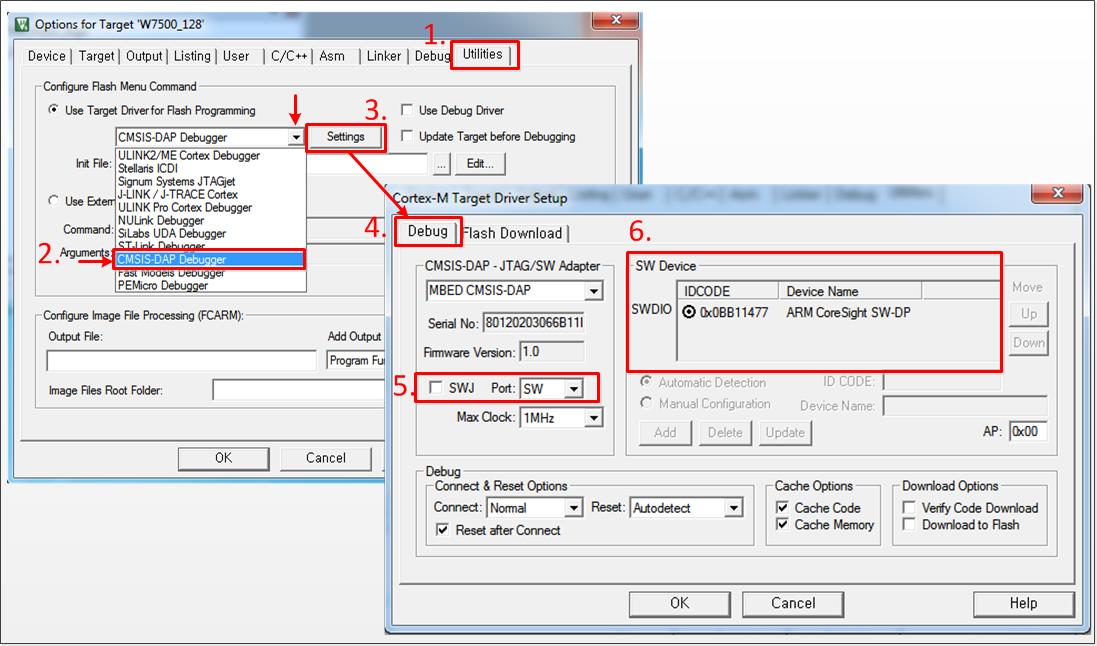
-
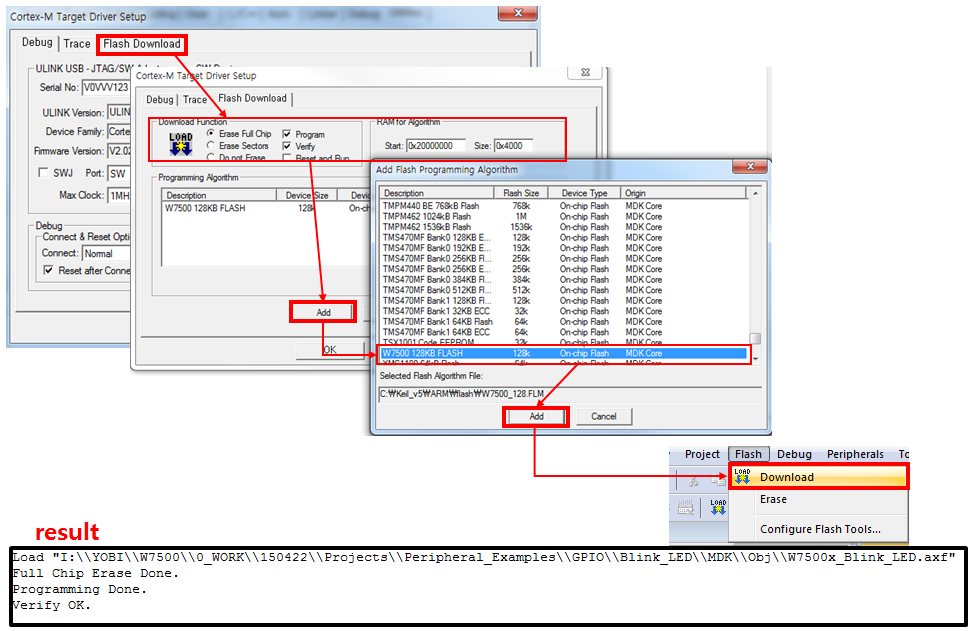
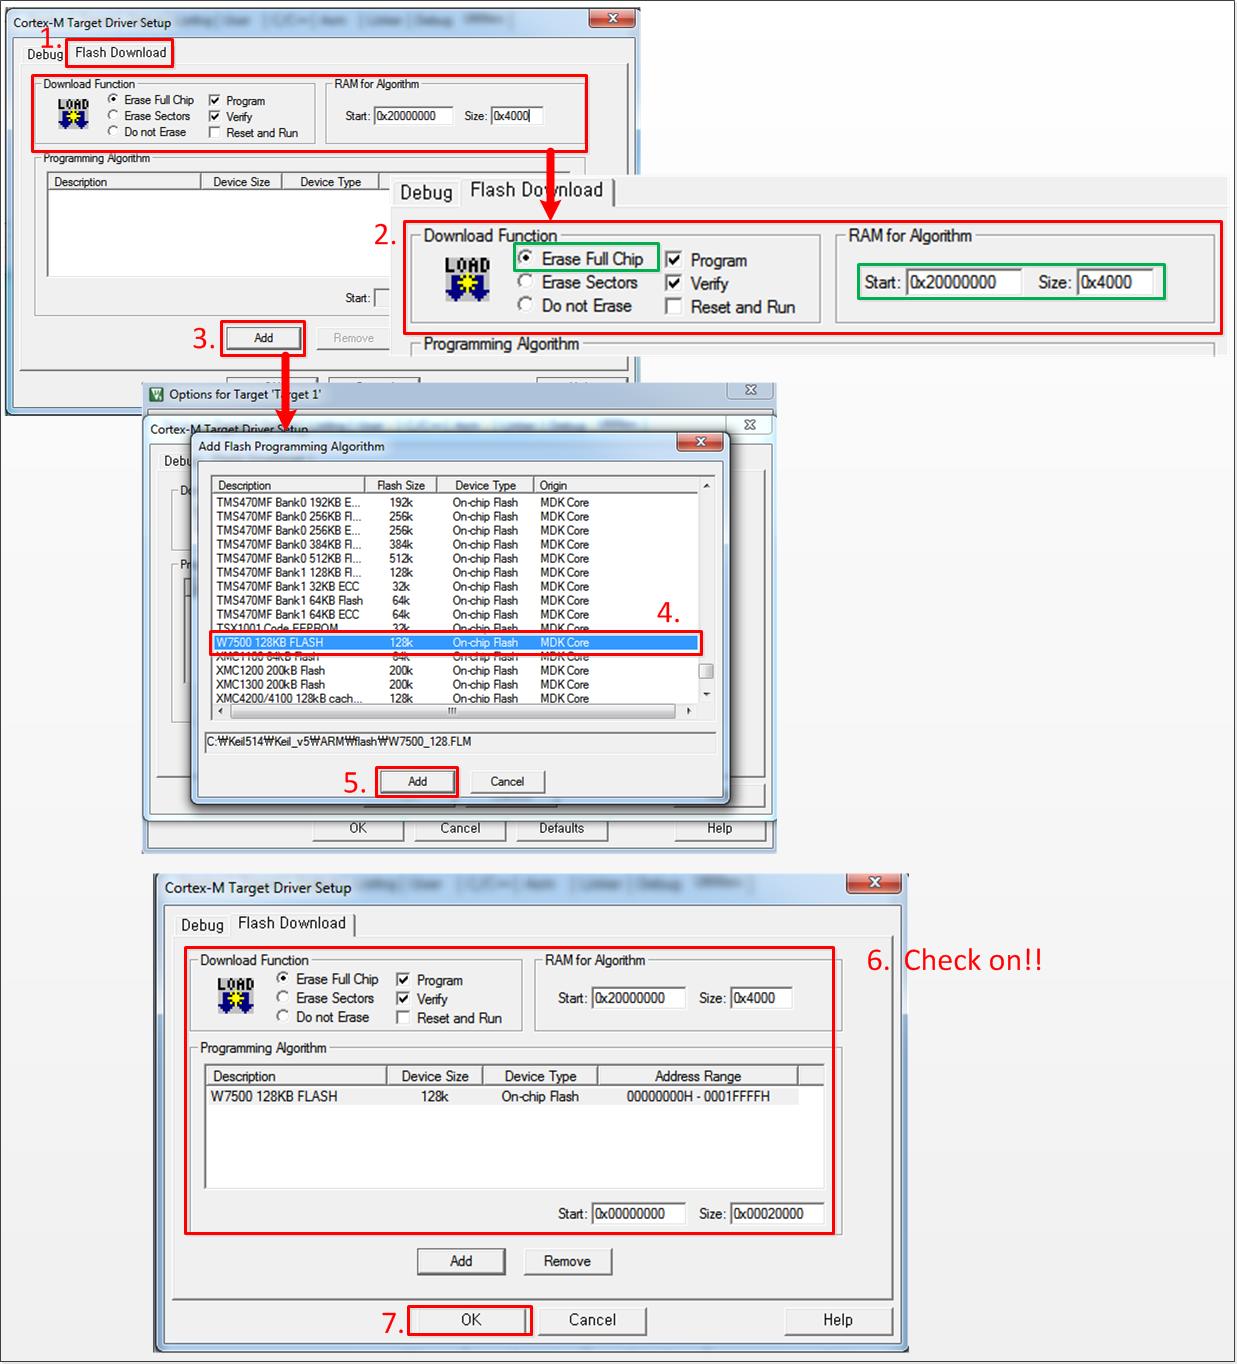
Next to the Debug menu bar, Click 'Flash Download' and set 'Erase Full Chip' in Download Function, '0x20000000 to 0x4000' in RAM for Algorithm, Add 'W7500_128KB_FLASH' on Programming Algorithm. After checking it with below figure, click 'OK'.
-
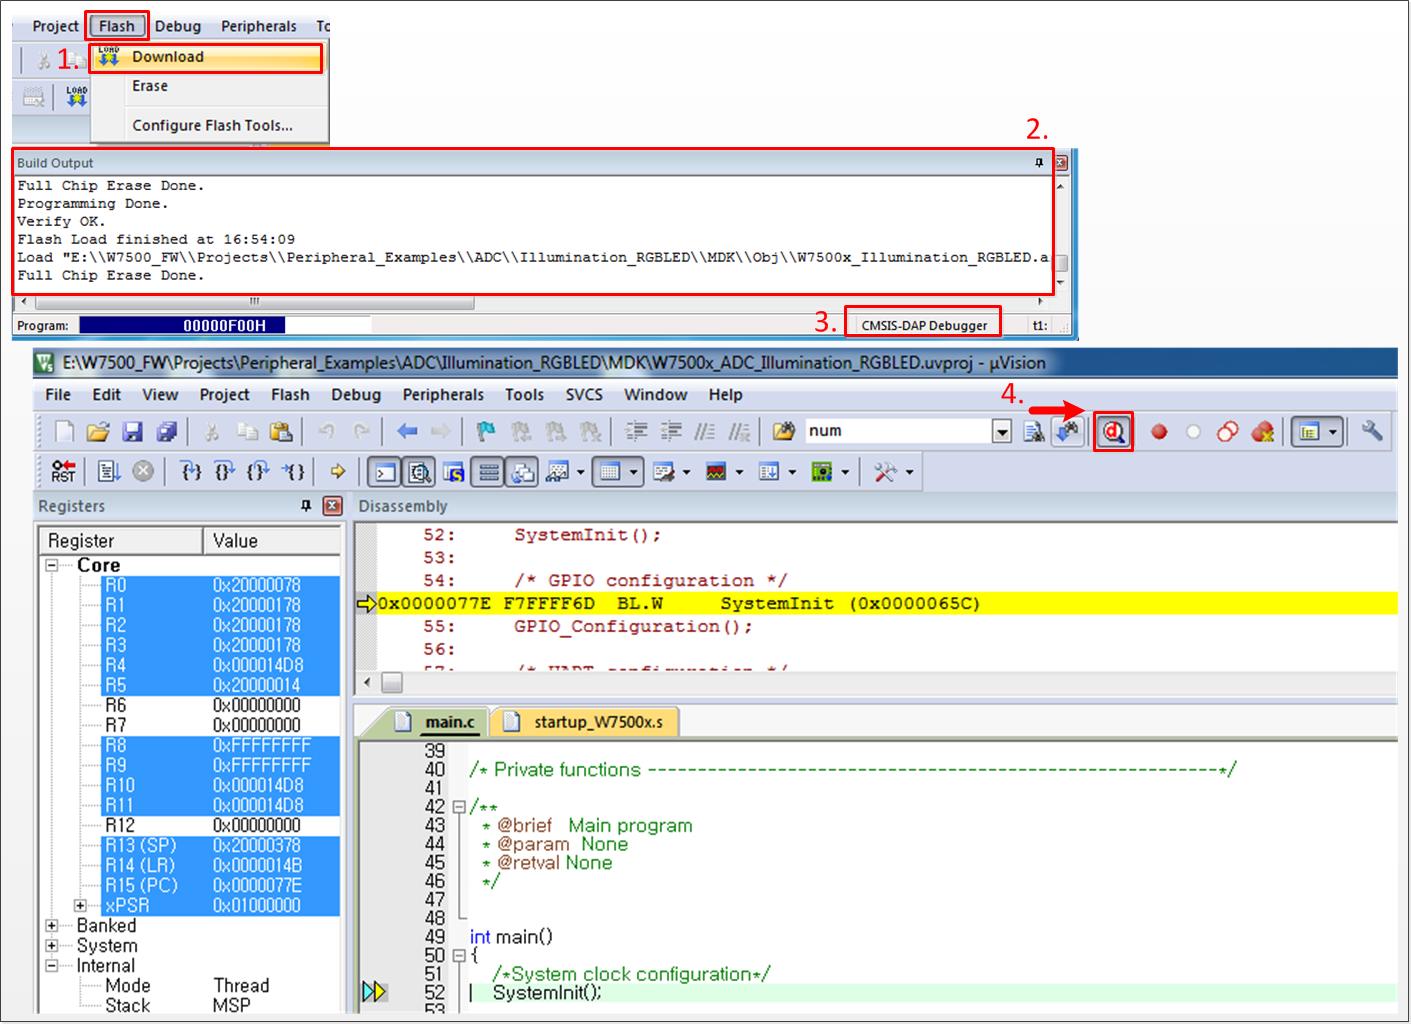
Download the firmware into WIZwiki-W7500. You can check complete message and the CMSIS-DAP Debugger at the bottom. Chick the 'Debug icon' or Ctrl+F5 to debug.
Reference
Using the ISP
W7500 ISP Program
Go to ISP tool manual & Program download
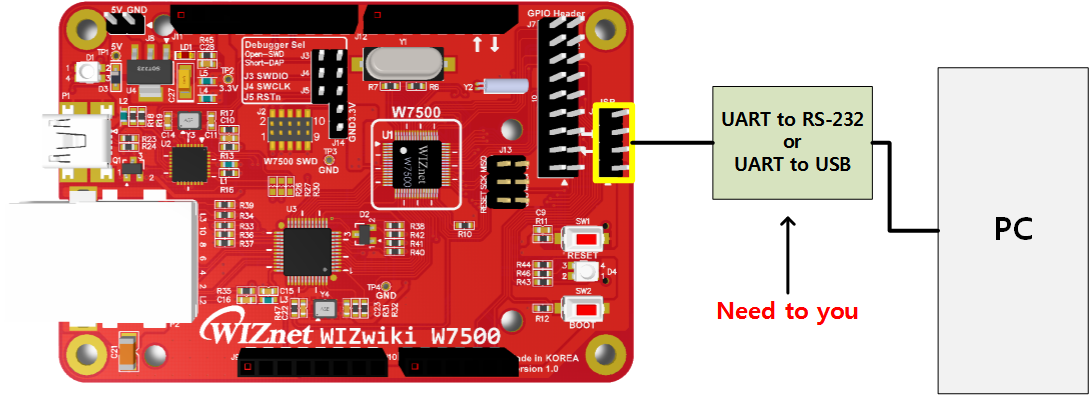
When W7500 is in the boot mode, firmware writing is possible via the ISP
since WIZwiki-W7500 has built-in an ISP header. As ISP header supports
the UART signals, you need a converter like TTL to RS232 or TTL to USB
in order to connect to your PC.
Please refer the block diagram setting as below.
To follow
- Run "W7500_ISP (20xxxxxx) .exe".

-
To make WIZwiki-W7500 enter the Boot Mode, supply power once while pressing the SW2,BOOT switch.
-
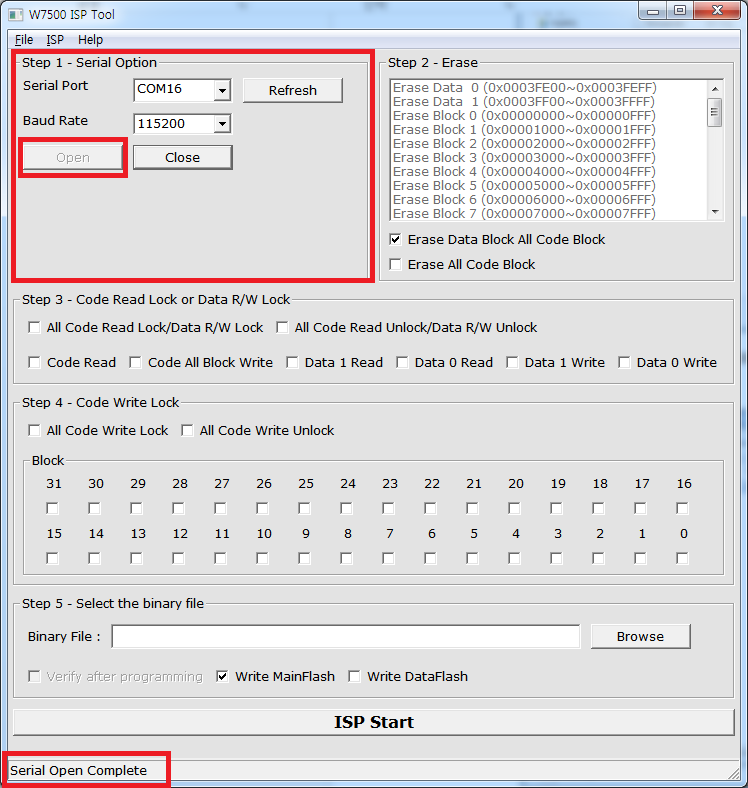
Select the device connected to the ISP header from "Serial Port" and click "Open". If you entered Boot Mode successfully, then "Serial Open Complete" message will be printed on the status bar at the bottom of window.
Before click the open button of ISP tool, we suggest you to test it in other terminal windows.
After opening serial port using the terminal windows,enter the capital "U". If it is in the ISP mode, you can see the returned character.
-
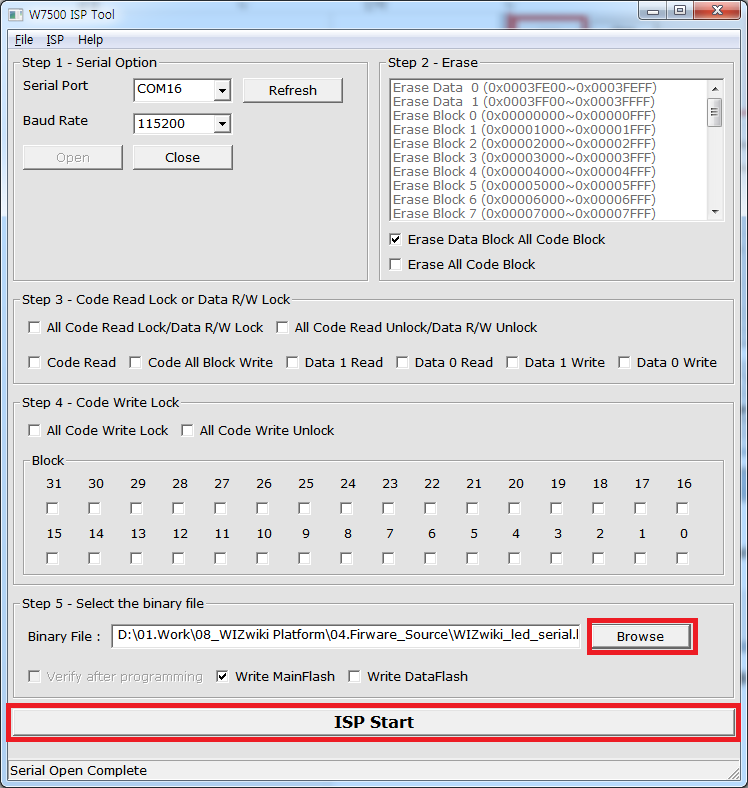
Click "Browse" to select the binary file.
-
Click "ISP Start" button, then the firmware writing will be performed.
-
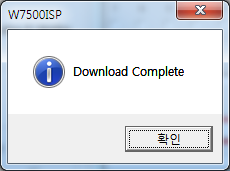
After the firmware writing completes, the window like below will pop up.
How to connect an external SWD debugger to WIZwiki-W7500
This page shows how to write and debug firmware in WIZwiki-W7500 with an external SWD debugger. When you need to debug firmware, you have two ways. One is debugging with an external SWD debugger and the other is using the CMSIS-DAP debugger. In this page, how to debug firmware with the SWD debugger is posted only.
Using the SWD debugger
-
You can find SWD Header in the middle of WIZwiki-W7500 and Debugger Sel Jumper with three caps above it.
Then open the J3, J4, J5 jumper cap in Debugger Sel Jumper.
Now, your WIZwiki-W7500 is ready to connect the SWD debugger.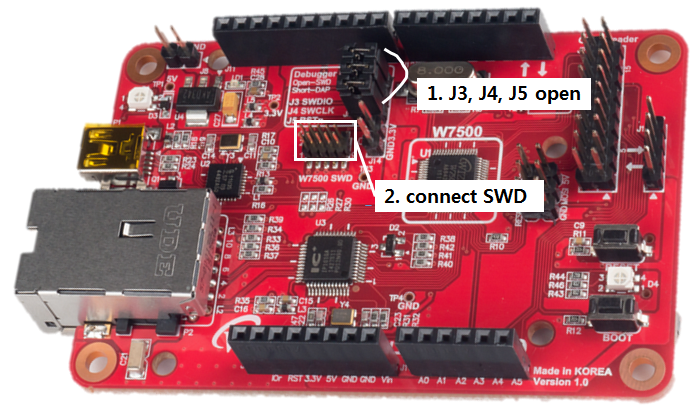
-
Connect ULINK debugger and SWD Header. At this moment, be careful of matching pin number.
-
Setting Flash Algorithm and ULINK debugger in Keil and
Download on WIZwiki-W7500. Then you can check the success message.