How to Debug WIZwiki-W7500
On the WIZwiki-W7500, there are SWD Header and CMSIS-DAP to debug WIZwiki-W7500. At first, you need to set Flash Algorithm to use debugging. This page shows how to set Flash Algorithm and how to use ULINK Debugger and CMSIS-DAP Debugger.
Set Flash Algorithm
Download
To follow
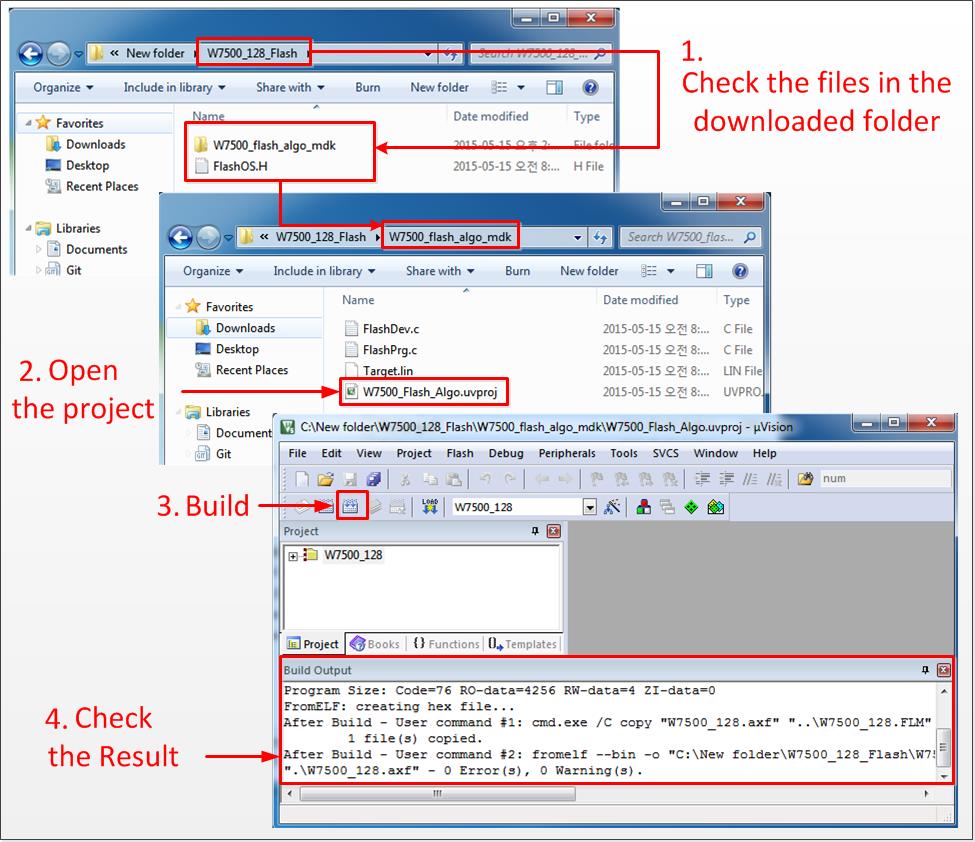
- Download the attached File and unzip. Then you can find one folder and one file in it. In 'W7500_flash_algo_mdk' folder, open the project and Build it.
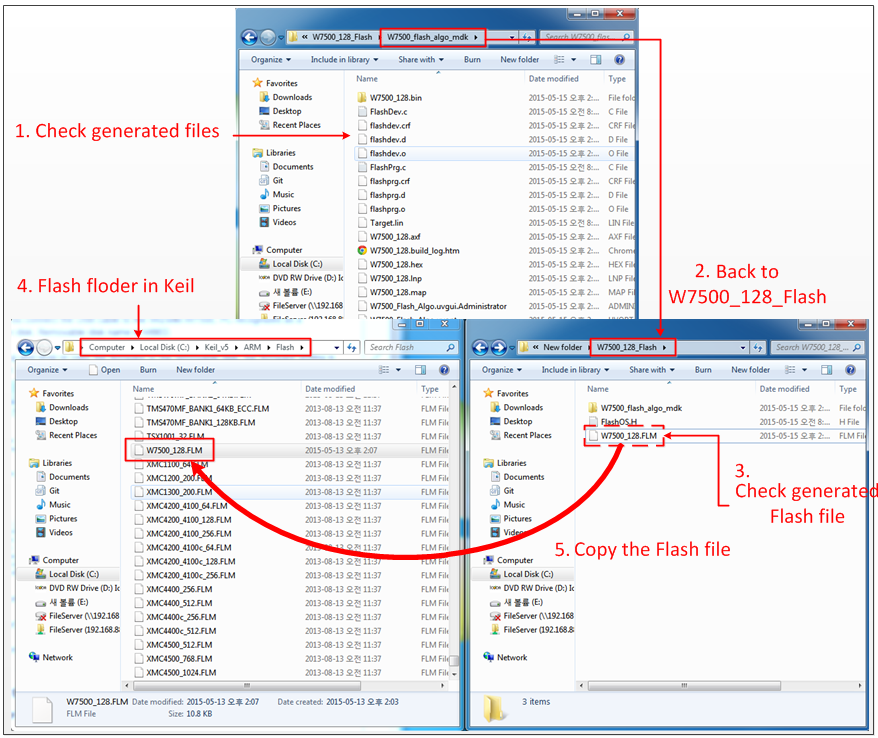
- After build, you can check the generated files in project folder. Back to 'W7500_128_Flash' folder and copy 'W7500_128_FLM' flash algorithm file into the Flash folder in Keil. C:\Keil_v5\ARM\Flash
Using ULINK Debugger
To use ULINK Debugger, you should uncap SWD Debugger Sel Jumper usually disconnected with cap. Do not forget to connect USB cable to supply power to the board.
To Follow
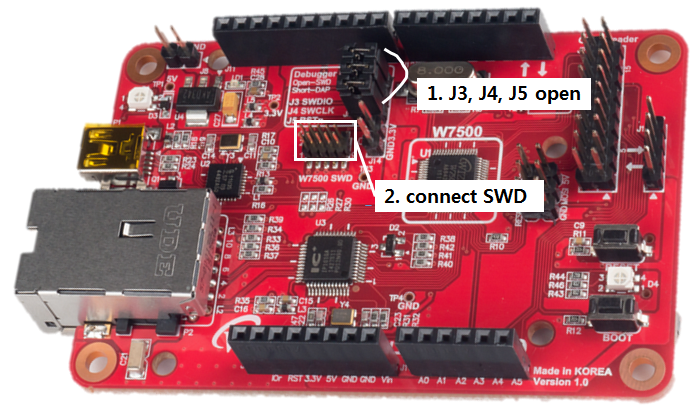
- You can find SWD Header in the middle of WIZwiki-W7500 and Debugger Sel Jumper with three caps above it. Then open the J3, J4, J5 jumper cap in Debugger Sel Jumper. Now, your WIZwiki-W7500 is ready to connect the SWD debugger.
-
Connect ULINK debugger and SWD Header. At this moment, be careful of matching pin number.
-
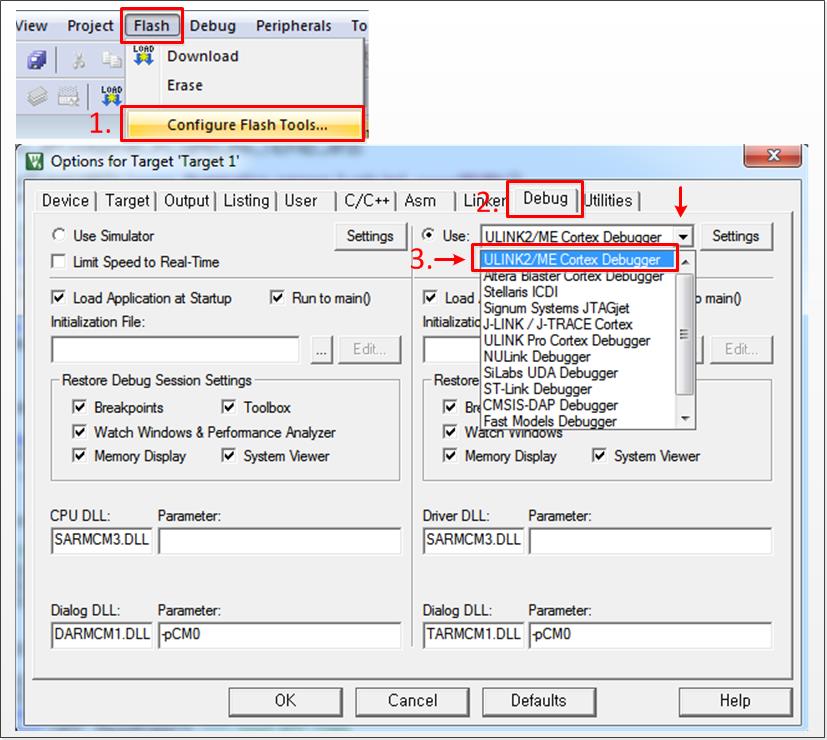
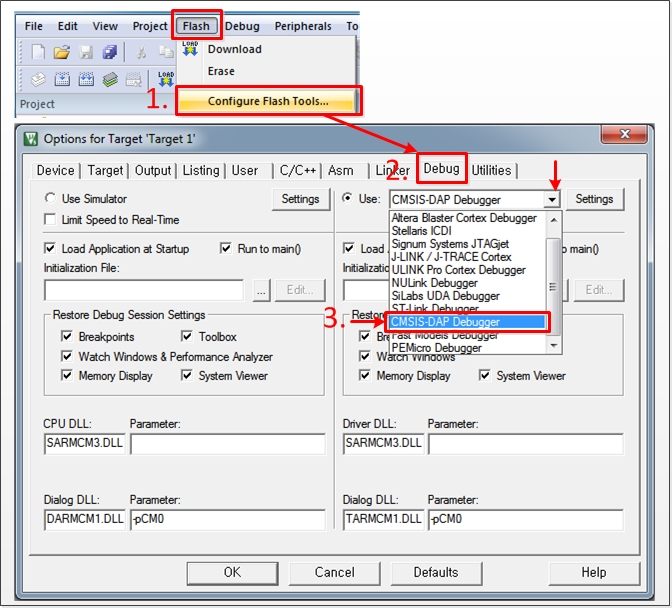
Click 'Flash' in top menu and open 'Configure Flash Tools'. Set 'Debug' on top menu with choosing 'ULINK2/ME Cortex Debugger'.
-
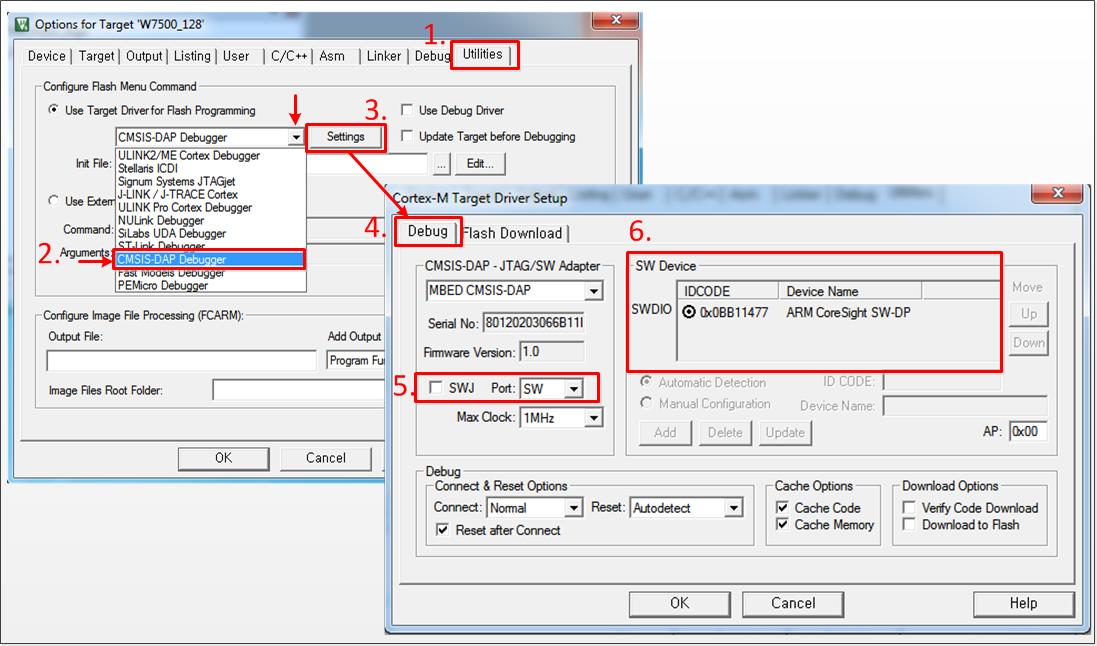
Click 'Utilities' next Debug and choose 'CMSIS-DAP Debugger'. Open 'Setting' menu and unchecked 'SWJ' in Debug on top menu. Then confirm 'ARM CoreSight SW-DP' set on SW Device.

-
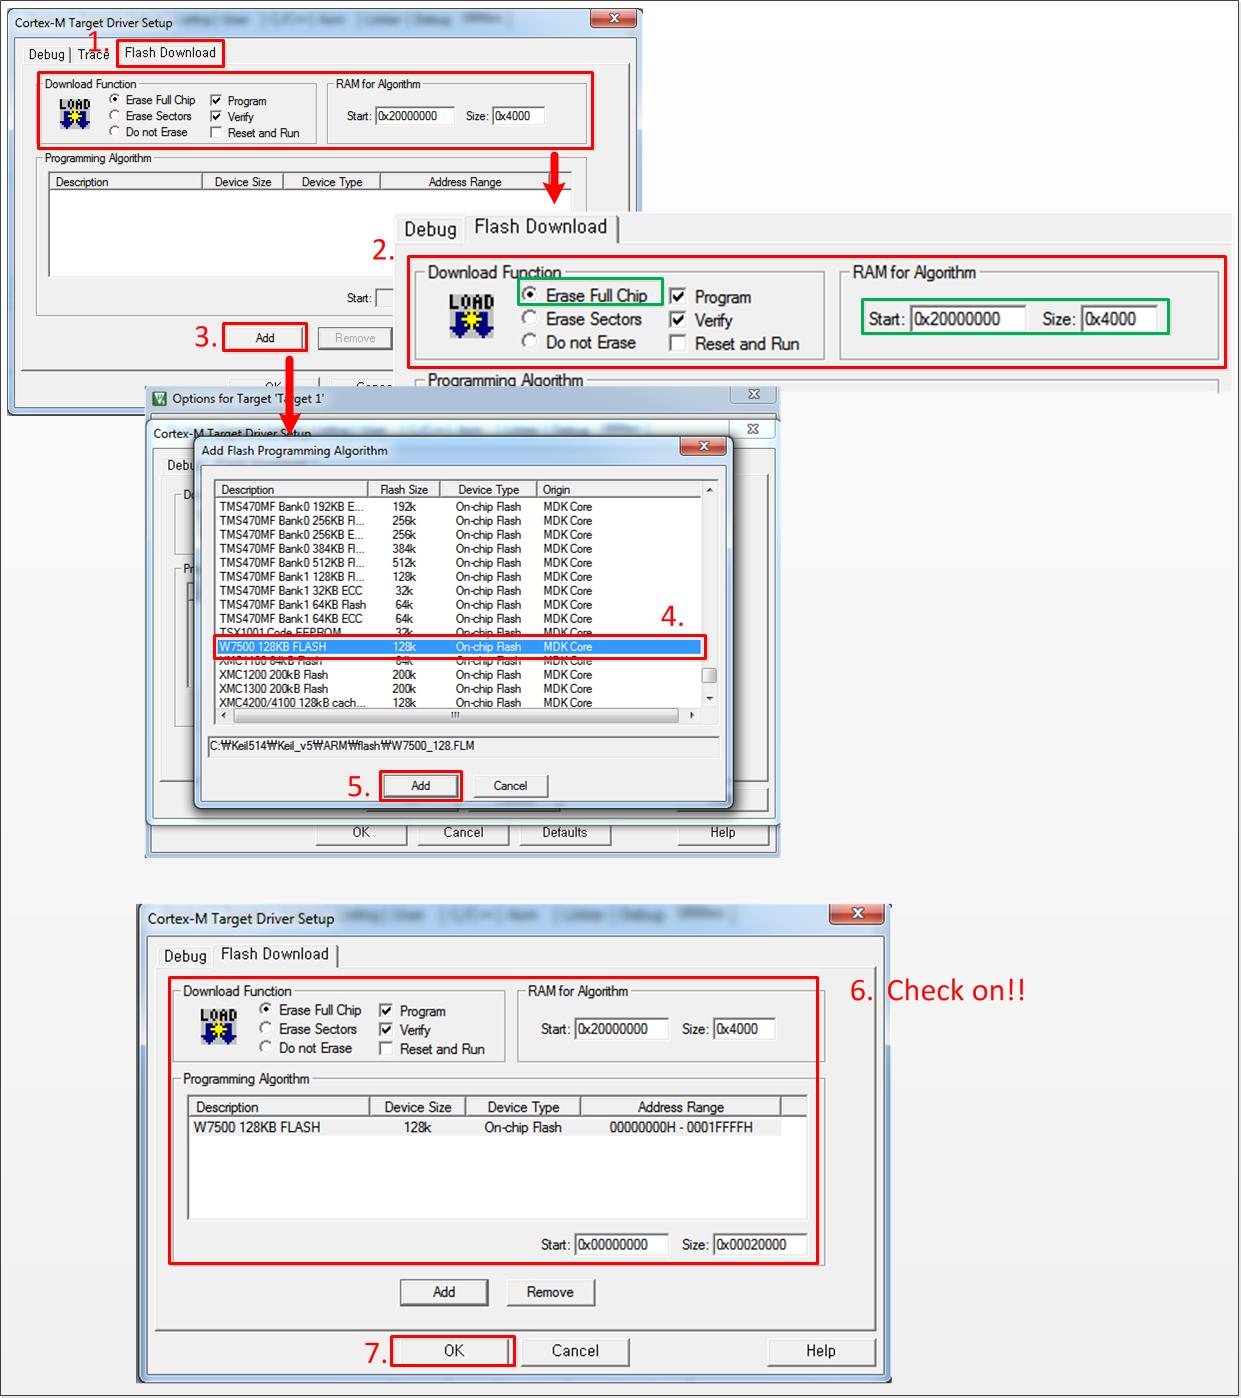
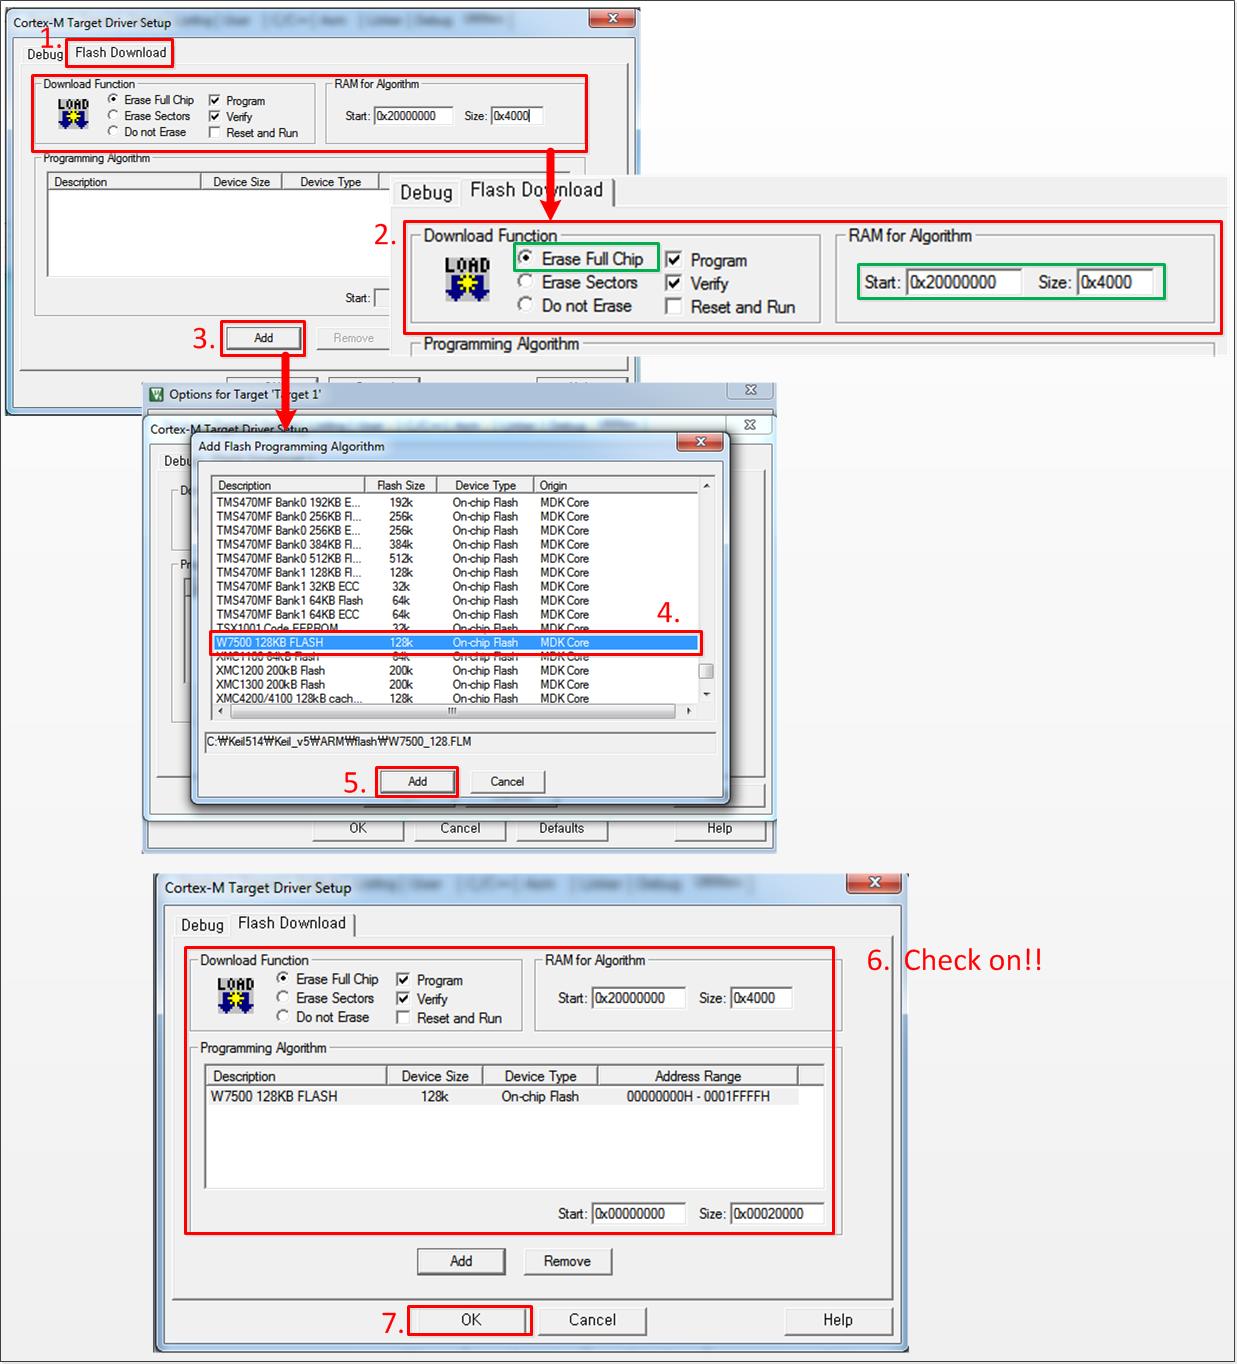
Click 'Flash Download'. Set 'Erase Full Chip' in Download Function, type '0x20000000 to 0x4000' in RAM for Algorithm and Add 'W7500_128KB_FLASH' on Programming Algorithm. After comparing with the figure below, click 'OK'.
- Download the firmware into WIZwiki-W7500. You can check complete
message and the ULINK Debugger at the bottom. Chick the 'Debug icon' or
Ctrl+F5 to debug.

Using CMSIS-DAP Debugger
CMSIS-DAP does support USB cable and Debugger as well. You need to Set Flash Algorithm to use CMSIS-DAP Debugger in Keil.
To Follow
-
Click 'Flash' in top menu and open 'Configure Flash Tools'. Set 'Debug' on top menu with choosing 'CMSIS-DAP Debugger'.
-
Click 'Utilities' and choose 'CMSIS-DAP Debugger'. Open 'Settings' menu and unchecked 'SWJ' in Debug menu. Then confirm 'ARM CoreSight SW-DP' set on SW Device.
-
Next to the Debug menu bar, Click 'Flash Download' and set 'Erase Full Chip' in Download Function, '0x20000000 to 0x4000' in RAM for Algorithm, Add 'W7500_128KB_FLASH' on Programming Algorithm. After checking it with below figure, click 'OK'.
-
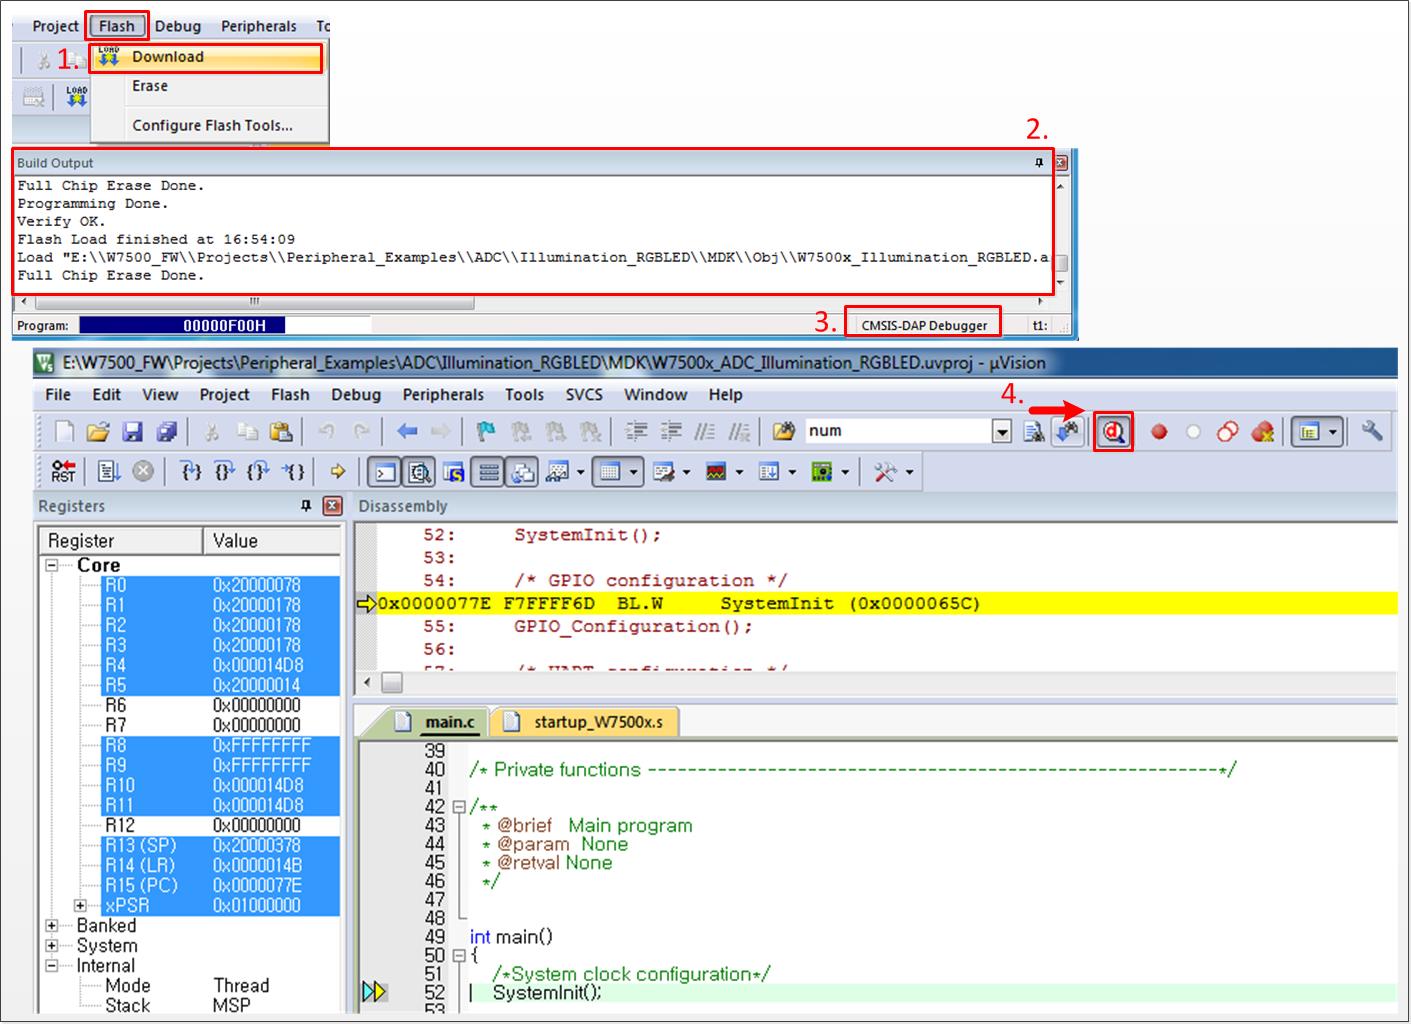
Download the firmware into WIZwiki-W7500. You can check complete message and the CMSIS-DAP Debugger at the bottom. Chick the 'Debug icon' or Ctrl+F5 to debug.
When downloading multiple projects
In case of WIZ750SR code using W7500 chip, Boot and App project exist respectively. Therefore, there is a problem when following the previous explanations. Regardless of which debugger you use, you only need to pay attention to the following settings.
To Follow
- For general configuration, follow the previous instructions.
-
Click 'Flash' in top menu and open 'Configure Flash Tools'.
-
Click 'Utilities' in tap menu.
-
And choose 'your debugger'.
-
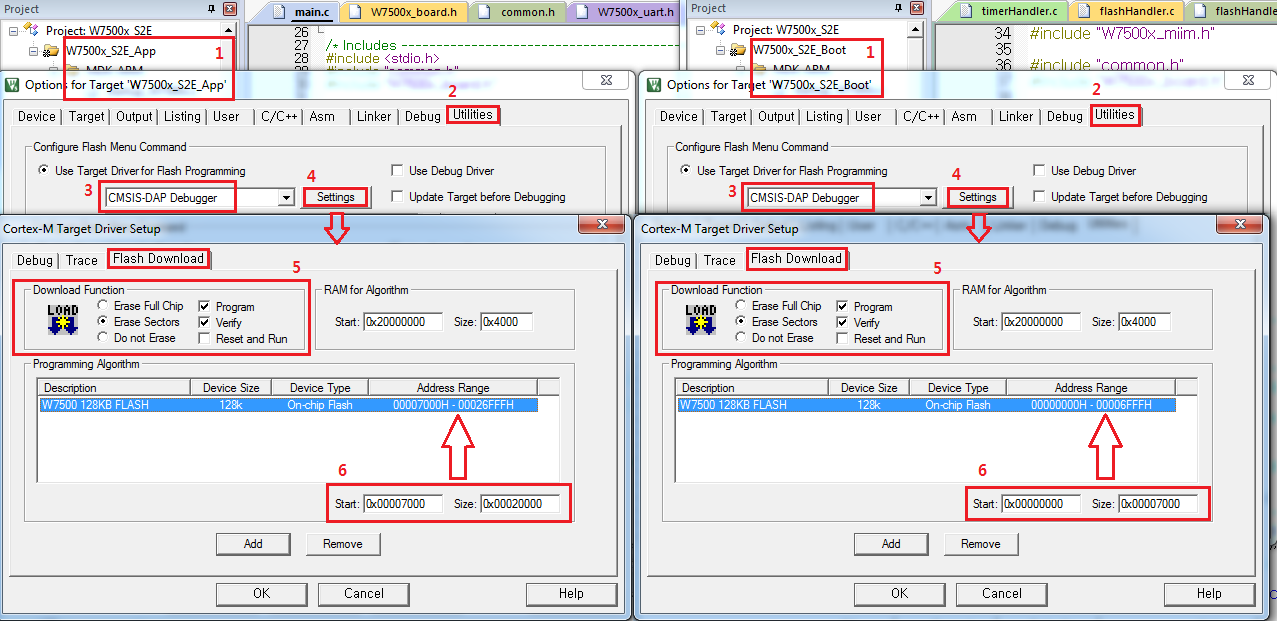
Open 'Setting' menu next to it and click 'Flash Download' in tap menu.
-
Only set 'Erase Sectors', 'Program', 'Verify' in Download Function.
-
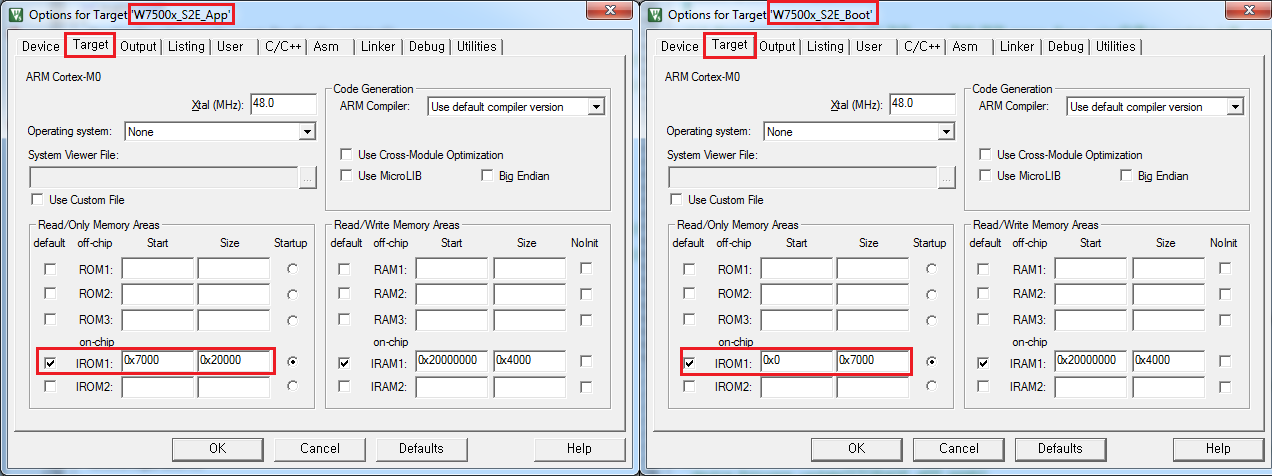
Click W7500 128KB FLASH in Programming Algorithm and fill the [Start] [Size] Box.
You can get [Start] address and [Size] from target information like figure below. If everything is entered correctly, Click 'OK'.
The remaining steps can be followed by the previous description.
How to switch app & boot for debug
You just need reset device and debug that you want!