How to start WIZwiki-W7500 Board
When you get a WIZwiki-W7500 platform board first on your hand, the serial driver installation and hardware test are needed. Because WIZwiki-W7500 uses CMSIS-DAP firmware writing and serial communicates through UART1 on W7500 (Target MCU).
To install the serial driver
To install the serial driver from ARM mbed, please refer to the below link.
Hardware self-test
WIZwiki-W7500 has a built-in default firmware. You can do self-test with the default firmware as below.
Test Sequence
-
Connect Ethernet cable, USB cable to WIZwiki-W7500. If you have a SD card, insert the SD card.
-
Run the Device Manager in Control panel and check which COM port is allocated to the USB port on WIZwiki-W7500.
-
Press Reset SW, then LED 'D4' on WIZwiki-W7500 will be turned on. If D4 is turned off, then press the Reset SW again.
Serial setting Baud rate : 115200 Data bits : 8 Parity : None Stop bits : 1 Flow : None
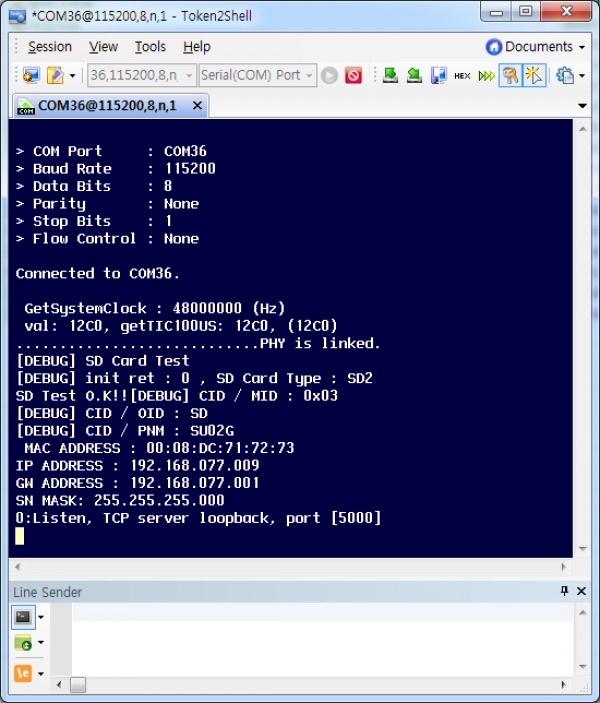
If you have a SD card, the state of D4 will turn like this: White => White Blink => Yellow The following message prints out to the serial port.
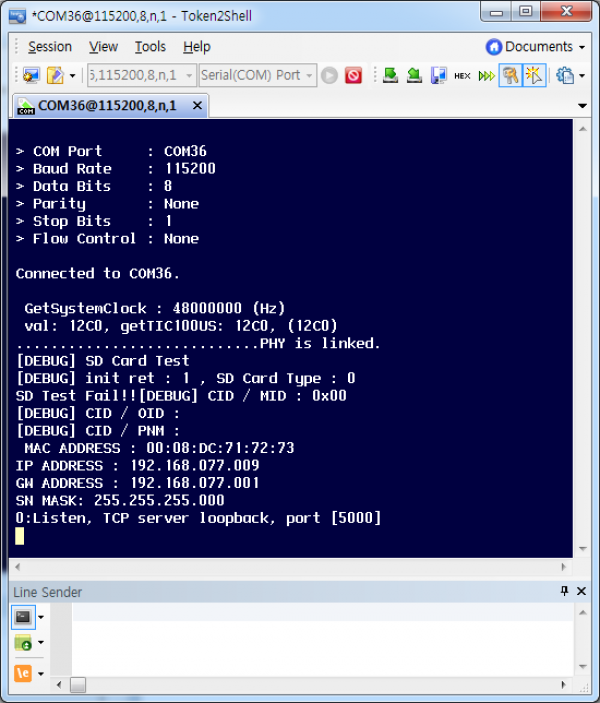
If you do not have a SD card, D4 of the state will turn like this: White => White Blink => Red The following message prints out to the serial port.
-
Run a command window and proceed with the ping test to WIZwiki-W7500.
-
WIZwiki-W7500 operates as loopback server.
-
Make proceed with the ping test or loopback test with an IP of 192.168.077.009 on WIZwiki-W7500.
Necessarily, IP of the PC must also be set to 192.168.077.XXX.
-
If you can do everything well, then your WIZwiki-W7500 doesn't have any problem.