AWS Connection Guide
Getting Started
Hardware Requirement
- Desktop or laptop computer
- MicroUSB cable
- LAN cable
- WIZ510SSL
- WIZ510SSL-EVB
Software Requirement
- Preferred Serial Terminal (TeraTerm, YAT, etc.)
- AWS Console account
AWS IoT Core preparation before start
Save certificates and key during creation.
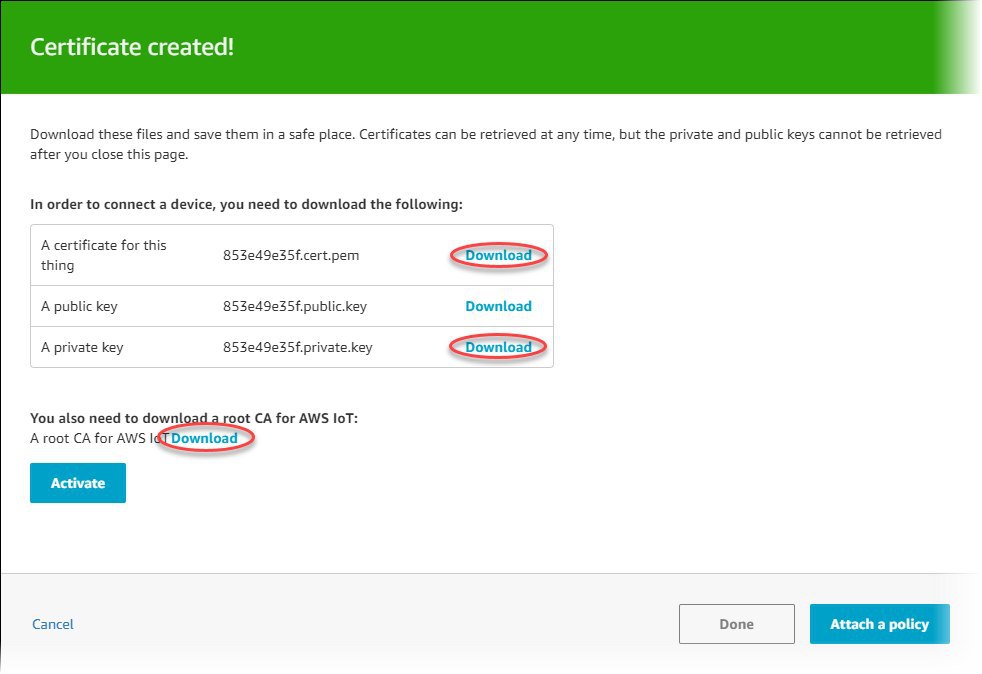 AWS root CA can be downloaded from here
Introduction
AWS IoT provides secure, bi-directional communication between Internet-connected devices such as sensors, actuators, embedded micro-controllers, or smart appliances and the AWS Cloud. It is possible to connect to AWS via WIZ510SSL and send data using MQTTS.
In this document we will provide guide how to connect to AWS services. Process consists of following steps:
- Creation of AWS account
- Creation & configuration of Thing in IoT Core
- Connection & Message transfer
For this guide we used evaluation board WIZ510SSL-EVB
Device preparation
Device connection
Please check COM port number in Device Manager.
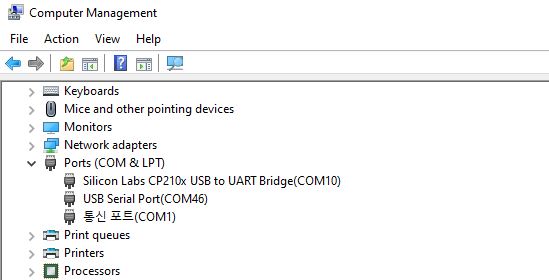
If COM port cannot be found in Device Manager, please install drivers below.
Configuration Description
There are two ways how to configure WIZ510SSL: using ConfigTool and using AT Commands.
1. Configuration using AT commands
Please refer to [Command Manual] to find information about all AT Commands. Below we will describe commands created for AWS connection.
| Description | Command | Remark |
|---|---|---|
| Set network configuration to DHCP | IM1 | |
| Set operation mode to MQTTS client | OP6 | |
| Set remote host | RH<parameter> | Use AWS endpoint |
| Set remote port to 8883 | RP8883 | |
| Set packing time | PT500 | 500 is given as example |
| Set Client ID | QC<parameter> | Use Thing name |
| Set Public Topic | PU<parameter> | $aws/things/<Thing Name>/shadow/update |
| Set Subscribe Topic | U0<parameter> | $aws/things/<Thing Name>/shadow/update/accepted |
| Set MQTT Keep Alive time | QK60 | 60 is given as example |
| Set Root CA option | RC2 | 2 - required |
| Enable Client Certificate | CE1 | 1 - enabled |
| Save Root CA | OC | |
| Save Client certificate | LC | |
| Save Private Key | PK | |
| Save settings | SV | |
| Reboot device | RT |
Please note that WIZ510SSL supports multiple command setup. It is possible to make above settings as following:
IM1\r\nOP6\r\nPT500\r\nQC"Thing Name"\r\nRH"End Point".amazonaws.com\r\nRP8883\r\nPU$aws/things/"Thing Name"/shadow/update\r\nU0$aws/things/"Thing Name"/shadow/update/accepted\r\nQK60\r\nRC2\r\nCE1\r\n
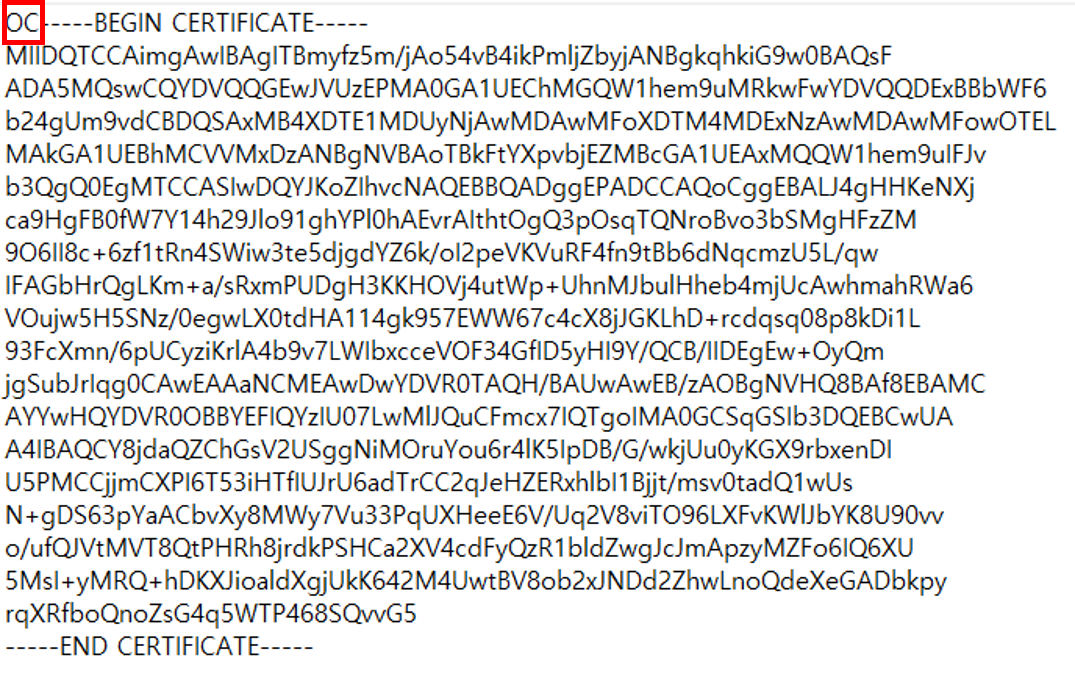
To save Root CA, Client Certificate or Private Key we used YAT file transfer function.
First, add appropriate command name in the beginning of the file.
Refer to below example:
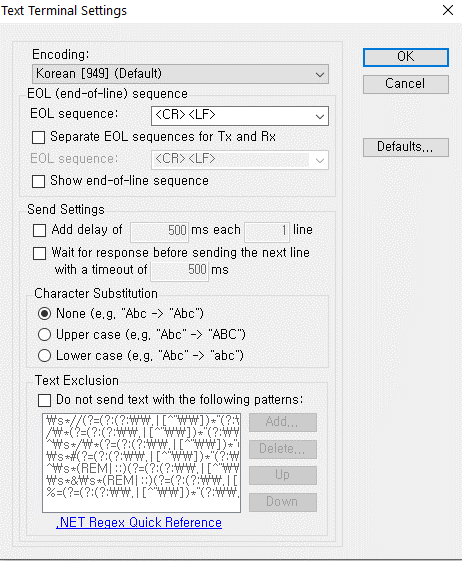
Use following EOL settings:
Each certificate shall be sent separately.
It is necessary to save settings and reboot device.
SV\r\nRT\r\n
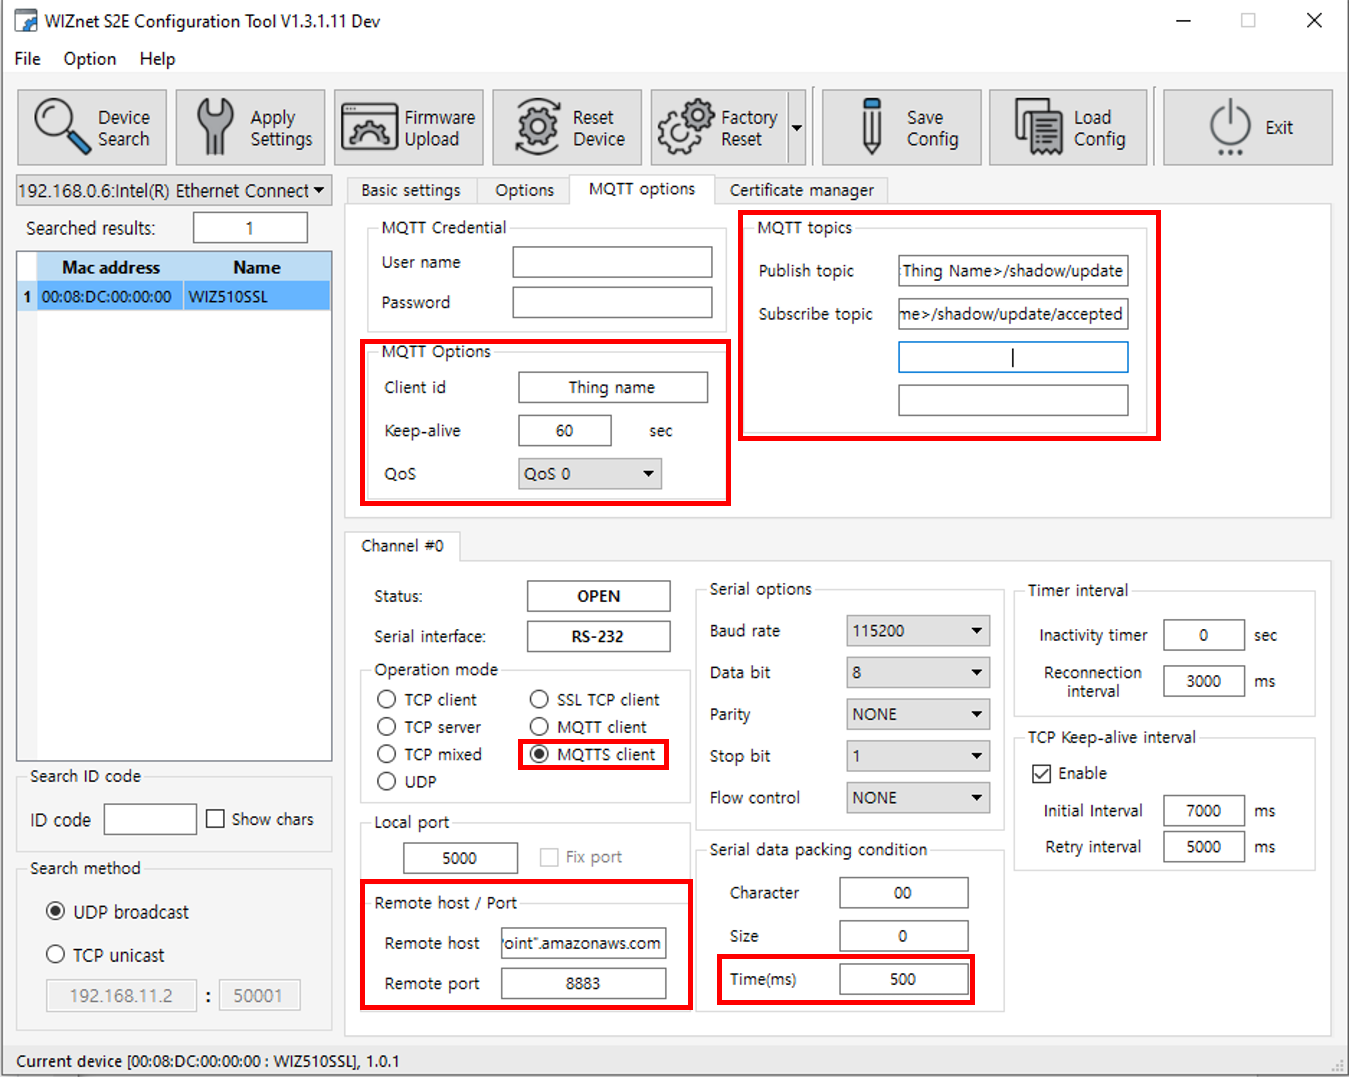
2. Configuration using Config Tool
Please refer to [Config Tool Manual] to find detail information about Config Tool. Below we will show configuration required for AWS connection.
Step 1.
Setup DHCP select following:
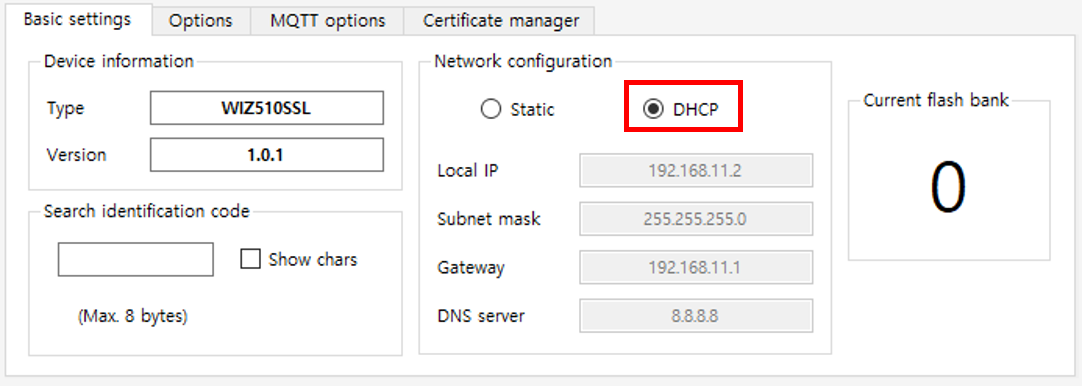
Make settings in MQTT Options tab:
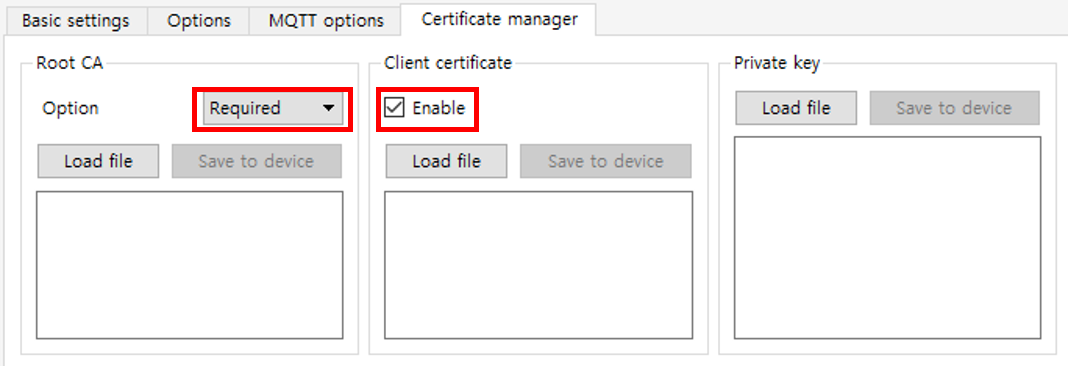
Make settings in Certificate Manager tab:
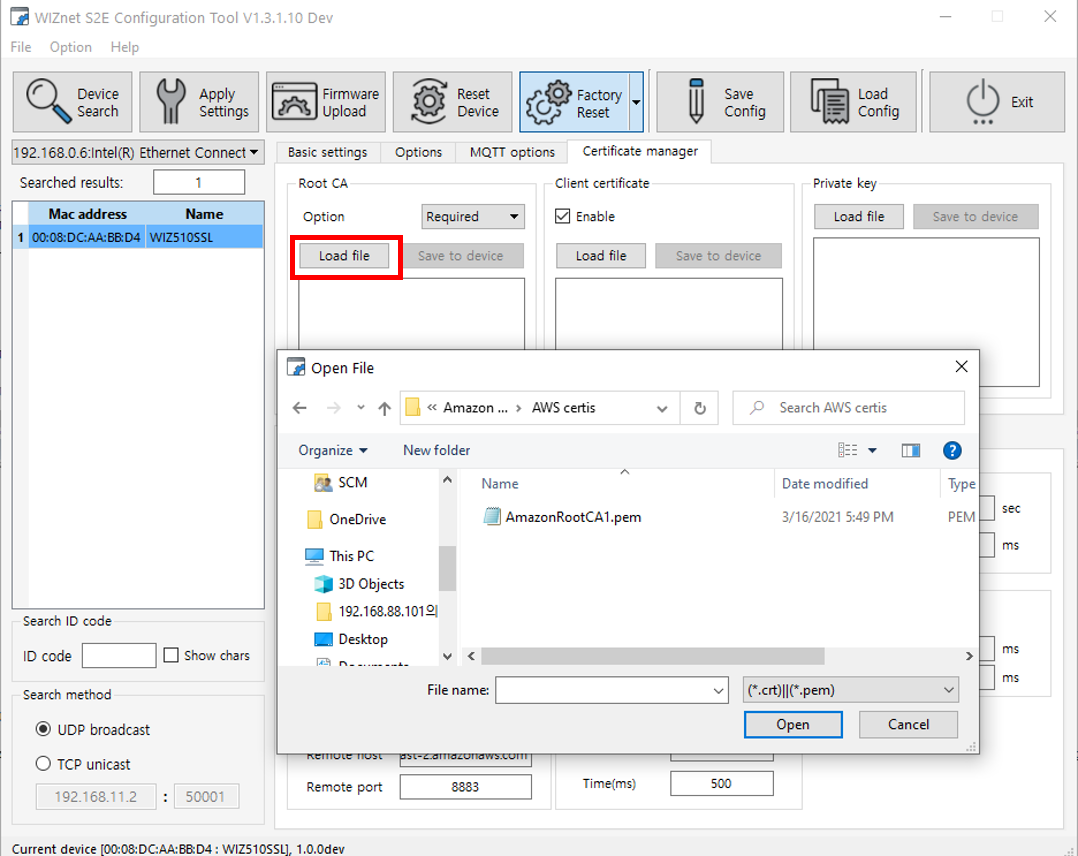
Step 2.
To load certificates/keys follow below steps:
-
Click "Load File" button. File explorer window will appear.
-
Select file and click "Open"
Select original file, not the file with added AT command!
- Click "Save to device" button. If succesful, "Upload Complete" pop-up window will appear.
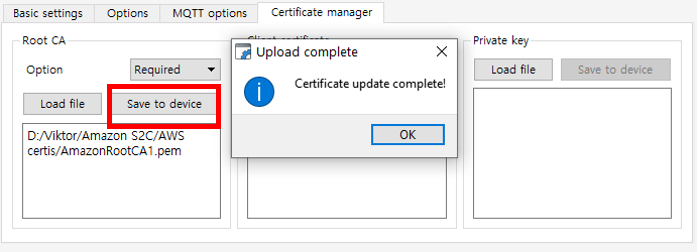
When saving certificate or key, "Save to device" button shall be pressed for each one. "Apply settings" button will NOT save certificates/keys to device.
Step 3.
Press "Apply settings" button to save settings made in Step 1. Reboot device.
Results
- Send test message using Terminal
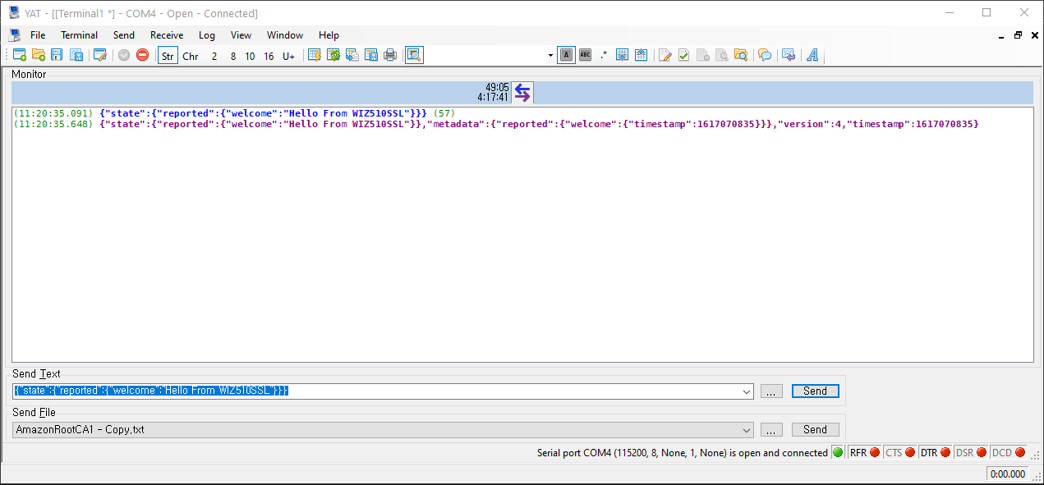
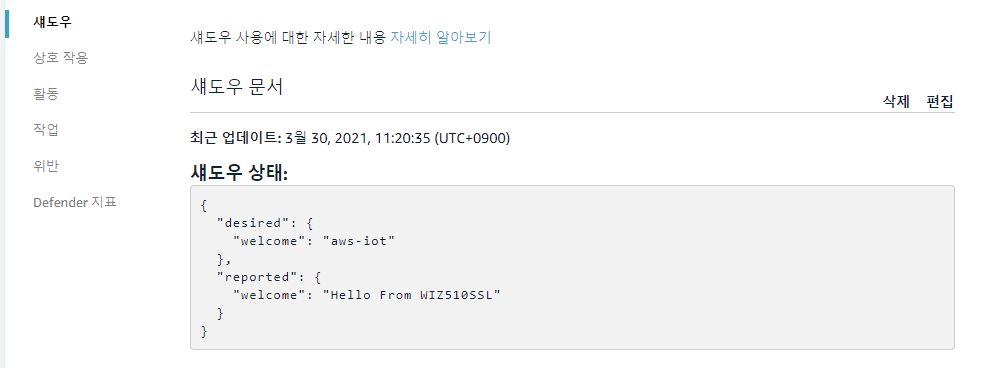
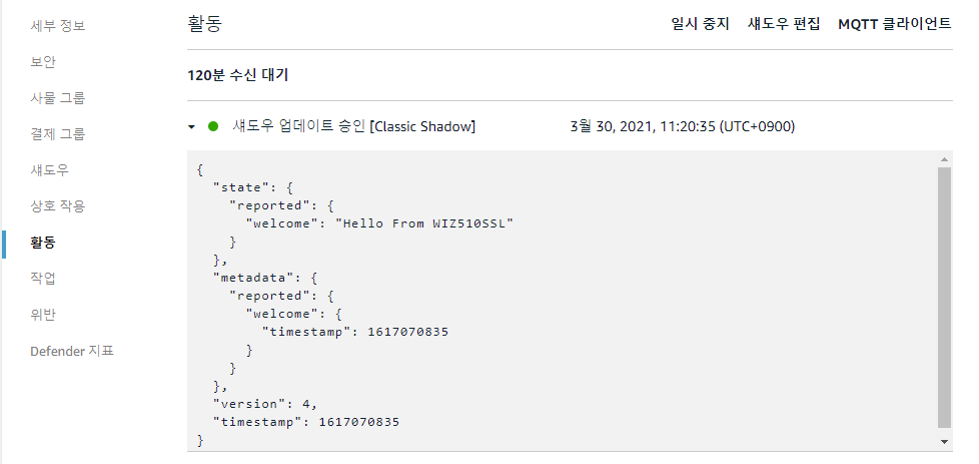
- Since we subscribed to "updated" topic, when MQTT message is sent we can see reply message instantly. Also it is possible to check in AWS IoT -> Manage -> Things -> Shadow or Activity
Congratulations
WIZ510SSL is successfully connected to AWS!